
Reversible Feathers Crochet Stitch
Reversible Feathers Crochet Stitch
The reversible feathers crochet stitch creates soft, overlapping plumes that look exactly the same on both faces of the fabric — turn the work over and there is no wrong side, no flat back, just feathers. That is because every feather is a cluster worked into a chain space, not into the top of a stitch, so it bulges equally to front and back. That makes the reversible feathers crochet stitch perfect for baby blankets, scarves and throws, where both sides show, unlike one-sided textures such as the honeycomb stitch.
Why This Stitch Is Reversible
Most textured stitches are one-faced: bobbles pop towards you, cables sit on the surface, and the back is flat or messy. The reversible feathers crochet stitch is different. Its feathers are drawn up from the middle of the fabric, through open chain spaces, so half of each plume settles on one side and half on the other. The single crochet rows between the feathers are also identical on both faces. Flip the fabric at any point and compare — front and back match. It is the same both-sides-good behaviour that makes the moss stitch a blanket favourite, but with far more texture.
Materials
- Worsted weight (medium, #4) yarn: about 45 m (50 yd) for the swatch. For the baby blanket in Step 6: about 1,100 m (1,200 yd) total — roughly 650 m main colour and 450 m contrast. Soft acrylic or acrylic-wool blends are ideal.
- 5.0 mm (US H-8) crochet hook
- Yarn needle and scissors
If you are unsure how the #4 weight compares with other yarns, the Craft Yarn Council explains the standard system on its yarn standards page — check it before substituting, because feather height depends on yarn thickness.

- [PREMIUM 3-SKEIN VALUE BUNDLE] This kit includes 3 factory-fresh skeins of Premier Yarns Anti-Pilling Everyday Worsted, …
- [EXCLUSIVE BONUS BRANDED GAUGE TOOL] Ditch the guesswork and ensure a flawless fit every time. Each multi-pack comes com…
- [PERMANENT ANTI-PILLING TECHNOLOGY] Say goodbye to annoying fuzz and lint. Unlike standard acrylic yarns that look old a…
A soft worsted acrylic in two gentle colours is the classic choice. Acrylic keeps the feathers springy after washing, shows the plumes clearly because it has no halo, and blanket-size balls mean fewer joins across a wide row.

- Soft grip design for enhanced comfort during use
- Ideal 5.0mm size for a variety of yarns and projects
- Ergonomic shape helps reduce hand fatigue for prolonged crafting
Cluster stitches pull several loops through at once, and a soft-grip 5.0 mm hook saves your wrist over a whole blanket. Look for a smooth head that slides through seven loops without splitting the yarn.
Gauge and Finished Sizes
Gauge in pattern: one full repeat (4 sts of the space row) measures about 3.2 cm (1¼ in) wide; 2 pattern rows (one space row + one feather row) measure about 2.5 cm (1 in). Practice swatch: about 30 cm (12 in) wide × 12.5 cm (5 in) tall. Baby blanket example: about 80 cm × 90 cm (31½ in × 35½ in). Gauge matters — if your swatch is narrower than 3.2 cm per repeat, go up a hook size before the blanket, or it will come out smaller than planned.
Abbreviations (US terms)
- ch = chain
- sc = single crochet
- hdc = half double crochet
- dc = double crochet
- sl st = slip stitch
- st(s) = stitch(es)
- sp = chain space
- rep = repeat
- Feather = the cluster stitch defined in Step 2
The Stitch Multiple
Chain a multiple of 4, plus 2 extra chains: the swatch chains 38, which is (4 × 9) + 2. Row 1 works 37 sc across — a multiple of 4 plus 1 — and every row after that keeps exactly 37 stitches: 10 sc plus 9 spaces or 9 feathers. Keep that count and the stitch will never drift.
Step-by-Step Reversible Feathers Crochet Stitch
Step 1: Foundation Chain and Setup Row

Ch 38. Row 1 (setup): sc in the 2nd ch from the hook and in every ch across. Count: 37 sc. Row 2 (space row): ch 1, turn. Sc in the first sc. *Ch 3, skip the next 3 sc, sc in the next sc.* Rep from * to * 8 more times. Count: the opening sc plus 9 repeat scs = 10 sc, and 9 ch-3 spaces. Check the maths: 10 sc + (9 × 3 skipped sc) = 10 + 27 = 37 stitches accounted for. Those open spaces are where every feather will live.
Step 2: First Feather Row

First, the feather itself. Feather (worked in one ch-3 sp): yarn over, insert hook in the space, yarn over and pull up a long loop about 1.5 cm (⅝ in) tall; repeat that twice more in the same space, so you have 3 half-finished hdc and 7 loops on the hook; yarn over and pull through all 7 loops, then ch 1 to close the plume. Row 3 (feather row): ch 1, turn. Sc in the first sc. *Work one Feather in the next ch-3 sp, sc in the next sc.* Rep from * to * 8 more times. Count: 10 sc and 9 Feathers. Pull each loop up to the same height — even loop height makes the feathers look like a row of matching plumes instead of random puffs.
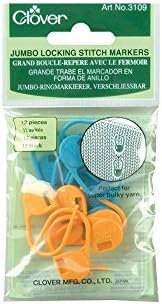
- CLOVER-Jumbo Locking Stitch Markers. Use these handy little tools for marking positions of knitted stitches
- Caution: Keep marker in locked position when not in use
- Material: Polyacetal
On a wide blanket row, a locking marker in the first and last stitch is the quickest insurance against lost edge stitches. Large markers clip straight onto a stitch, so they stay put through the turning and tugging of cluster rows.
Step 3: Second Feather Row (the Repeat Row)

From here, the fabric is just two rows repeated. Row 4 (space row): ch 1, turn. Sc in the first sc. *Ch 3, skip the next Feather, sc in the next sc.* Rep from * to * 8 more times. Count: 10 sc, 9 ch-3 spaces — identical to Row 2. Row 5 (feather row): repeat Row 3 exactly: 10 sc, 9 Feathers. Continue repeating Rows 4 and 5 until your swatch has 10 pattern rows in total (Rows 2–11, ending with a feather row) or measures about 12.5 cm. Every space row must end with 10 sc — if you ever count 9 or 11, the mistake is in that row, and unpicking one row fixes everything.
Step 4: Keeping the Edges Straight

Wavy edges in this stitch come from one of two places: a missed first sc after the turn, or a skipped last sc hiding under the ch-3 space. Protect yourself three ways. One: work the turning ch 1 loosely — it does not count as a stitch, so the first sc goes in the very first stitch. Two: before each feather row, count the previous row’s 10 sc. Three: place a marker in the first and last sc of every space row. The edge should stack in a straight column of single crochets; hold the swatch against a table edge to check. Straight edges matter just as much on seamed projects like the tops in crop it cute.
Step 5: Changing Colours Cleanly

Change colour only at the end of a space row, so the new colour first appears as a full row of feathers. Work the last sc until two loops remain on the hook, drop the old colour, yarn over with the new colour and pull through both loops. Ch 1, turn, and work the feather row in the new colour. Leave 10 cm tails, and weave them in later along the sc row in opposite directions so no lump forms. For stripes, work 2 pattern rows per colour, or 4 for bolder bands. Because there is no wrong side, there is no hiding place for sloppy changes — this clean pull-through method keeps the join invisible on both faces. Stripes show off beautifully in blanket patterns like the crochet bobble blanket.
Step 6: Working the Baby Blanket Size

Scale the reversible feathers crochet stitch swatch up using the same multiple. For a blanket about 80 cm (31½ in) wide you need 20 repeats: stitch count = (4 × 20) + 1 = 81 sc, so ch 82 and work Row 1 as before to get 81 sc. Every space row then has 21 sc and 20 ch-3 spaces (21 + 60 = 81 ✓), and every feather row has 21 sc and 20 Feathers. Work the two-row repeat, changing colours as in Step 5 (a pretty sequence is 6 rows main, 4 rows contrast, repeated), until the blanket measures about 88 cm (34½ in) — roughly 70 pattern rows — then end with a space row so the top matches the bottom. Finish with one plain row: ch 1, turn, sc in every sc and 3 sc in every ch-3 space across; count: 21 + (20 × 3) = 81 sc, squaring off the top edge for the border. At about 1,100 m of yarn, the result is a generous pram and cot size. If you love blanket maths, the honeycomb baby blanket uses a similar repeat-count approach.

- Premium Bent Tip Yarn Needles – Includes practical size 16 blunt needles in 4 colors, each about 2.75 in long, packed in…
- Curved Tip for Weaving in Ends – The bent weaving needle slides under stitches more easily than a straight one, ideal fo…
- Large Eye for Yarn – The large eye is designed for common yarn and tapestry threads, helping you thread and pull yarn th…
A bent-tip yarn needle slides under single crochet rows without splitting the plies. On a reversible fabric, where both sides show, clean woven ends are the difference between handmade and homemade-looking.
Step 7: Simple Border

A plain border keeps both sides equal. With the main colour, join yarn in any corner. Round 1: ch 1, sc evenly around all four sides: 1 sc in each st along the top and bottom edges (81 sc per side), 1 sc in the end of every space row and 2 sc in the end of every feather row along the sides, and 3 sc in every corner stitch. Join with a sl st to the first sc. Round 2: ch 1, sc in every sc around, again working 3 sc in the middle stitch of each corner group. Join, fasten off. The corner count is the only number that matters: 3 sc in each corner keeps the blanket square instead of pinched or flared. Two rounds are enough for the reversible feathers crochet stitch — a deep border would hide the plumes.
Step 8: Blocking and Care

Weave in every end first, along an sc row, never across a feather. Wash gently in cool water, roll in a towel to remove water, then lay flat on blocking mats, pinning the corners square and easing the edges straight; do not pin the feathers — let them relax as the fabric dries. Acrylic blends need only this one shaping; wool blends reward a light steam from 10 cm away, never touching the fabric. For everyday care, machine wash cool on a gentle cycle and dry flat — the plumes are structural, not surface stitches, so they keep their texture wash after wash. Fold it either way up in the cot: there is genuinely no wrong side to hide.
Troubleshooting
- Feathers lean: your loops are different heights. Pull every loop up against the previous feather before closing the cluster.
- Row count changes: recount the space row — it must always be a multiple of 4 plus 1 (37 swatch, 81 blanket).
- Fabric too stiff: go up to a 5.5 mm hook for a drapier blanket.
Once the repeat clicks — usually by the third feather row — the reversible feathers crochet stitch becomes wonderfully meditative crochet. Enjoy it.