Elegant Butterfly Top Crochet Pattern Free
Easy Butterfly Crochet Top For Summer
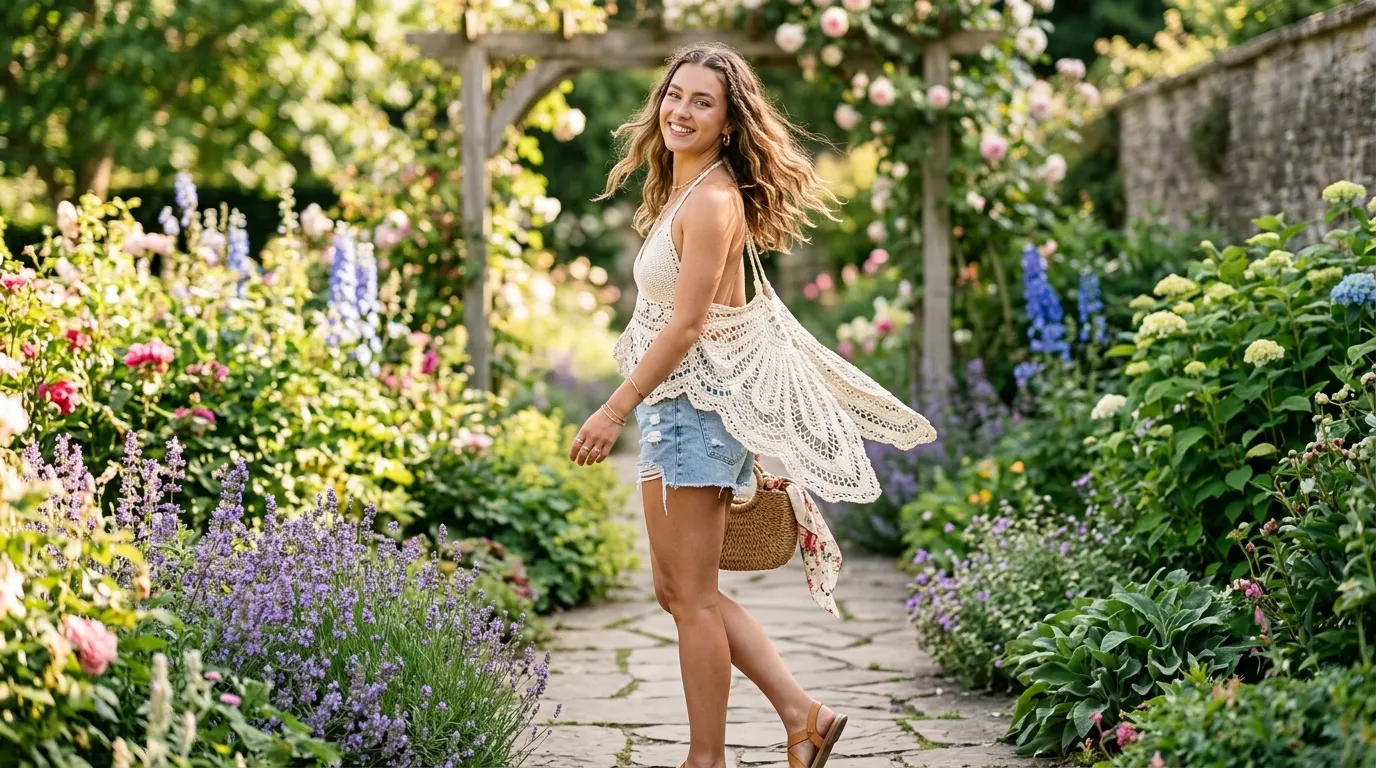
A crochet butterfly top is the perfect mix of cute, airy, and stylish. Its wing-inspired shape creates a soft drape that feels lightweight and comfortable for sunny days, vacations, beach outfits, or casual everyday wear. This design looks beautiful with jeans, skirts, shorts, or layered over dresses for a trendy handmade look.
The open stitch details give the fabric a flowy appearance while still feeling soft and wearable. You can customize the size, colors, and length to create a top that perfectly matches your personal style.

Materials You’ll Need

- 100% mercerized cotton thread
- 3 mm crochet hook
- Wool needle
- Scissors
- Measuring tape
- Stitch markers
Skill Level
Intermediate
You should know:
- Double crochet stitches
- Chain stitches
- Slip stitching
- Basic seaming
- Measuring crochet fabric
Crochet Abbreviations (US Terms)
- ch = chain
- dc = double crochet
- sl st = slip stitch
- st = stitch
- yo = yarn over
Butterfly Top Crochet Instructions
Step 1: Create The Foundation Chain

Start by making a slip knot on your hook.
Chain in multiples of 10 + 2.
For a small size:
- Chain 92 stitches
Keep your foundation chain slightly loose so the edge stays smooth and flat.
Step 2: First Double Crochet Row
Skip the first 3 chains from the hook.
Work 1 double crochet into the 4th chain.
Continue placing 1 double crochet into every chain across the row.
At the end of the row:
- Total stitches: 90 dc
This row forms the solid base structure of the butterfly top.
Step 3: Begin The Open Butterfly Stitch Pattern
Chain 3 and turn your work.
Place:
- 1 dc in the first stitch
- 1 dc in the next stitch
You now have your starting group of 3 dc.
Next:
- Chain 10
- Skip 1 stitch
- Work 3 dc into the next stitches
Repeat this pattern across the row:
- 3 dc
- ch 10
- skip 1 stitch
Finish the row with 4 dc to balance both edges evenly.
Step 4: Create The Mesh Arches

Chain 8 and turn.
Into the large chain spaces from the previous row:
- Work 3 dc
- ch 1
Repeat this into every arch space across the row.
At the end:
- Finish with an elongated closing stitch for a smooth edge.
This step creates the airy butterfly-wing texture.
Step 5: Repeat The Pattern Rows
Continue repeating:
- Solid dc row
- Open chain row
- Arch row
Repeat until the panel measures:
- Approximately 80 cm wide for small size
You’ll usually need around 17 pattern rows.
Step 6: Prepare Both Panels
Create 2 matching crochet panels.
Lightly steam or block both pieces using a cloth over the fabric. This helps:
- Open the stitches
- Improve drape
- Shape the butterfly design evenly
Step 7: Assemble The Butterfly Top
Place both rectangles together with wrong sides facing outward.
Shoulder Seams
Leave:
- 28 cm opening for the neckline
Slip stitch or sew the shoulders together carefully.
Side Seams
Leave:
- 46 cm opening for hips and arm space
Join the side seams evenly.
The loose sleeve openings help create the signature butterfly shape.
Optional Finishing Touches
You can customize your butterfly top with:
- Picot edging
- Single crochet borders
- Longer body length
- Color-blocked rows
- Gradient yarn
Helpful Crochet Tips
- Always measure your gauge first
- Use stitch markers to track repeats
- Keep chain tension relaxed
- Block your finished top for a polished look
- Match stitches carefully during assembly
Styling Ideas
This crochet butterfly top looks gorgeous with:
- Denim shorts
- High-waisted jeans
- Maxi skirts
- Beachwear outfits
- Layered boho styles
Soft pastel yarns create a delicate feminine look, while bold shades make the butterfly design stand out beautifully.