Honeycomb Stitch Crochet Pattern: A Textured Hexagon Stitch Tutorial in 6 Steps
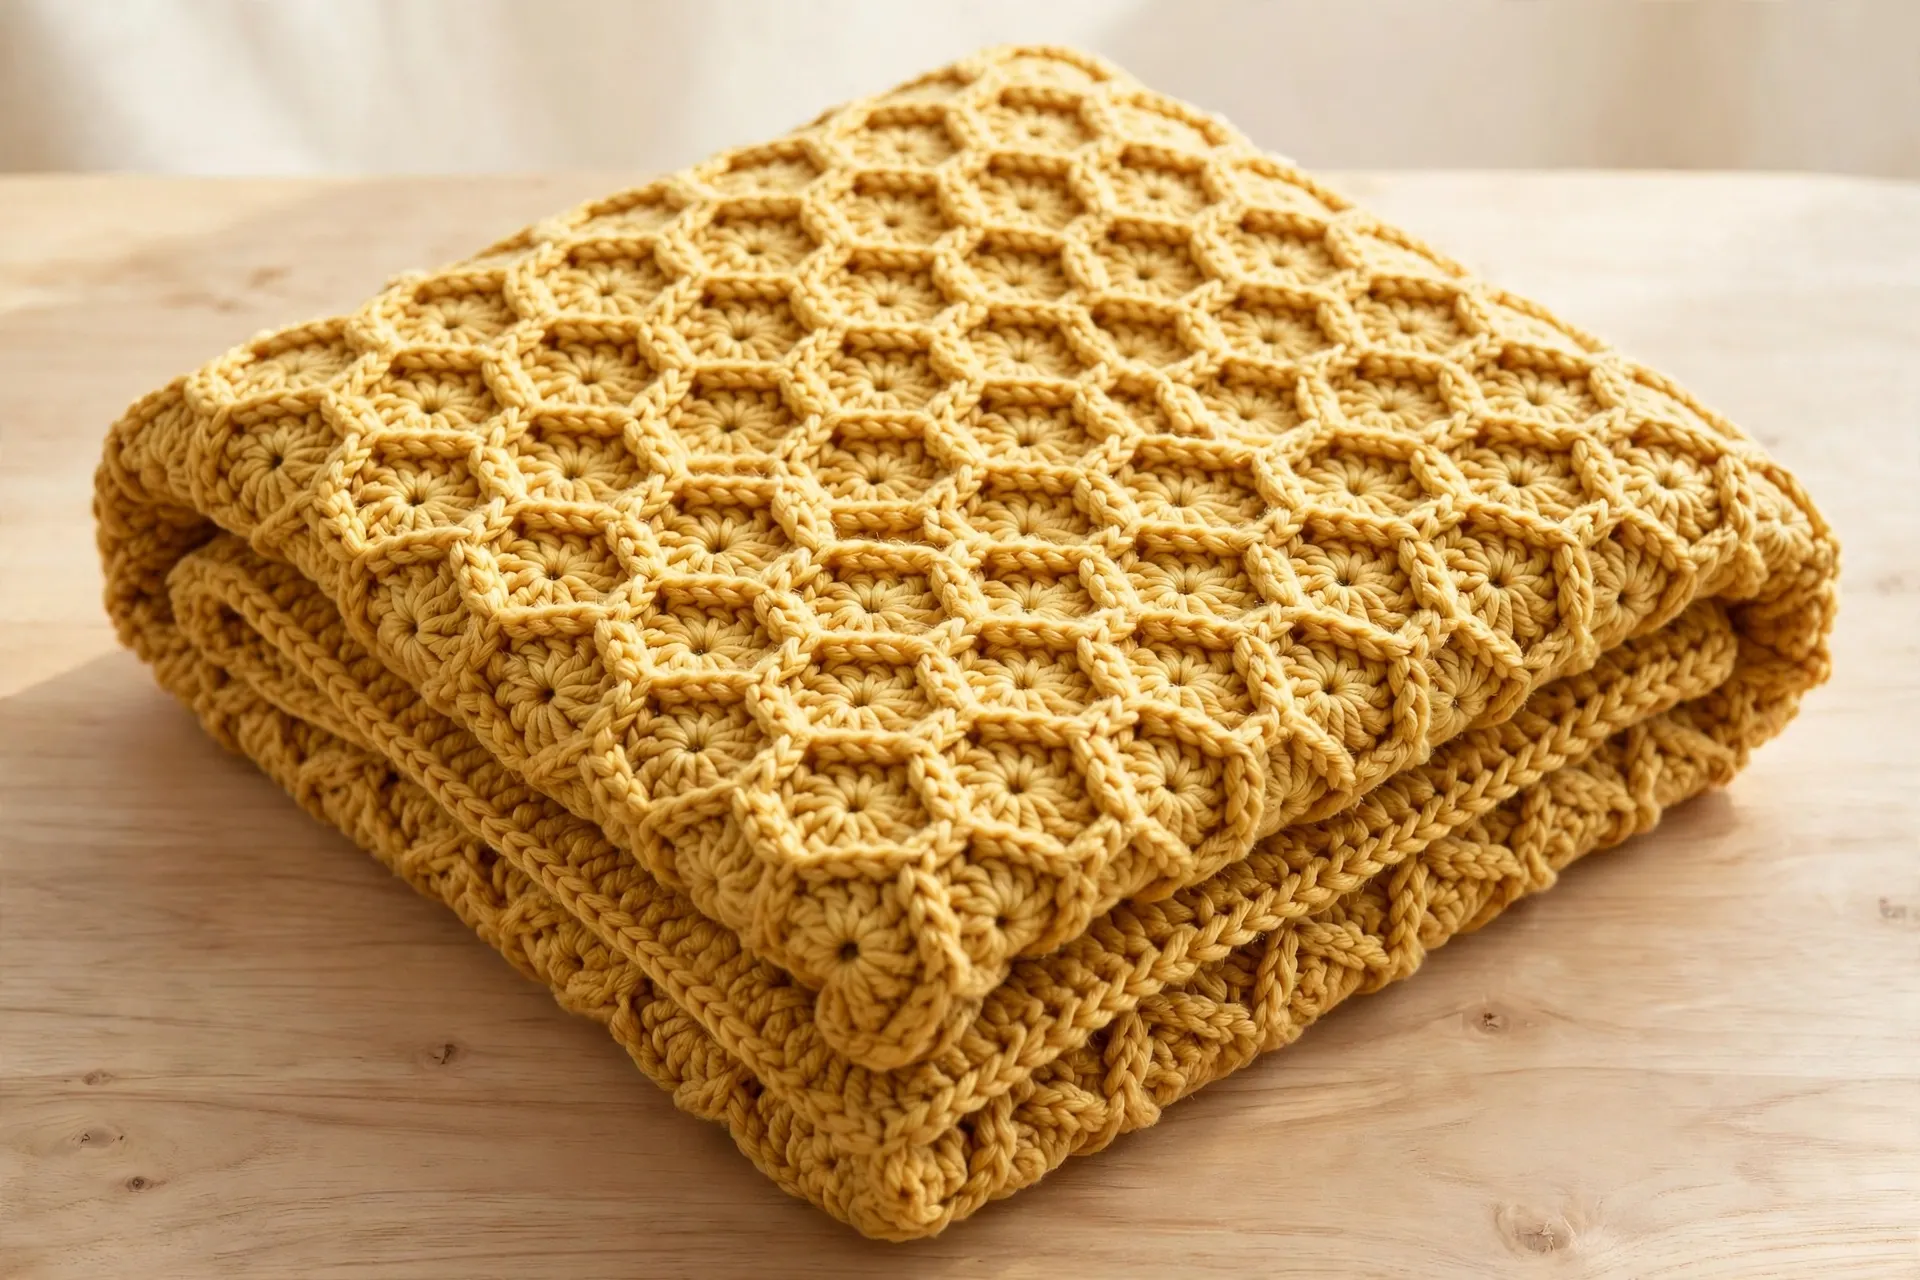
The honeycomb stitch crochet pattern builds real, raised hexagon cells — pointed at the top and bottom, walled at the sides — using nothing but double crochet and front post treble stitches that lean, meet and join across the surface. The cells grow row by row, anchored deep into the fabric, so the finished cloth is thick, springy and wonderfully warm.
This tutorial teaches the stitch on a counted swatch first, then turns it into a finished baby blanket with every count written out. If you can work a double crochet, you have every skill this stitch needs to start. Once you have worked a full band, this honeycomb stitch crochet pattern becomes easy to read at a glance.
What Is the Honeycomb Stitch?
The honeycomb stitch is a post-stitch pattern: plain rows of double crochet form the background, and on the cell rows, tall front post trebles (FPtr) dive down around the posts of stitches two rows below. Worked in leaning pairs, those post stitches draw the bottom point of each hexagon; worked together in pairs two rows later, they close the top point. Stack the rows and the points connect into a lattice of elongated hexagons.
Because the post stitches sit on the front of the fabric, the texture is one-sided: bold and sculpted on the right side, flatter on the back. The cloth is dense with very few holes, so it suits anything that needs warmth and structure — blankets, cushion covers, tote panels and cosy washcloths. Our honeycomb crochet baby blanket uses a simpler construction; this tutorial is the post-stitch version, with deeper relief. If you enjoy raised textures, our crochet bobble blanket pattern is a natural next project. That one-sided relief is what makes the honeycomb stitch crochet pattern so satisfying to finish.
Materials and Gauge
- Worsted weight (#4) yarn: about 60 yd (55 m) for the swatch. For the blanket in Step 6: approx. 1,500 yd (1,370 m) in total — about 1,350 yd of golden honey yellow and 150 yd of cream for the border. A smooth acrylic or wool blend shows the cells best; avoid fuzzy yarns while you learn — you need to see the posts clearly. New to yarn labels? The Craft Yarn Council’s standard yarn weight system explains what the “#4” on the band means.
- 5.0 mm (US H-8) crochet hook
- Stitch markers (at least 2), tapestry needle, scissors and a tape measure
Gauge: 15 stitches and 7 rows = 4 inches (10 cm) in the honeycomb pattern, measured after light blocking. Post stitches pull the fabric in, so check the swatch honestly — a small gauge error becomes a big blanket error. Checking gauge matters here, because the honeycomb stitch crochet pattern pulls inward more than plain double crochet.
The stitch multiple: this honeycomb stitch crochet pattern is a multiple of 6 + 1. Chain a multiple of 6 plus 4 chains (28, 34, 40 … 118): the extra chains form the turning chain and closing stitch.
Useful Materials from Amazon
Everything for this honeycomb stitch crochet pattern is standard kit:
A smooth worsted acrylic in a warm honey shade gives crisp post stitches and cells you can actually see — one yarn line keeps every cell the same size.
Front post trebles mean constant yarn-overs and reaches around the work; a soft-grip 5 mm hook keeps your wrist comfortable.
A marker in the last stitch of each row makes counting a glance instead of a recount.
A large-eye tapestry needle weaves ends in along the backs of the post stitches, hidden inside the thick fabric.
Abbreviations (US Terms)
- ch = chain
- dc = double crochet
- sc = single crochet
- st(s) = stitch(es)
- rep = repeat
- RS = right side
- WS = wrong side
- FPtr = front post treble crochet: yarn over twice, insert your hook from front to back to front around the post of the stitch named, yarn over and pull up a loop, then (yarn over, pull through 2 loops) 3 times. In this pattern the FPtr is always worked around a stitch two rows below, and it takes the place of the stitch at the top that you skip.
- FPtr2tog = front post treble crochet 2 together: work an FPtr around the first named post until 2 loops remain on your hook, work an FPtr around the second named post until 3 loops remain, then yarn over and pull through all 3 loops — two legs joined at one top point.
The Honeycomb Stitch Crochet Pattern, Step by Step
Work the swatch first: it contains every row of the pattern, counted in full. The blanket in Step 6 is the same rows on a longer chain.
Step 1 — Materials, Gauge and the Stitch Multiple

Gather everything above. The whole pattern hangs on one number: 6 — each hexagon cell is 6 stitches wide, and every row begins and ends so the cells stay whole, which is why the count is always a multiple of 6 plus 1 (swatch: 25 stitches, 4 cells; blanket: 115, 19 cells). Rows run in a four-row rhythm: two cell rows, one restore row, one plain row.
Step 2 — Foundation and Base Rows

With honey yellow, chain 28.
Row 1 (WS): Dc in the 4th chain from the hook and in every chain across. (25 dc)
Row 2 (RS): Ch 3 (counts as a dc here and throughout), turn, dc in every dc across. (25 dc)
Do not rush these plain rows: they are the anchor rows — every post stitch reaches down two rows to grip one of these double crochets, and a wobbly base row means wobbly cells.
Step 3 — Honeycomb Row A: The Cell Walls

This row draws the bottom point of every cell: the two front post trebles of each pair are both worked around the same post two rows below, so they lean together and meet at a point underneath.
Row 3: Ch 3 (counts as the first stitch), turn. *Skip the next dc, FPtr around the post of the dc two rows below that sits directly under the next dc (call it the anchor post); dc in the next dc; skip the next dc, FPtr around that same anchor post; dc in each of the next 3 dc; rep from * 3 more times. (25 sts)
Read one repeat slowly: the first FPtr takes the place of the dc you skipped and leans right, anchored under the following stitch; one dc goes into the next stitch at the top; the second FPtr takes the place of the next dc and leans left, around the very same anchor post. The pair forms a shallow V — the bottom point of a hexagon. The four cell points land under stitches 3, 9, 15 and 21, and the row still counts 25: post stitches replace stitches in this honeycomb stitch crochet pattern, they never add them.
Step 4 — Honeycomb Row B: Completing the Cells

Row B closes the tops of the cells, offset by half a cell (3 stitches) from Row A, so each top point sits between two bottom points. Its tool is the FPtr2tog: two legs anchored two rows below, joined at a single top point.
Row 4: Ch 3, turn, dc in the next 2 sts. Then repeat across: *skip the next st, work the first leg of an FPtr2tog around the post of the dc two rows below that sits under the next st; skip the next st, work the second leg around the post of the dc two rows below that sits under the next st after that; skip the next st (the FPtr2tog is complete and spans 5 stitches); dc in the next st; rep from * until 4 sts remain; work the last FPtr2tog as a half cell: skip 1 st, leg around the post under the next st, skip 1 st, leg around the post under the last st. (10 sts)
Two things to expect. First, the count drops — 25 becomes 10 — because every FPtr2tog covers 5 stitches with 1. That is correct and temporary; Step 5 restores it. Second, the hexagons are suddenly obvious: each point (centred over stitches 6, 12 and 18, with half points at the edges) sits between two V points of Row 3. The legs anchor into the plain dc of Row 2, passing in front of Row 3 — that layering makes the cells look carved rather than flat.
Step 5 — Repeating the Cells

Row 5 (restore row): Ch 3, turn, dc in the next 2 sts. *Work 5 dc into the top of the next FPtr2tog, dc in the next dc; rep from * across, ending with 4 dc into the last FPtr2tog instead of 5. (25 sts — count restored)
Row 6 (plain row): Ch 3, turn, dc in every dc across. (25 dc)
That is one complete band of cells: Rows 3–6. Repeat Rows 3–6 for the pattern. The anchors stay honest because every Row A reaches into the restore row two rows below it, and every Row B into the plain row two rows below it — always a plain dc row, never another post row. For the swatch, work Rows 1–10 in total (two bands), fasten off, and measure: about 6½ × 5½ inches (16.5 × 14 cm). If your count held at 25 on every plain row, you are ready for the blanket. With two bands behind you, the honeycomb stitch crochet pattern feels rhythmic rather than fiddly.
Step 6 — The Blanket Project: Border and Finishing

The blanket is the identical stitch at a bigger count.
Blanket body: With honey yellow, chain 118. Work Row 1 (115 dc) and Row 2 (115 dc), then repeat Rows 3–6 until you have 62 rows in total — 15 bands of cells. Every plain row must count 115 stitches; every Row B ends on 40 stitches before its restore row brings it back to 115. The body measures about 30¾ × 35½ in (78 × 90 cm). Fasten off the honey yarn.
Border Round 1 (cream): Join cream in any corner stitch. Ch 1, sc across the top (115 sc), 3 sc in the corner stitch; down the side work 2 sc into the end of each post-stitch row and 1 sc into the end of each plain or restore row (92 sc); 3 sc in the corner; sc across the bottom (115 sc), 3 sc in the corner; work the second side to match (92 sc), 3 sc in the last corner, join with a sl st to the first sc. (422 sc)
Border Round 2: Ch 3, dc in every sc around, working (2 dc, ch 2, 2 dc) into the centre sc of each corner group. Join. (434 dc + 4 ch-2 corner spaces)
Border Round 3: Ch 1, sc in every dc around, working 3 sc into each corner ch-2 space. Join, fasten off. (446 sc)
Weave in all ends along the backs of the post stitches, then block lightly to about 31 × 36 in (79 × 91 cm). For more nursery makes, browse our roundup of crochet baby blanket patterns.
Tips for Even Honeycomb Cells
- Count the quiet rows, not the busy ones. Rows 3 and 4 are hard to count mid-flow; Rows 5 and 6 must read exactly 25 (or 115). Check there and errors surface while they are still one row deep.
- Pull every FPtr up to full height. A post stitch worked short drags its cell out of shape and puckers the fabric. Pull each loop up to the full height of the row you are on.
- Practise small before you commit. A honeycomb washcloth (chain 28, work to 14 rows) teaches the anchor rhythm cheaply — our crochet dishcloth patterns show the sizes that work best.
- Post stitches reward smooth yarn. Save the fluffy balls for plainer work — and for more post-stitch practice, try the waffle stitch pillow, a smaller, faster project.
Common Mistakes and How to Fix Them
- The cells look like straight columns of diamonds. Row B was not offset — its FPtr2tog points must sit between Row A’s V points (centres over stitches 6, 12, 18 on the swatch), not above them.
- Panic at the Row 4 count. Row B always ends on far fewer stitches (10 on the swatch, 40 on the blanket). If you “fixed” it by adding stitches, unpick: the restore row needs the true count to land back on 25 or 115.
- The post stitches sit on the surface like cords. You anchored into the row directly below instead of two rows below. The legs must dive past the row you are standing on and grip the plain dc row beneath it — that depth is the relief.
- The fabric puckers or cups. The FPtr loops were pulled up too short, or your tension tightened on the post rows. Loosen up on Rows 3 and 4, and let blocking do the rest.
Frequently Asked Questions
Is the honeycomb stitch crochet pattern suitable for beginners?
For a confident beginner, yes. The only new skills are the front post treble and working two of them together, both defined in full above. Master the swatch — if your plain rows count 25 every time, the blanket holds no surprises.
Can I make it in one colour, or with stripes?
One colour is the classic choice: the cells read as pure texture. For stripes, change colour at the end of a plain row (Row 2 or Row 6); changing mid-cell smears the points.
What else can I make with this stitch?
Anything flat and warm. For a cushion panel, chain 64 (61 stitches, 10 cells) and work about 44 rows; for a tote front, chain 52 (49 stitches) with a plain dc back panel. The maths never changes — a multiple of 6 plus 1, four-row bands. Whatever you choose, the honeycomb stitch crochet pattern scales cleanly, since the maths never changes.
Which yarn works best for honeycomb stitch?
A smooth worsted acrylic or wool blend with good stitch definition. Cotton gives crisper, cooler cells for washcloths but shows every tension wobble. Avoid fuzzy or very dark yarns while learning — you need to see the posts.
Final Thoughts
The honeycomb stitch crochet pattern looks like it needs a chart, a highlighter and a free weekend — and turns out to be four rows, two of them plain double crochet. Learn where the anchors live, trust the restore row, and the hexagons simply appear. Make the swatch tonight; by the blanket’s second band your hands will be counting in sixes on their own. Keep this honeycomb stitch crochet pattern in your rotation for gifts: it looks far harder than it is.