Tape Lace Crochet Pattern: A Classic Lace Tape Tutorial in 6 Steps
Most lace looks complicated because you see the whole finished piece at once. Tape lace is the friendly way in: you learn one small motif unit, repeat it until the strip is as long as you need, and only then decide what it becomes. This tape lace crochet pattern builds a classic fan-scallop tape from just double crochet and single crochet — nothing to memorise beyond two short rows. Work three tapes, join them side by side, and the same tape lace crochet pattern turns into an elegant table runner; work one tape and it becomes an edging, a bookmark or a curtain tie-back. This tape lace crochet pattern rewards slow, steady work.
The unit is counted stitch by stitch below, so your fans line up evenly from the first scallop to the last — this is how most vintage dresser lace started: one tape, patiently repeated. This tape lace crochet pattern grows one fan at a time.
What Is Tape Lace?
Tape lace is lace built from narrow, repeating strips instead of one wide piece of fabric. You crochet a tape — a strip one motif wide — by repeating a small unit over and over. The tapes are joined edge to edge for runners, tablecloths and curtains, or used singly as trims and insertions on pillowcases, towels and garments. This tape lace crochet pattern starts with a single strip.
- One unit, endless length. Learn the repeat once and the tape grows — a bookmark in an evening, a runner in a weekend.
- Mistakes stay small. If a fan goes wrong, you unpick one unit (two rows), not a tablecloth.
- It joins beautifully. Straight tape edges sit neatly against each other, so joined pieces look woven, not patched.
The idea is a close cousin of motif work like our star-centre granny square, except the motifs are linked in a strip from the start, so there is far less sewing at the end. It is also the technique behind delicate pieces like our crochet Christmas snowflakes — if you have made those, your hands are ready.
Materials and Gauge
This tape lace crochet pattern is written for fine cotton thread, which gives the crisp, heirloom look. One thing confuses everyone at first: for crochet thread, a bigger number means a finer thread — the opposite of yarn. The Craft Yarn Council’s standard yarn weight system explains the lace (size 0) category that crochet threads belong to. This tape lace crochet pattern works best in fine thread.
- Size 10 cotton crochet thread in white or cream, approx. 180 yd (165 m) for the three-tape runner — one standard ball is plenty
- 1.5 mm (US 7 steel) crochet hook
- Fine tapestry needle (small eye), small sharp scissors, tape measure
- Blocking mats and rustproof pins
Gauge: the tape measures about 1¾ in (4.5 cm) wide (13 stitches), and one unit (2 rows) adds about ⅜ in (1 cm) of length in size 10 thread with the 1.5 mm hook. Thread work varies by hand, so measure your own first unit (Step 1) and plan with your unit length: units needed = desired length ÷ your unit length. For a chunkier tape, DK cotton yarn with a 3.5 mm hook roughly doubles everything — about 3½ in wide, ¾ in per unit.
Finished runner: three tapes of 48 units each, about 18 in (46 cm) long × 5½ in (14 cm) wide joined — a slim centrepiece runner. In the DK version, 24 units per tape gives the same length at about 10½ in wide.
Useful Materials from Amazon

- Country Of Origin: India
- This high luster mercerized cotton crochet thread is perfect for crochet projects both large and small
- Package Dimensions: 4.17″ H x 3.87″ L x 3.87″ W
A smooth, mercerised size 10 thread shows every fan crisply and blocks beautifully.

- Steel crochet hook
- Ergonomic soft touch handle
- Comes with protective cover
A plain steel 1.5 mm hook is the traditional tool for size 10 thread; an ergonomic-handle version is kinder for long sessions.

- Case: Abs Resin, Polypropylene, Needles: Steel
- Imported
- Chibi bent tip needles
Choose a set with fine, small-eye needles — you will weave thread tails and join the tapes with one.
Foam mats and rustproof pins are how lace gets its showroom finish: pinned to size and dried, every scallop suddenly matches.
Abbreviations (US Terms)
- ch = chain
- sc = single crochet
- dc = double crochet
- sl st = slip stitch
- st(s) = stitch(es)
- rep = repeat
The Tape Lace Crochet Pattern, Step by Step
Follow this tape lace crochet pattern in order. The whole tape is one foundation row plus a two-row unit repeated: a fan row and a plain row. Every row keeps exactly 13 stitches — if your count ever changes, something has crept in or slipped away, and the row is quick to redo.
Step 1 — Materials and Gauge

Gather your thread and hook, then make a practice start: work the foundation row and two full units from Steps 2–3 (five rows in total). Lay it flat, unpinned, and measure: about 1¾ in (4.5 cm) wide, each unit about ⅜ in (1 cm) long. Write your unit length down — Step 4 uses it to plan the tape. Narrower and tighter? Go up to a 1.75 mm hook; wider and looser, drop to a 1.25 mm.
Step 2 — The First Motif Unit

Foundation chain: Ch 14.
Row 1 (base row): Sc in the 2nd ch from the hook and in every ch across. (13 sc) This plain row is the tape’s spine — every unit builds on the row before it.
Row 2 (fan row): Ch 3 (counts as the first dc), turn. Skip the next 2 sc, work 5 dc in the next sc (first fan made), skip the next 2 sc, sc in the next sc, skip the next 2 sc, work 5 dc in the next sc (second fan made), skip the next 2 sc, dc in the last sc. (13 sts: 12 dc and 1 sc)
Count the row through once: the turning chain covers stitch 1, two are skipped, the fan sits in stitch 4, two are skipped, the centre sc lands in stitch 7, two are skipped, the second fan sits in stitch 10, two are skipped, and the last dc closes stitch 13 — two full fans and one centre stitch, balanced.
Row 3 (plain row): Ch 1, turn. Sc in every st across. (13 sc)
Rows 2 and 3 together are one motif unit: two plump fans with open eyelets beneath them (the skipped stitches), framed by flat single crochet — the classic scalloped look of tape lace, from dc and sc alone.
Step 3 — The Repeat Unit: How the Tape Grows

From here the tape lace crochet pattern is pure rhythm:
- Unit Row A: repeat Row 2 (the fan row). (13 sts)
- Unit Row B: repeat Row 3 (the plain sc row). (13 sc)
Alternate A and B and the strip grows one unit — about ⅜ in (1 cm) — at a time. Because every fan row is worked into a flat sc row, the fans stack in neat columns and the eyelets line up in rows. A few habits keep the growth even:
- Count the fans, not the stitches. Two fans per unit, always; a missing fan shows at a glance.
- Keep the centre sc honest. It is easily swallowed by a neighbouring fan — mark it for the first few units if needed.
- Relax at the edges. The fan row’s first and last stitches form the selvedge; tight edges curl the tape sideways.
Step 4 — Working the Tape to Length

Keep repeating the unit until the tape is the length you want. For the runner, each tape is 48 units: foundation row, then 96 rows of units — about 18 in (46 cm) at the gauge above. If your own unit measured longer or shorter in Step 1, adjust the count: units needed = 18 ÷ your unit length in inches. Make all three tapes the same number of units: matching counts matter more than matching inches, because the Step 5 joins are made unit to unit.
Finishing a tape: always end with a plain row (Unit Row B), so both ends are straight single-crochet rows. Fasten off with a 6 in (15 cm) tail and weave it along the backs of the last stitches. Store finished tapes rolled loosely — thread lace creases if folded hard, and the final block fixes the rest.
Step 5 — Joining Tapes into the Runner
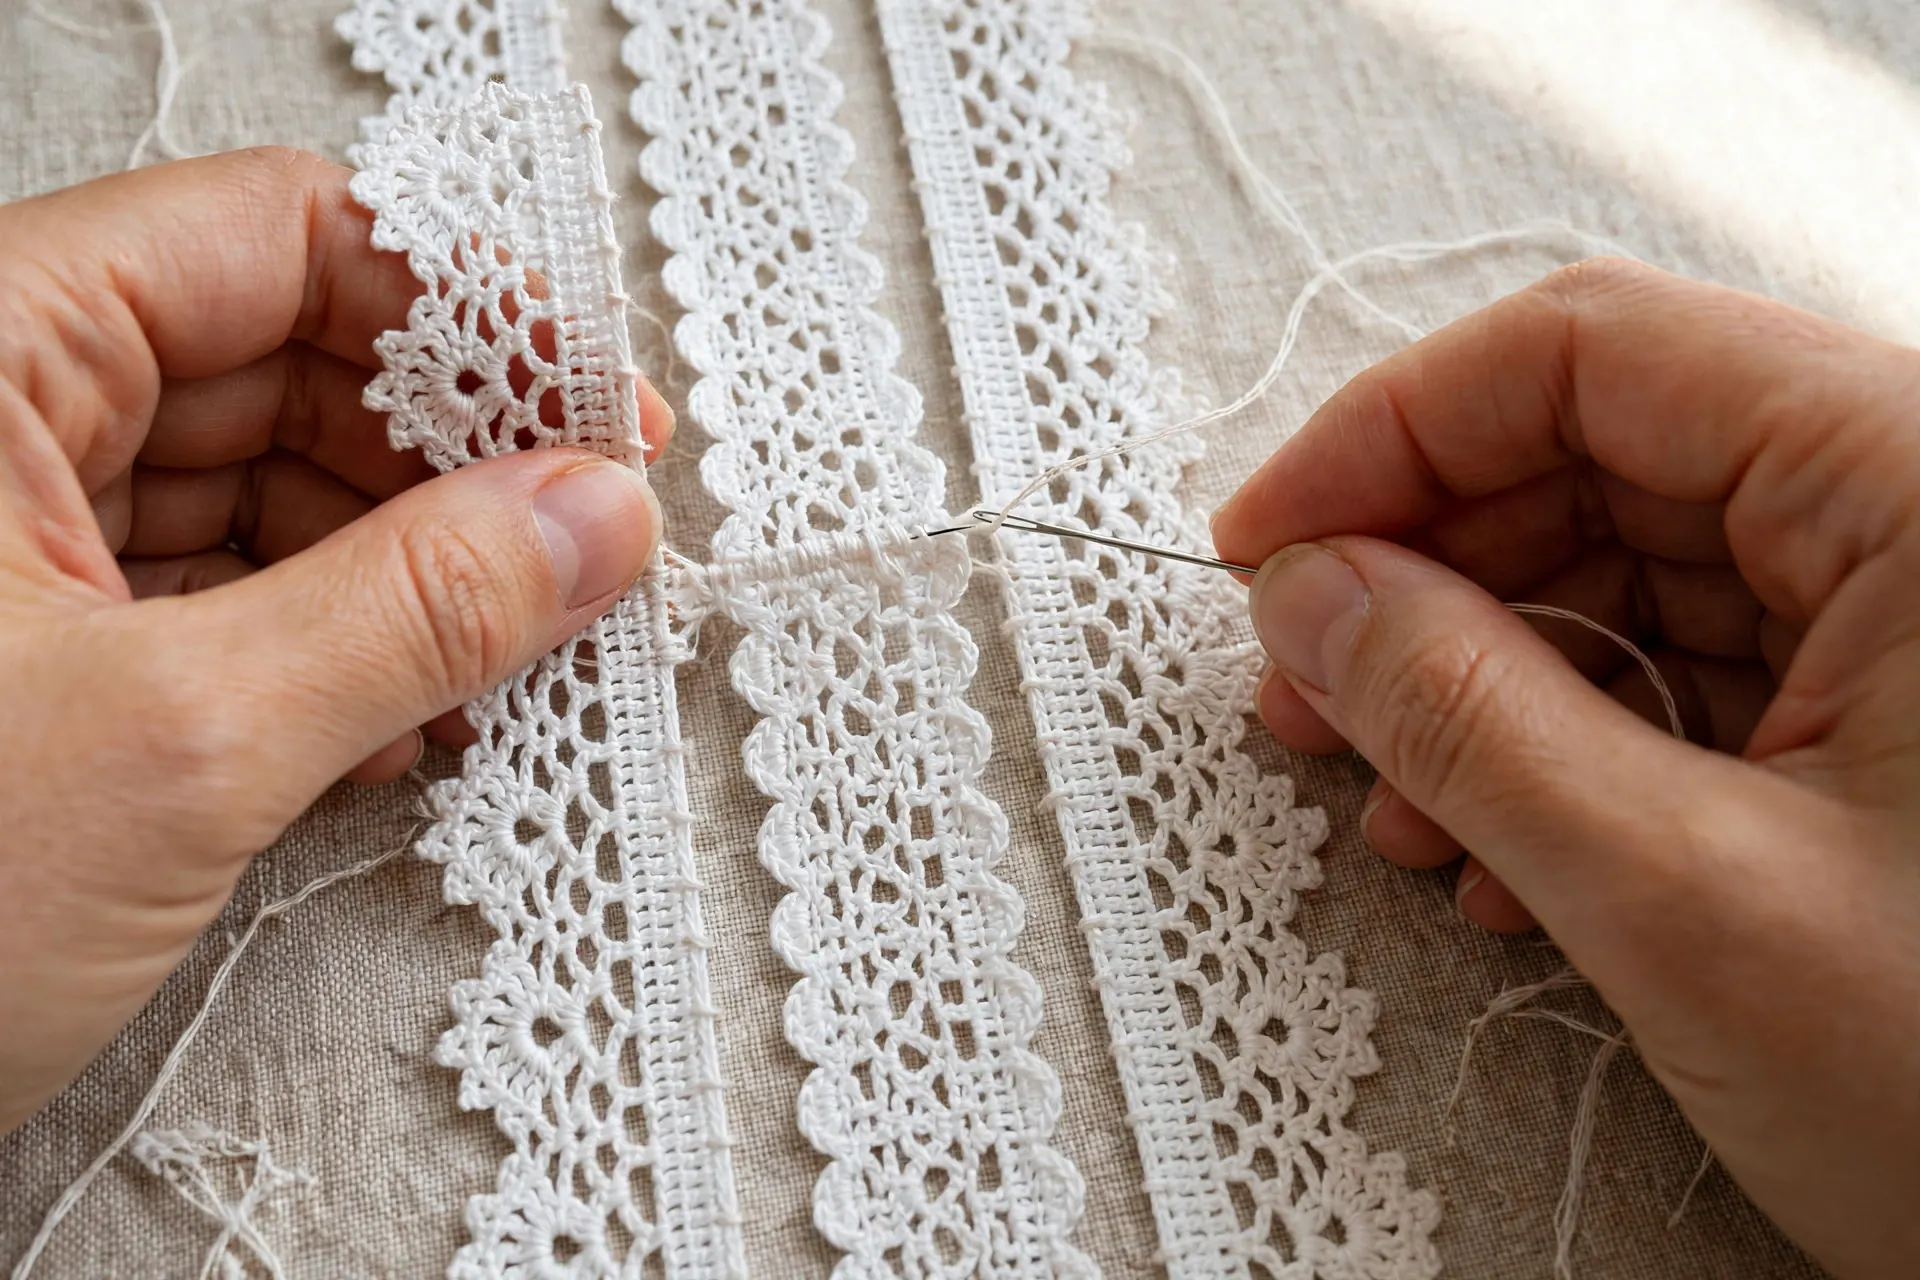
Lay the three tapes side by side, right sides up, ends level, units matched fan to fan. Join tape 1 to tape 2, then tape 2 to tape 3, one full seam at a time, with a tapestry needle and about 24 in (60 cm) of the same thread, whipstitching through the selvedge stitches:
- Anchor the thread at the first corner with two tiny stitches in the same place.
- Pass the needle through the end stitch of a row on the first tape and the matching end stitch on the second — one join for every row end, two joins per unit.
- Keep stitches small, snug and even; do not pull tight, or the seam puckers.
- At the far end, anchor with two stitches and weave the tail back along the seam before trimming.
For a 48-unit tape that is 96 joins per seam — each join is one pass of the needle, and the matched units make it mindless work. Prefer a crocheted join? Slip stitch through corresponding row ends instead (96 sl st per seam), working loosely so the seam stays flat. A joined runner also makes a pretty gift — our striped crochet Christmas table runner shows the same centrepiece idea in yarn.
Optional edging round: work one round of sc around the runner: 2 sc into each unit along both long sides (96 per side), 39 sc across each short end (13 per tape), 3 sc in each corner — about 278 sc — then join with a sl st and fasten off.
Step 6 — Finishing, Blocking and Uses

Thread lace only looks like heirloom lace after blocking. Soak the runner in lukewarm water for ten minutes, roll it in a towel, then pin it flat on blocking mats to 18 × 5½ in (46 × 14 cm), easing each fan into shape. Dry completely before unpinning — the difference is dramatic, the same pin-and-set finish that makes our snowflakes hold their points.
Then put the tape to work:
- As the runner: three tapes joined as in Step 5 — down a dresser or hall table.
- As an edging: a single tape sewn along the edge of a pillowcase or plain tablecloth; allow one unit per ⅜ in of edge.
- As an insertion: sew a tape between two pieces of linen or along a garment yoke — the trick that trims our crochet mesh scarf.
- As panels: join five or six tapes for placemats and wider centrepieces, or build curtain panels the way throws are pieced in our summer blanket patterns.
Care: hand wash cool, roll in a towel, pin flat to dry. Cotton thread lace lasts for decades.
Tips for Neat Tape Lace
- Good light is a tool. Fine white thread on a white background disappears; work over a dark cloth so every stitch shows.
- Let the hook do the sizing. In thread crochet the hook, not your grip, sets the stitch size — a death-grip makes smaller, tighter fans, not neater ones.
- Measure every ten units. A quick check against your Step 1 unit length catches tension drift early.
- Soak, do not just pin. A soaked block relaxes every stitch into place; dry-pinning rarely does.
Common Mistakes and How to Fix Them
- The count is not 13. A fan ate the centre sc, or a skip was missed. The fan row must run: skip 2, fan, skip 2, sc, skip 2, fan, skip 2 — recount against Step 2 and redo the row.
- The tape twists like a ribbon. The two selvedge stitches are worked at different tensions, or rows turned inconsistently. Turn the same way every row and keep both edges equally relaxed.
- Fans lean to one side. The 5 dc are crowded toward one side of their stitch. Enter the stitch cleanly each time and let the fan spread symmetrically.
- The joined runner puckers. The seam was pulled tight, or the tapes have different unit counts. Count units before joining, and join with the tapes laid flat and unstretched.
- The lace looks limp and grey. It needs washing and a proper soaked block, not more starch — wash, pin to size, dry fully.
Frequently Asked Questions
Is this tape lace crochet pattern suitable for beginners?
For a beginner comfortable with single and double crochet, yes — the skills are basic; only the fine thread is a challenge. If size 10 feels fiddly at first, learn the unit in DK yarn with a 3.5 mm hook, then graduate to thread.
How long does one tape take to make?
A 48-unit tape takes most crocheters two to three hours of relaxed work — two to three minutes per unit once the rhythm settles. Three tapes plus joining and blocking make a comfortable weekend project.
Can I make the tape wider?
The tape is one motif wide by design; width comes from joining tapes, not widening them. For a wider single strip, work the DK version (about 3½ in wide) or join two tapes and treat the pair as one band.
What thread or yarn works best?
Mercerised cotton size 10 thread gives the classic crisp lace and blocks well. Size 20 makes a finer tape (about 1¼ in wide) for delicate edgings; avoid fluffy or splitty fibres — fuzz hides the fans.
How do I join tape lace around a corner?
Mitre it: fold the tape at 45 degrees at the corner, pin the fold flat, and whipstitch the folded edges together on the wrong side. One fold per corner keeps the fans running unbroken around the turn.
Final Thoughts
There is a reason tape lace has survived for centuries: it asks for two simple rows and a little patience, and returns lace that can become almost anything. Master this tape lace crochet pattern and you own a building block — runners, edgings, insertions, whole tablecloths one tape at a time. Make the first tape tonight, and by the weekend your table could be wearing lace.