
There’s something really satisfying about crocheting a project that looks stylish but feels incredibly simple to make. That’s exactly why I keep coming back to mesh scarves. They work up fast, don’t use a huge amount of yarn, and somehow always look elegant no matter what color palette is used.
A crochet mesh scarf pattern is perfect when I want a relaxing project that still feels fashionable and useful. The open stitch design creates that soft airy texture that drapes beautifully without feeling bulky, which makes it ideal for layering during spring, summer evenings, or even mild fall weather.
What I personally love most about mesh scarves is how customizable they are. They can be made long and dramatic, short and minimal, skinny like a trendy neck scarf, or oversized like a lightweight wrap.
And honestly, once the pattern repeat clicks, it becomes one of those crochet projects that’s hard to put down.
Why Mesh Scarves Are So Popular
Mesh scarves have become one of my favorite “mindless crochet” projects because the stitches are repetitive in the best possible way. After the first few rows, there’s no constant counting or complicated shaping involved.
They’re especially great for:
- Beginner crocheters
- Quick weekend projects
- Lightweight accessories
- Layering outfits
- Gift ideas
- Using soft gradient yarns
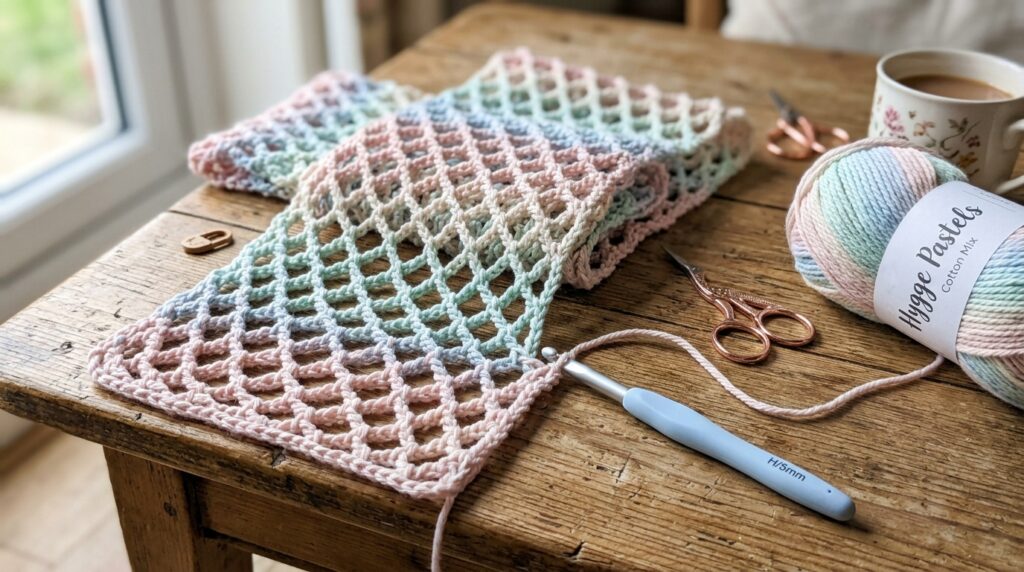
The fishnet-style texture also gives the scarf a modern handmade look that feels trendy without trying too hard.
I’ve noticed that lightweight scarves like this are the ones I actually wear most often because they don’t feel too heavy indoors.
Materials Needed
Yarn
- Lightweight yarn (Sport Weight or DK Weight)
- Cotton blends create the cleanest drape
- Soft acrylic blends work beautifully for cozy texture
Hook
- 3 mm crochet hook
- Or 3.5 mm hook for looser tension
Other Supplies
- Scissors
- Tapestry needle
- Measuring tape (optional)
Skill Level
Beginner Friendly
This scarf mainly uses:
- Chain stitches
- Single crochet stitches
- Repeating rows
It’s honestly one of the easiest wearable crochet projects to memorize.
Crochet Abbreviations
- ch = chain
- sc = single crochet
- sl st = slip stitch
- st = stitch
Tips Before Starting
A few things made a huge difference the first time I made a mesh scarf:
Keep Tension Relaxed
Tight chains make the scarf lose that soft airy effect. Slightly loose stitches create much prettier drape.
Count Carefully in the Beginning
Once the foundation row is correct, the rest becomes extremely repetitive and relaxing.
Lightweight Yarn Works Best
Chunky yarn can make mesh scarves feel stiff instead of flowy.
Crochet Mesh Scarf Pattern
Step 1: Create the Foundation Chain
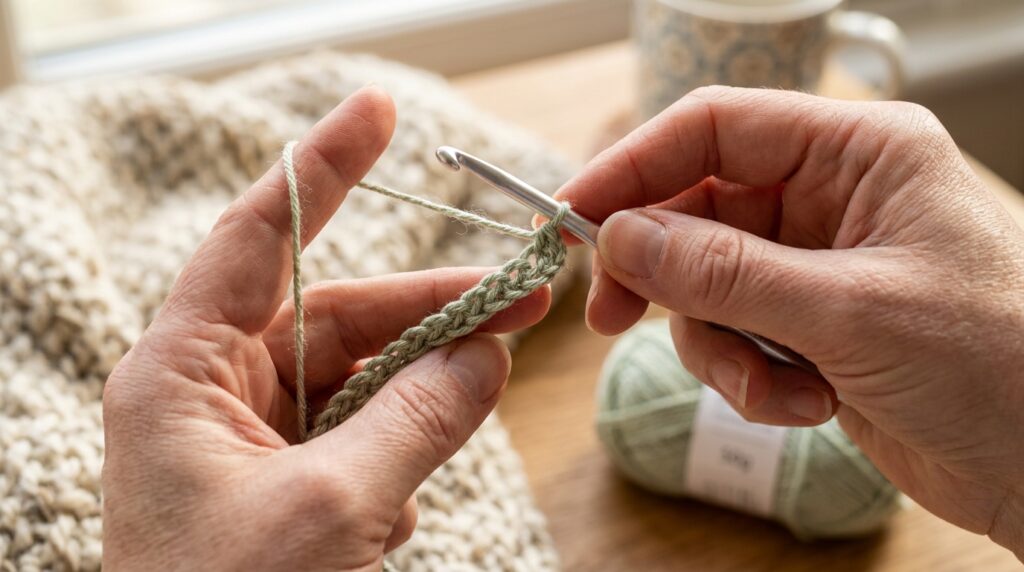
Start with a slip knot.
Chain 25 stitches.
This creates a slim scarf width, but the width can easily be adjusted by adding more chains in multiples of 5.
For wider scarves:
- Chain 35
- Chain 40
- Chain 50
depending on the desired look.
Step 2: Start the Fishnet Design
Count 4 chains away from the hook and insert the hook into the 5th chain.
Work:
- 1 single crochet
Then:
- Chain 4
- Skip 4 chains
- Single crochet into the next chain
Repeat this pattern all the way across the row:
ch 4 → skip 4 → sc
Finish the row with a single crochet in the final chain.
At this stage, the scarf already starts developing that classic fishnet appearance.
Step 3: Begin Row Two
Chain 4 and turn the work.
Instead of crocheting into stitches directly, work into the open chain spaces created from the previous row.
Insert the hook into the first open space and make:
- 1 single crochet
Then:
- Chain 4
- Move to the next open space
- Work another single crochet
Continue repeating this sequence across the entire row.
This is the section where the project becomes incredibly relaxing because the pattern repeat is easy to memorize.
Step 4: Continue the Pattern
Repeat Row Two over and over until the scarf reaches the desired length.
For a standard scarf:
- Approximately 140 rows works beautifully
For a shorter scarf:
- Stop earlier
For oversized dramatic scarves:
- Add additional rows
One thing I personally noticed while making mesh scarves is how quickly they grow because the openwork stitches work up much faster than dense crochet fabric.
Step 5: Finish the Scarf
Once the desired length is reached:
- Cut the yarn
- Pull through the final loop
- Tighten gently
Use a tapestry needle to weave in all loose ends neatly.
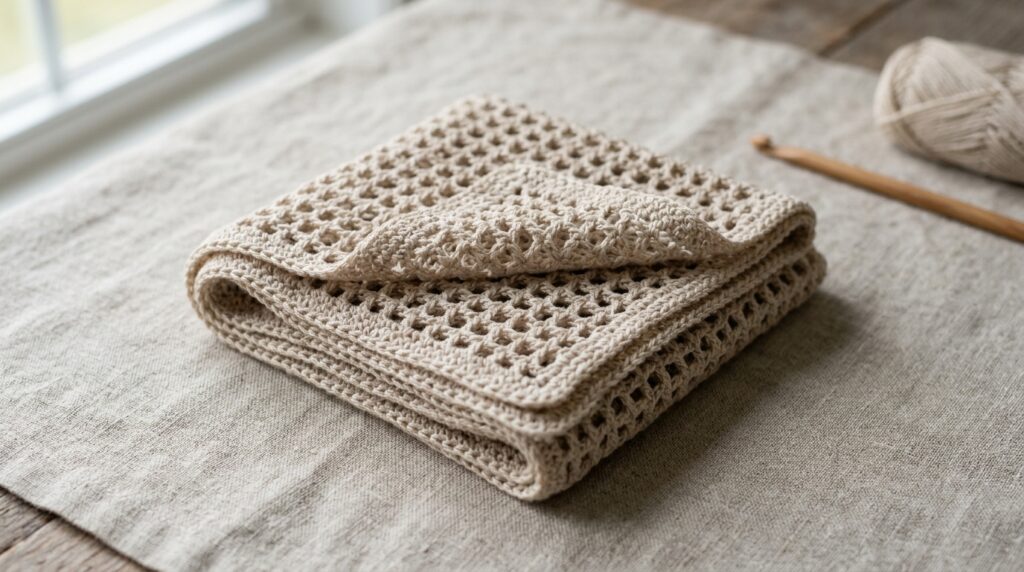
At this point the scarf is technically finished, but adding a border can make it look even more polished.
Optional Border
For a cleaner finished edge:
Work single crochet stitches evenly around the entire scarf border.
This helps:
- strengthen the edges
- improve shape
- prevent stretching
- create a professional finish
I personally love adding borders when gifting crochet scarves because they instantly make the project look more refined.
Customization Ideas
Make It Oversized
Increase the starting chain count for a shawl-style scarf.
Use Gradient Yarn
Color-changing yarn creates beautiful transitions throughout the mesh texture.
Add Fringe
Tassels or fringe give the scarf a cozy boho appearance.
Create a Skinny Scarf
Use fewer foundation chains for a trendy lightweight neck scarf.
What I Loved About This Pattern
After trying different crochet scarf styles over the years, mesh scarves consistently stay one of my favorite quick projects because they feel:
- relaxing
- stylish
- lightweight
- beginner-friendly
- easy to customize
They also make amazing travel projects since the stitch repeat is so simple to remember.
And honestly, the airy texture makes handmade scarves feel modern instead of overly bulky.