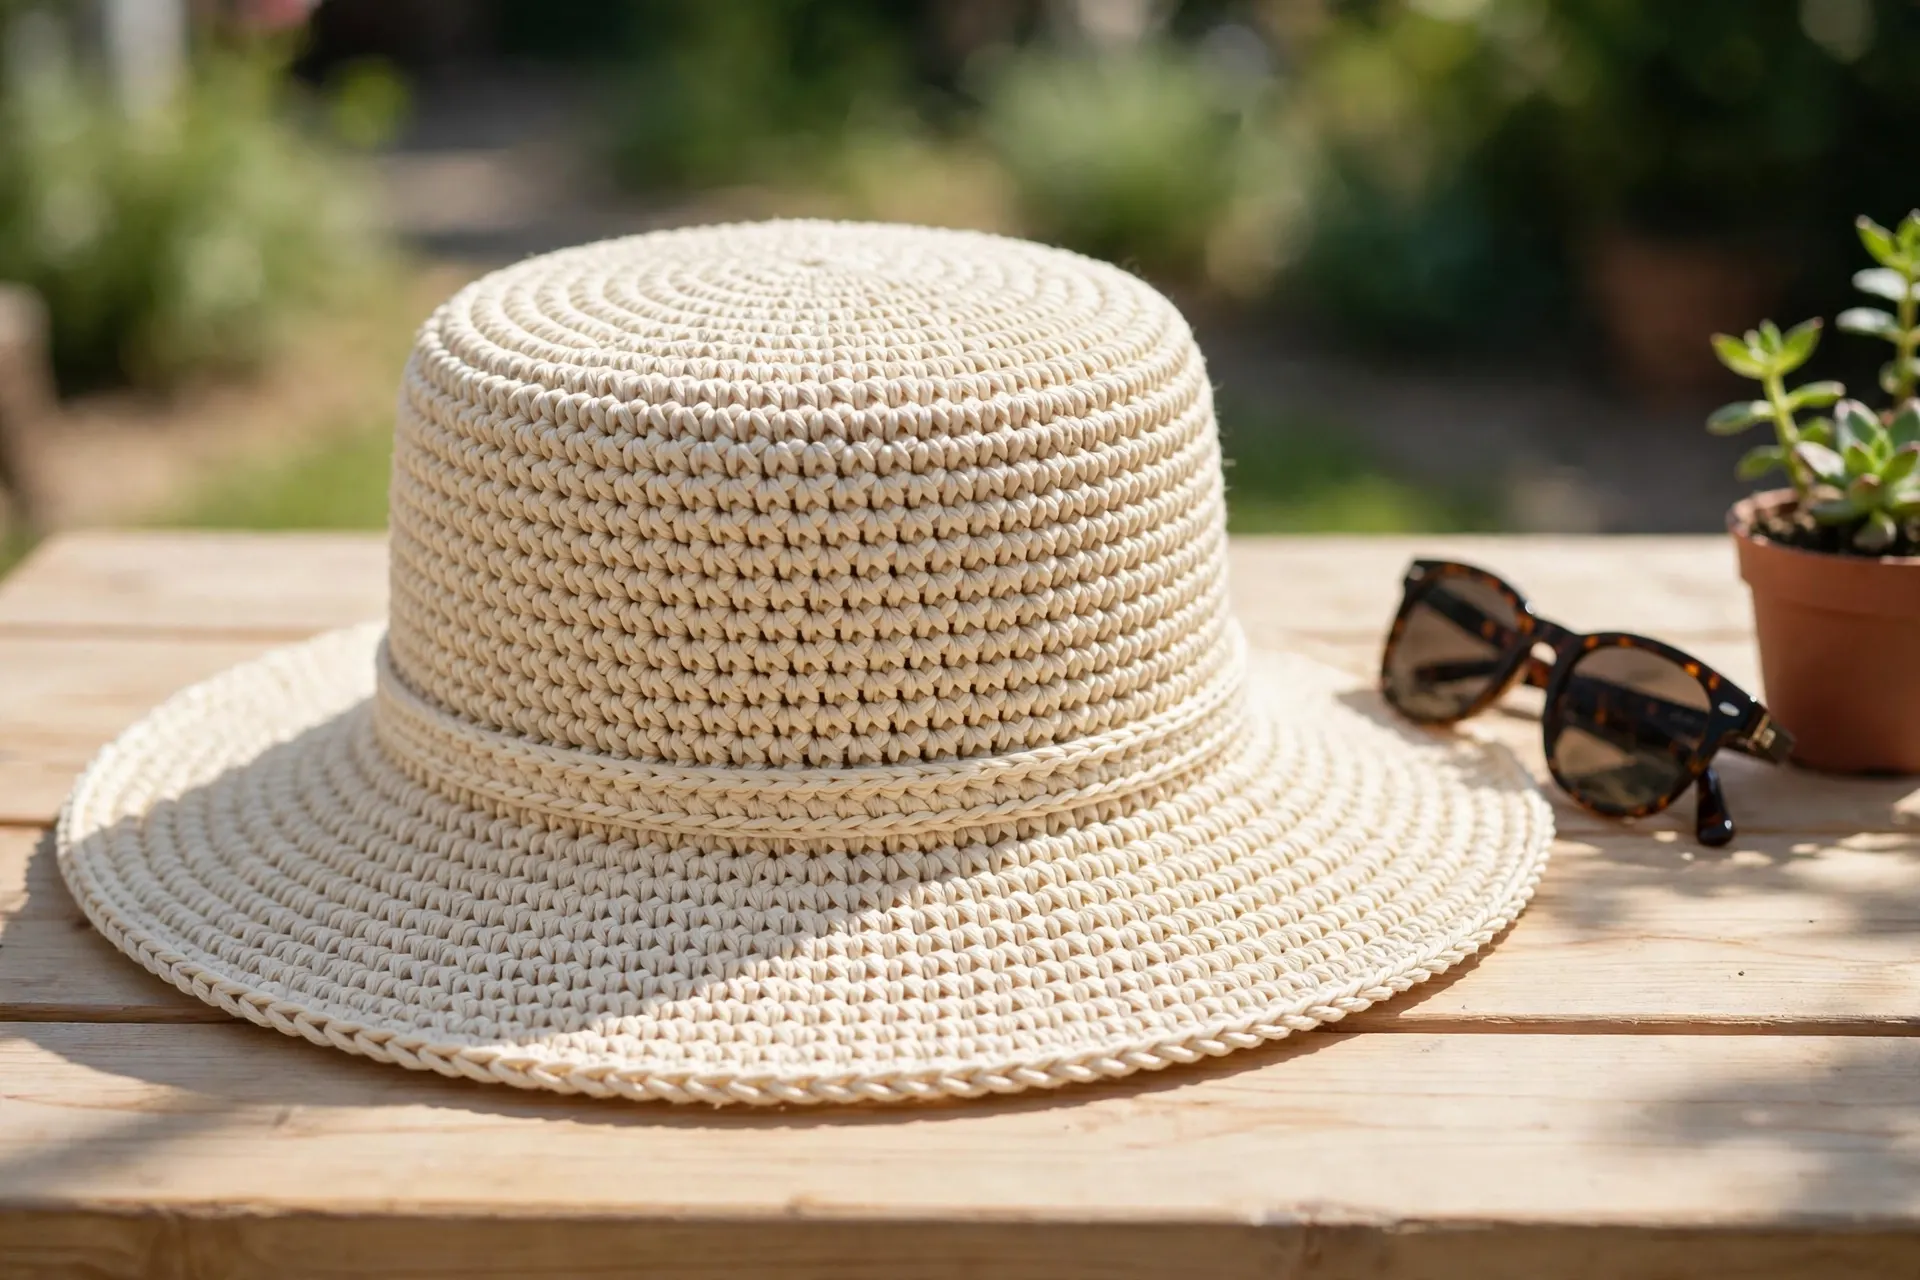
Panama Hat Crochet Pattern: A Classic Summer Hat in 7 Steps
The classic Panama shape — flat-topped crown, straight sides and a wide, gently sloping brim — is one of the most flattering hats there is, and far easier to crochet than it looks. This panama hat crochet pattern works the whole hat in one piece from the top down: a counted circle for the crown, plain rounds for the sides, then a flared brim that shades face and shoulders. No sewing, and only one stitch to know: the half double crochet.
Written in full for adult size M (fits a 22 in / 56 cm head), in cool, breathable cotton. Sizes S and L change only the crown and side rounds, and every round of this panama hat crochet pattern ends with its stitch count, so you always know you are on track. Follow the counts closely, and this panama hat crochet pattern will reward you with a hat that looks store-bought.
About This Hat
- A timeless shape. The flat crown and wide brim read “Panama” instantly — elegant with dresses, practical in the garden.
- One piece, top down. Crown, sides and brim are worked in continuous rounds — the only finishing is two woven-in ends.
- Cotton does the work. Worsted cotton breathes, washes well, and takes a starch so the brim keeps its line.
- Three sizes, one method. Only the crown diameter changes between S, M and L — the same approach as our summer baby hat crochet pattern, scaled up.
- A weekend project. Roughly 24 rounds — most crocheters finish in two or three evenings. Add a ribbon band, or wear our crochet headband pattern over the crown instead.
Materials and Gauge
This panama hat crochet pattern is worked firmly, in cotton, so the crown stands up and the brim holds its slope. If yarn labels are new to you, the Craft Yarn Council’s standard yarn weight system explains what the #4 on the band means.
- Worsted weight (#4) cotton yarn, approx. 300 yd (275 m) for size M — about 260 yd for S, 340 yd for L. Ecru is the classic Panama colour; white, sand and pastels all work.
- 4.0 mm (US G-6) crochet hook
- Stitch marker (for the first stitch of each round)
- Yarn needle, scissors and a tape measure
- Optional: millinery or craft wire for the brim edge, spray starch for a crisper finish (Step 7)
Gauge: 15 hdc and 11 rounds = 4 in (10 cm) in half double crochet, worked in rounds. Gauge matters: two stitches too many per 4 inches grows the hat a full size.
Sizes:
| Size | Crown stitches | Crown diameter | Finished circumference | Fits head | Side rounds |
|---|---|---|---|---|---|
| S | 70 | ≈ 6 in (15 cm) | ≈ 18¾ in (48 cm) | 20–21 in | 8 |
| M | 80 | ≈ 6¾ in (17 cm) | ≈ 21¼ in (54 cm) | 21–22 in | 9 |
| L | 90 | ≈ 7½ in (19 cm) | ≈ 24 in (61 cm) | 23–24 in | 10 |
The rule behind the table: crown diameter = head circumference ÷ 3.14. Cotton relaxes about an inch with wear, so finished circumference is written slightly smaller than the head — that negative ease keeps the hat on in a breeze.
Useful Materials from Amazon

- COTTON YARN FOR EVERYDAY MAKES: 24/7 Cotton is a smooth, 100% cotton yarn available in a wide range of vibrant, lasting …
- GENEROUS SKEIN, PREMIUM FINISH: Each ball includes 185 yd (170 m) and 3.5 oz (100 g), offering more yardage than compara…
- EASY-CARE CROCHET YARN: Mercerization strengthens the cotton fibers, improves color vibrancy, and creates a smoother fee…
A smooth worsted cotton is non-negotiable here: crisp stitch definition, a cool feel and a washable finish acrylic cannot match in summer.

- Soft touch crochet hook
- Lightweight and ergonomic
- Built in soft cushion
Twenty-four rounds of firm cotton is real hand work — a soft-grip ergonomic 4 mm hook keeps fingers and wrist comfortable throughout.

- The Package Height of the Product is 10.16 centimeters
- The Package Length of the Product is 1.016 centimeters
- The Package Width of the Product is 7.62 centimeters
One locking marker in the first stitch of each round is the difference between relaxing and recounting.

- Makes ironing easier
- Light body without stiffness
- Quickly removes wrinkles
A light mist of spray starch is the Panama secret: it sets the brim’s slope and the flat crown so the hat keeps its line.
Abbreviations (US Terms)
- ch = chain
- hdc = half double crochet
- inc = increase: work 2 hdc in the same stitch
- sc = single crochet
- sl st = slip stitch
- st(s) = stitch(es)
- MR = magic ring
- rep = repeat
How the rounds work: join every round with a sl st to the first hdc, then ch 2 to start the next. The ch-2 does not count as a stitch anywhere in this pattern — counts are hdc (or sc) only. Mark the first hdc of each round.
The Panama Hat Crochet Pattern, Step by Step
Size M is written in full; where S and L differ, the change is given at the end of the step — everything else is identical.
Step 1 — Materials, Gauge and Sizes

Gather everything above and swatch first: ch 18, hdc in the 3rd ch from the hook and in each ch across (16 hdc), then 11 more plain rows. Measured flat, the middle should show 15 stitches and 11 rows inside 4 in (10 cm). Too many, go up to a 4.5 mm hook; too few, drop to a 3.5 mm. Then measure the head — forehead and widest part of the back — and pick your size; most adult women wear the M. Getting the size right at this stage is the secret to a comfortable panama hat crochet pattern.
Step 2 — Crown Rounds 1–4: The First Circles

The crown is a flat circle gaining 10 stitches per round. The increases move position each round — deliberate: it keeps the circle round instead of ten-sided.
- Round 1: Make a magic ring, ch 2, 10 hdc into the ring, pull the ring closed, join with a sl st to the first hdc. (10 hdc)
- Round 2: Ch 2, inc in every stitch around, join. (20 hdc)
- Round 3: Ch 2, *hdc in next st, inc in next st; rep from * around, join. (30 hdc)
- Round 4: Ch 2, *inc in next st, hdc in next 2 sts; rep from * around, join. (40 hdc)
Lay it flat after every round: no ripple, no cupping — the mistakes section explains both. A flat crown now means smooth sides later in this panama hat crochet pattern.
Step 3 — Crown Rounds 5–8: Work to Full Diameter

Keep increasing by 10 stitches a round until the circle reaches your size’s diameter:
- Round 5: Ch 2, *hdc in next 3 sts, inc in next st; rep from * around, join. (50 hdc)
- Round 6: Ch 2, *inc in next st, hdc in next 4 sts; rep from * around, join. (60 hdc)
- Round 7: Ch 2, *hdc in next 5 sts, inc in next st; rep from * around, join. (70 hdc)
- Round 8: Ch 2, *inc in next st, hdc in next 6 sts; rep from * around, join. (80 hdc)
Stop here for size M — the circle should measure about 6¾ in (17 cm) across. Size S stops after Round 7 (70 sts, about 6 in / 15 cm). Size L works one more round — Round 9: Ch 2, *hdc in next 7 sts, inc in next st; rep from * around, join (90 hdc) — about 7½ in (19 cm) across. Measure across the centre in two directions and average: a quarter inch out is fine; a full inch means gauge drifted — rework the crown now, not the fit later.
Step 4 — The Straight Side Rounds

With no increases at all, the work now folds down at the crown’s edge into straight Panama sides.
- Rounds 9–17 (9 rounds): Ch 2, hdc in every stitch around, join. (80 hdc in every round)
The sides measure about 3¼ in (8.5 cm) deep; S works 8 rounds, L works 10. Try the hat on now, pulled to where you’ll wear it (just above the eyebrows): snug, not tight — the cotton relaxes. Too loose means one fewer crown round; tight, the next size up. Your brim starts from this count: 70 (S), 80 (M) or 90 (L). Write your count down before moving on with this panama hat crochet pattern.
Step 5 — The Brim: First Rounds

The brim flares because it increases again — more gently than the crown, with increases spaced one stitch further apart each round, so it slopes instead of ruffling. Size M follows; S and L below.
- Brim Round 1: Ch 2, *hdc in next 7 sts, inc in next st; rep from * around, join. (90 hdc)
- Brim Round 2: Ch 2, *inc in next st, hdc in next 8 sts; rep from * around, join. (100 hdc)
- Brim Round 3: Ch 2, *hdc in next 9 sts, inc in next st; rep from * around, join. (110 hdc)
For S and L: same pattern, different starting spacing — S increases in every 7th stitch (hdc in 6, inc), L in every 9th (hdc in 8, inc); spacing moves one stitch further apart each round, always +10 sts, so after three rounds S stands at 100 sts, L at 120. The brim should tilt down smoothly; a gentle edge wave settles later, a strong ruffle does not — see Mistakes. Trust the counts here, and the brim of this panama hat crochet pattern will slope exactly as intended.
Step 6 — The Brim: Final Rounds and Edge

Three more increase rounds complete the width; an sc round locks the edge.
- Brim Round 4: Ch 2, *inc in next st, hdc in next 10 sts; rep from * around, join. (120 hdc)
- Brim Round 5: Ch 2, *hdc in next 11 sts, inc in next st; rep from * around, join. (130 hdc)
- Brim Round 6: Ch 2, *inc in next st, hdc in next 12 sts; rep from * around, join. (140 hdc)
- Final round: Ch 1, sc in every stitch around, join, fasten off. (140 sc)
The finished brim measures about 2½ in (6.5 cm) wide (S and L end on 130 and 150 final-round sts, same width). For a firmer, wire-held edge, crochet the final round over millinery or craft wire laid along the previous round; overlap its ends by an inch and twist or tape together. A wired brim shapes by hand — slope at the front, slight lift at the back — and holds in wind and luggage.
Step 7 — Shaping and Finishing

Weave in the two ends, running each through stitch backs in two directions so nothing slips. Then shape the hat — this is what makes it look bought:
- Steam or mist. A few seconds over gentle steam, or a misting of water, until just damp and relaxed.
- Set the crown. Stand the hat on a head form, upturned bowl or rolled towel matching the crown; smooth the top flat.
- Set the brim. Arrange the gentle downward slope all round — or press it flat for a straighter line — and let it dry completely in position.
- Crisp it (optional). A light mist of spray starch before drying gives a firmer set.
- Add a band (optional). Grosgrain ribbon stitched at the back, or a crocheted strip (ch 6, sc in rows to head circumference, joined into a loop). Pair it with the floral crochet daisy bag for a full beach-day set.
Tips
Four habits keep the hat from this panama hat crochet pattern looking sharp season after season:
- Count every round. Ten increases per crown and brim round, none on the sides — each join’s count is your early-warning system.
- Work firmly. Loose stitches flop by lunchtime; if the fabric feels drapey, drop to a 3.5 mm hook rather than fighting tension.
- Let the increases travel. Staggered on purpose — stacked in the same spots, they build corners and the crown turns polygonal.
- Shape it while damp. Two minutes of smoothing after each wash keeps the Panama line crisp — the same firm finishing that structures our elegant crochet handbag.
Common Mistakes and How to Fix Them
- The crown ruffles or cups. Both mean the increase count drifted: ruffling = a doubled increase or loosened tension; cupping = missed increases (an “inc” worked as one stitch). The crown must gain exactly 10 stitches a round — recount and unpick to the last flat round.
- The brim waves like lettuce. It increased too fast for your tension: rework it with a plain round between increase rounds — narrower, but smooth.
- The brim flops. Stitches too loose, or a soft yarn: crochet the final round over wire, add starch, or remake the brim a hook size smaller.
- The hat is the wrong size. Check crown diameter against the rule — head ÷ 3.14 — before the side rounds. A whole size out is almost always gauge, not counting.
Frequently Asked Questions
Is this panama hat crochet pattern suitable for beginners?
It suits a confident beginner — the whole hat is half double crochet, so if you can work in rounds and increase, you can make it. Make one plain version first, before adding wire or a band.
How much yarn does the hat actually take?
About 300 yd (275 m) of worsted cotton for M — roughly two 100 g balls; S about 260 yd, L about 340 yd. A contrasting band adds a few yards. Buy a little extra if you want spare yarn to practise the brim of this panama hat crochet pattern.
Can I make the brim wider or narrower?
Yes — each extra increase round adds roughly ⅜ in (1 cm) of width; stop one round early for a narrower brim. Keep the final sc round at any width: it stops the edge stretching. For the opposite extreme of summer stitching, our crochet mesh scarf shows how open stitches behave in cotton.
Why cotton and not acrylic?
Cotton breathes, so your head stays cooler; it absorbs a hot day’s light sweat, washes clean, and holds its blocked shape. Acrylic traps heat, stretches in the sun, and a wide acrylic brim sags. A cotton-acrylic blend is an acceptable middle ground.
How do I wash the finished hat?
Hand wash cool, press the water out in a towel (never wring), reshape on a bowl and dry away from direct sun. With a wired brim, spot clean instead and dry the edge thoroughly.
Final Thoughts
A good summer hat is the hardest-working thing in a wardrobe, and this panama hat crochet pattern earns its place: one stitch, honest cotton, and a shape that has suited everyone for a century. Make the first in classic ecru, check the fit and brim slope, and the second — in white, sand or a soft colour — will practically make itself.