Rose Square Blanket Crochet Pattern: A 3D Rose Motif Blanket in 8 Steps
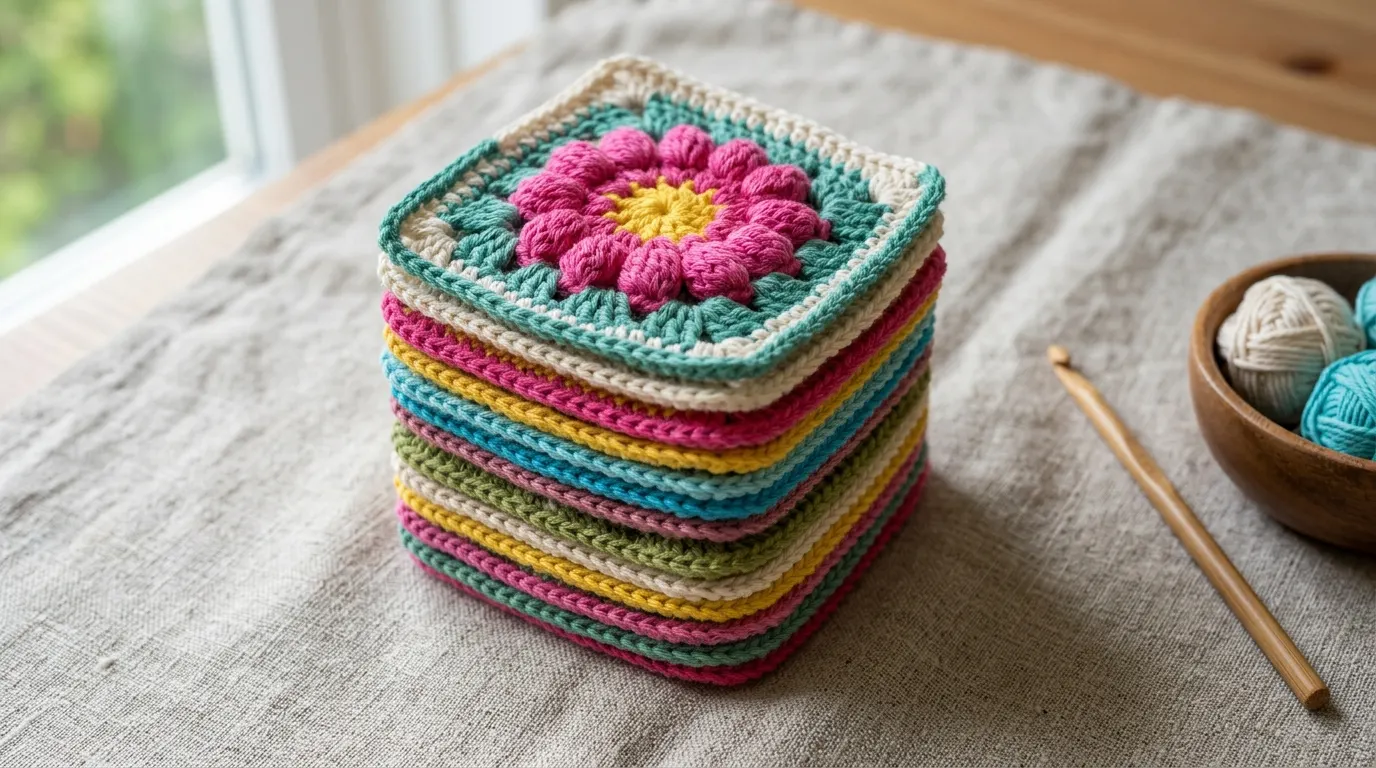
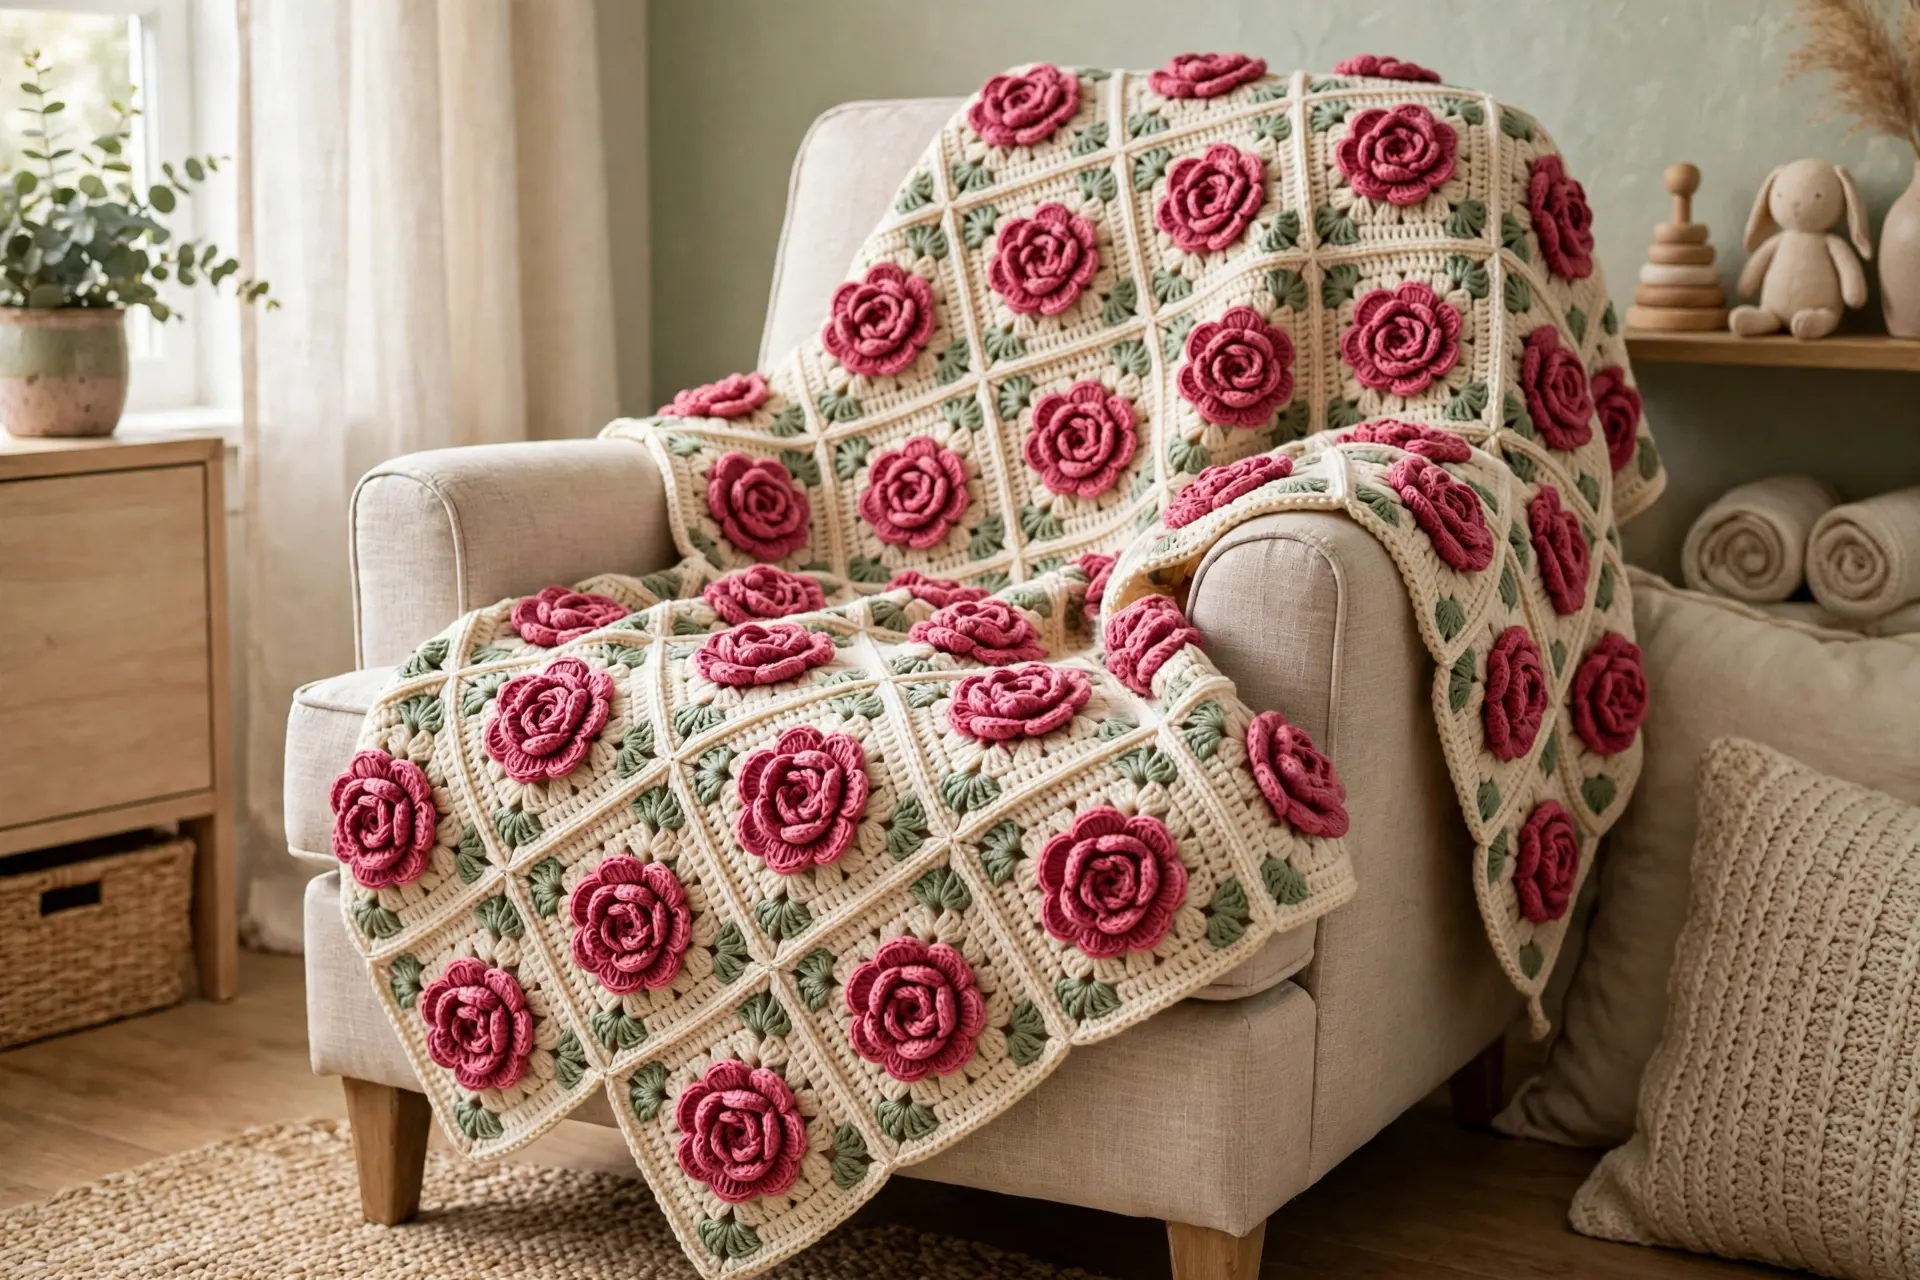
A flat flower is pretty; a rose you can feel is something else. This rose square blanket crochet pattern builds each square around a raised, three-dimensional rose — two layers of petals worked so the flower stands up from the fabric — then squares it off with sage green and cream. Join twenty squares and you have a baby blanket that looks like a rose garden in a frame — soft, textured and surprisingly simple to make.
Each motif measures about 6 inches (15 cm) square; the finished blanket is approximately 33 × 27 inches (84 × 69 cm) with its border — a lovely stroller, pram or tummy-time size. It is a practical size for a rose square blanket crochet pattern made for everyday use.
About This Blanket
The appeal of this rose square blanket crochet pattern is the contrast: a romantic, sculpted rose in the middle, and plain, honest crochet everywhere else.
- A rose with real dimension. The second petal layer is worked behind the first, into stitches the front layer never touches, so the petals stack like a real rose instead of lying flat.
- The square does the calming. Sage green and cream rounds turn the round flower into a tidy square that joins neatly.
- Portable and batchable. Twenty small motifs, each about half an hour: make them anywhere, join them in one sitting.
- A keepsake gift. It pairs with our honeycomb baby blanket as a textured gift set — more ideas in our roundup of crochet baby blanket patterns.
Materials and Gauge
- Worsted weight (#4) yarn: cream (main colour) approx. 800 yd (730 m); deep pink for the roses approx. 320 yd (293 m); sage green approx. 130 yd (119 m). If yarn labels are still a puzzle, the Craft Yarn Council’s standard yarn weight system explains what the “#4” on the band means.
- 5.0 mm (US H-8) crochet hook
- Yarn needle with a large eye, scissors, stitch markers, blocking mats and rustproof pins
Gauge: one finished motif = 6 in (15 cm) square after light blocking. Motif blankets forgive many things, but not twenty squares of twenty different sizes — make one motif first, measure it, and adjust your hook before committing to the set.
Useful Materials from Amazon
Everything this rose square blanket crochet pattern needs is standard stash equipment:

- Premium Quality Yarn: Crafted from durable acrylic fiber; each skein delivers consistent texture and strength for croche…
- Worsted Weight Size 4: This medium weight yarn works perfectly for afghans, scarves, hats, and sweaters; compatible with…
- Soft and Comfortable: Gentle on hands during extended crafting sessions; creates cozy blankets and wearables; features s…
One smooth worsted line in cream, deep pink and sage keeps every rose the same size — buy the cream in bulk, because it does the squaring, joining and most of the border.
Twenty motifs of layered petals is a lot of stitches; a soft-grip 5 mm ergonomic hook keeps your hands comfortable from the first bud to the last border round.
Foam mats and pins ease every rose square to exactly 6 inches — the difference between seams that lie flat and seams that fight you.
Each motif has tails to hide; a blunt tapestry needle weaves them into the back of the work, out of sight.
Abbreviations (US Terms)
- ch = chain
- sc = single crochet
- hdc = half double crochet
- dc = double crochet
- sl st = slip stitch
- st(s) = stitch(es)
- sp(s) = space(s)
- MR = magic ring
- rep = repeat
- BLO = back loop only
The Rose Square Blanket Crochet Pattern, Step by Step
Work through this rose square blanket crochet pattern in order: one complete motif first (Steps 2–5), then the set, the joining and the border. Every round ends with its count — check yours as you go.
Step 1 — Materials and Gauge

Gather your yarn, hook and needle, then make ONE complete motif following Steps 2–4. Block it lightly, measure it, and check it against the gauge: 6 in (15 cm) square. This square is your reference for the whole blanket — if its size is right, all twenty will match. Getting this first square right sets up the whole rose square blanket crochet pattern for success.
Step 2 — Rose Round 1: The Centre Bud

With deep pink, make a magic ring.
Round 1: Ch 3 (counts as the first dc), work 15 dc into the ring. Pull the ring snugly closed and join with a sl st to the top of the beginning ch-3. (16 dc)
Round 2 (the loop round): Ch 1, sc in the first dc, *ch 3, skip the next dc, sc in the next dc; rep from * 6 more times, ch 3, skip the last dc, join with a sl st to the first sc. (8 sc and 8 ch-3 loops)
Do not fasten off. You have a tight pink disc — the bud — ringed with eight little chain loops. Those loops hold the first petal layer; the height trick comes in Step 3.
Step 3 — Rose Round 2: The Petals Open

Round 3 (small petals): Sl st into the first ch-3 loop. *(Sc, 3 dc, sc) in the next ch-3 loop; rep from * 7 more times, join with a sl st to the first sc. (8 petals; 40 sts — 16 sc and 24 dc)
Round 4 (the back loop round): Push the small petals gently forward. Working behind them, join with a sl st in any sc of Round 2. *Ch 4, sc in the next sc of Round 2; rep from * 6 more times, ch 4, join with a sl st to the first sl st. (8 sc and 8 ch-4 loops)
Round 5 (large petals): Sl st into the first ch-4 loop. *(Sc, hdc, 2 dc, ch 2, 2 dc, hdc, sc) in the next ch-4 loop; rep from * 7 more times, join with a sl st to the first sc. (8 petals; 64 sts and 8 ch-2 tip spaces)
Fasten off the pink. Look at it: eight plump outer petals leaning back, eight smaller petals cupped in front, the bud in the middle — a rose about 3½ in (9 cm) across. The ch-2 space at the tip of every large petal is where the squaring round takes hold.
Step 4 — Squaring Rounds: Leaves and Background

Round 6 (sage green): Join sage green with a sl st in any petal’s ch-2 tip space. Ch 3 (counts as a dc), 2 dc in the same space, ch 2, 3 dc in the same space (first corner made). *Ch 1, 3 dc in the next tip space (side cluster), ch 1, (3 dc, ch 2, 3 dc) in the next tip space (corner); rep from * twice more. Ch 1, 3 dc in the last tip space, ch 1, join with a sl st to the top of the beginning ch-3. (36 dc, 4 ch-2 corner spaces and 8 ch-1 spaces — 9 dc along every side)
Read the shape back: corners sit on petals 1, 3, 5 and 7, with one side cluster on each petal between them, and the green reads as leaves framing the rose. Fasten off the green.
Round 7 (cream): Join cream in any corner ch-2 space. Ch 1, 3 sc in the same space, sc in every dc and every ch-1 space around, working 3 sc in each remaining corner space. Join with a sl st to the first sc. (56 sc — 14 sc along every side)
Step 5 — Finishing One Square

Weave in the pink and green tails on the back of the motif, working around — never across — the back of the rose, so the front keeps its shape.
Pin the square to a blocking mat, corners pulled gently into a true square, and mist lightly. It should dry to 6 in (15 cm) from edge to edge, with 14 sc along each side — the count that makes Step 7’s joining so simple. A well-blocked square is the quiet hero of this rose square blanket crochet pattern.
Step 6 — Making the Full Set

The baby blanket in this rose square blanket crochet pattern uses 20 motifs: 5 across × 4 rows. Batch them round by round — all 20 centre buds first, then all the petal rounds, then all the squaring rounds — so your tension, and therefore every rose, stays consistent.
Lay the finished squares out in a 5 × 4 grid before you join anything. Every rose here is deep pink, so the layout is simple, but check the roses all face the same way, then photograph the grid: it is the map you will join by. A single square also makes a sweet cushion front, like our flower pillow pattern.
Step 7 — Joining the Squares

Join the squares of this rose square blanket crochet pattern with slip stitches through the back loops — a flat, flexible seam that leaves the roses untouched on the front. First join the motifs into 4 strips of 5, then join the strips along their long edges.
Lay two motifs wrong sides together, edges aligned stitch for stitch — each side carries exactly 14 sc, so the counts match.
- With cream, join with a sl st through both corner stitches at once.
- Working along the edge, insert your hook through the back loop only of the next sc on the front motif and the matching back-loop sc on the back motif, yarn over and pull through everything on the hook — one slip stitch made.
- Repeat in every pair of stitches along the side (14 slip stitches), finishing at the corner.
- Carry straight on to the next motif in the strip; at a four-square junction, work one sl st into the shared corner point to anchor it.
Keep the joining yarn relaxed — a tight slip-stitch seam puckers, and the 3D roses will not hide it. Join the four strips the same way, then stretch the panel gently in both directions to settle the seams. The panel measures about 30 × 24 in (76 × 61 cm).
Step 8 — Border and Finishing

The border finishes the rose square blanket crochet pattern, worked around the whole blanket with the right side facing. Along each motif edge you will meet 14 sc; work 1 extra dc into every junction where two motifs meet, so the edges do not pull short.
Border Round 1 (cream): Join cream in any corner. Ch 3 (counts as a dc), (dc, ch 2, 2 dc) in the same corner. *Dc in every sc along the side (14 dc per motif edge) plus 1 dc into each motif junction, then (2 dc, ch 2, 2 dc) in the next corner; rep from * around, join with a sl st to the top of the ch-3. (282 dc and 4 ch-2 corner spaces — 74 dc along each long edge, 59 along each short edge)
Border Round 2 (deep pink): Join pink in any corner space. Ch 3, (dc, ch 2, 2 dc) in the same space. Dc in every dc around, working (2 dc, ch 2, 2 dc) in each corner space. Join. (298 dc)
Border Round 3 (cream): Join cream in any corner space. Ch 1, sc in every dc around, working 3 sc in each corner space. Join with a sl st to the first sc and fasten off. (310 sc)
Weave in the last tails, then block the blanket flat to about 33 × 27 in (84 × 69 cm). For care: machine wash gentle and cool, reshape while damp and dry flat. The same square, worked in cotton, makes a striking bag front like our daisy bag pattern, and our star-centre granny square is the festive cousin of this square.
Tips
- Push the first petals forward before Round 4. If a loop hides under a petal, the second layer sits crooked — expose every Round 2 sc first.
- Keep the petal tips relaxed. A tight ch-2 at a large petal’s tip cups the rose; a generous one lets it open.
- Count tips, not stitches. Eight ch-2 tip spaces at the end of Round 5 means the squaring round will land perfectly.
- Block before you join. Six-inch squares join into straight seams; unblocked squares join into wavy ones.
Common Mistakes and How to Fix Them
- The rose lies flat instead of standing up. Round 4 was worked into Round 3’s stitches instead of behind them, into Round 2’s sc — that offset is the whole 3D effect.
- A petal layer has seven or nine petals. A chain loop was skipped or worked twice. Recount the loops at the end of Rounds 2 and 4: eight, every time.
- The square twists. A corner landed on a side petal. Corners belong on petals 1, 3, 5 and 7 only, with exactly one side cluster between corners.
- Squares in different sizes. Tension drift across a long batch. Measure against your first blocked square every few motifs; adjust by half a hook size if needed.
- The border ripples. The extra dc at each motif junction was missed, so an edge pulled short. Recount Border Round 1: 74 dc on the long edges, 59 on the short ones.
Frequently Asked Questions
How long does one rose square take?
About 25 to 35 minutes once the rounds are familiar — the first square is the slow one. Twenty squares over a week of evenings is a comfortable pace.
Can a beginner make this blanket?
A confident beginner, yes. The stitches are basic — chains, single, half double and double crochet — and every round is counted. Practise the rose on one motif first; if the two petal layers sit neatly, the rest is repetition. That gentle learning curve is part of why this rose square blanket crochet pattern suits a first motif blanket.
Can I change the rose colour?
Absolutely. All twenty roses in deep pink is the classic look, but rotating pink, peach and cream roses through the grid makes a softer garden — keep the sage and cream rounds constant so the blanket still reads as one piece.
How do I make the blanket bigger?
Add motifs: every square adds 6 in (15 cm). A 6 × 5 layout (30 motifs) makes a cot blanket of about 39 × 33 in (99 × 84 cm) with the border; scale the yarn up by roughly half as much again.
Will the 3D roses survive washing?
Yes: wash gentle and cool, dry flat. The petals are anchored at two levels, so they relax rather than unravel; a quick finger-fluff once dry stands them back up.
Final Thoughts
There is a particular pleasure in a blanket that grows one rose at a time — a small, finished, three-dimensional flower every half hour, then, almost suddenly, a whole garden joined into a blanket. Make the first square tonight and block it: the rest of the blanket is just that moment, twenty times over. Keep the pattern close, because this rose square blanket crochet pattern is one you will want to make again.