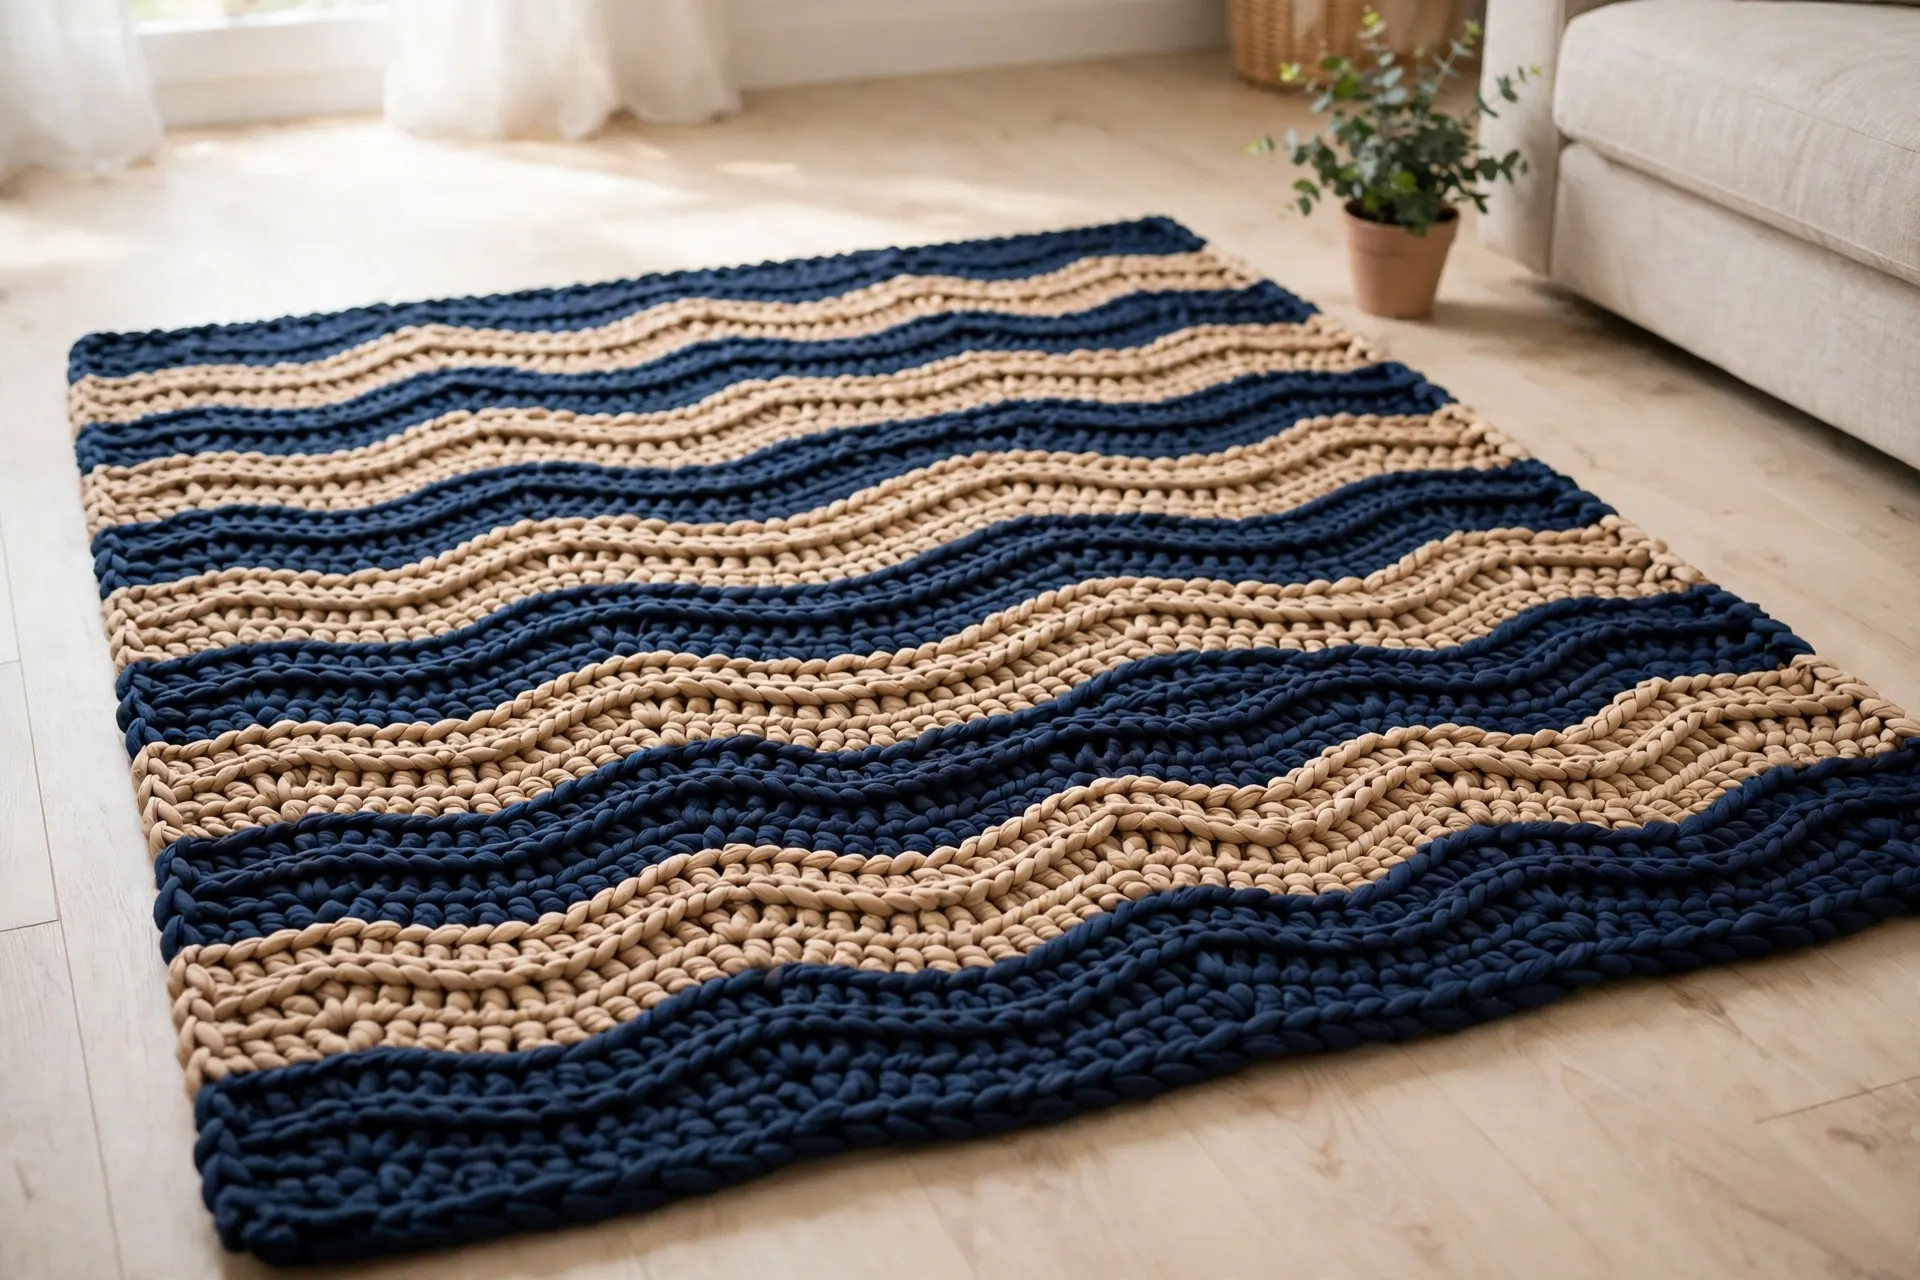
Wave Carpet Crochet Pattern: A Wavy Ripple Rug Tutorial in 7 Steps
Some rugs just sit on the floor; a ripple rug moves. This wave carpet crochet pattern turns two colours of chunky t-shirt yarn into rolling navy and sand waves that look far more complicated than they are — the whole design is one repeated row of half double crochet: three stitches in one stitch make each peak, three worked together make each valley. If you can count to fourteen, you can make this rug.
The finished carpet measures about 24 × 36 inches (61 × 91 cm) — a generous size for beside a bed, under a coffee table or inside a front door. It works up fast on a big hook, feels wonderful under bare feet, and because the stitch count never changes, it settles into a rhythm once the first wave row clicks.
Why a Wave Carpet Works
- The waves hide everyday life. Ripples break up the surface, so crumbs, pet hair and the odd scuff disappear into the pattern between washes.
- Thick and cushioned. T-shirt yarn makes a dense, padded fabric — a proper rug, not a blanket that wandered onto the floor.
- One row does everything. Learn a single 14-stitch repeat and the rest is rhythm — perfect evening crocheting.
- Stripes are built in. Changing colour every few rows turns the waves into bold bands with exaggerated contrast.
- It is endlessly resizable. Add or remove one repeat (14 sts) to change the width; add rows to change the length.
That balance of looks and practicality is why a wave carpet crochet pattern suits almost any room. If this one starts a floor-covering habit, our roundup of free crochet rug patterns has more shapes and sizes to try next, including a neat elegant crochet square rug pattern.
Materials and Gauge
This wave carpet crochet pattern is written for t-shirt yarn (recycled jersey yarn) — it gives the weight, grip and cushion a rug needs, and it is forgiving about small tension differences. If yarn labels are new to you, the Craft Yarn Council’s standard yarn weight system explains where t-shirt yarn sits at the super-bulky end of the scale.
- T-shirt yarn, approx. 700 g (about 350 yd / 320 m) in total: roughly 450 g deep navy and 250 g warm sand. Cones vary, so buy an extra cone of navy if your brand runs small — recycled dye lots are hard to match later
- 8.0 mm (US L-11) ergonomic crochet hook
- Large blunt yarn needle (big enough for jersey yarn), heavy duty scissors, tape measure
- A non-slip rug pad cut to size (Step 7)
Gauge: 7 hdc and 5 rows = 4 inches (10 cm) in half double crochet with t-shirt yarn and the 8.0 mm hook, measured on a swatch laid flat without stretching. T-shirt yarn varies between brands, so the swatch matters: thinner yarn makes a smaller, floppier rug; thicker makes a bigger, stiffer one. Adjust your hook until the swatch is close.
Finished size: about 24 × 36 in — width is 3 wave repeats = 42 stitches; length is 45 rows.
Useful Materials from Amazon
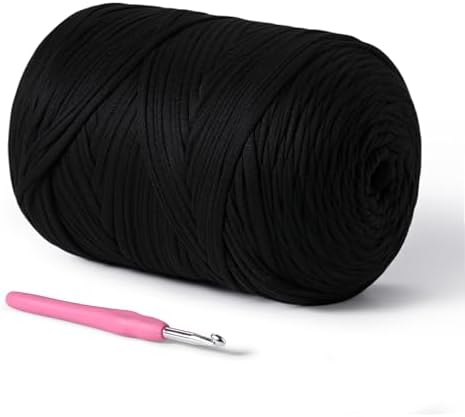
- T-shirt Yarn: Each roll of yarn weighs 800 g / 28.2 oz, 208 m / 228 yds long, line width of 3 cm, the yarn is thicker fo…
- Product Upgrade: T-shirt yarn is made of 95% polyester fiber and 5% spandex fiber, which makes the yarn fabric smoother …
- Multiple Uses: Whether you are a beginner knitter or an experienced crocheter, you can complete satisfactory knitting wo…
Choose a smooth, evenly cut jersey yarn with few joins — every join shows in a rug, and frayed edges make waves look fuzzy instead of crisp.
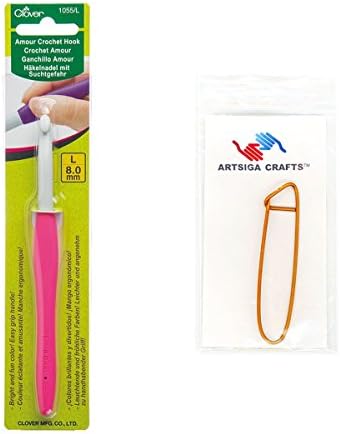
- Includes 1 Clover Amour Crochet Hook Size L/8mm with 1 Stitch Holder 1055/L
- Each stitch holder is made from aluminum and measures approximately 3.5 inches long
- The aluminum hook is optimally shaped for smooth crocheting and the size of the hook is impressed within the elastomer g…
Forty-five rows of thick yarn is a workout for your hands; a soft-grip 8 mm hook keeps your wrists happy to the last stripe.
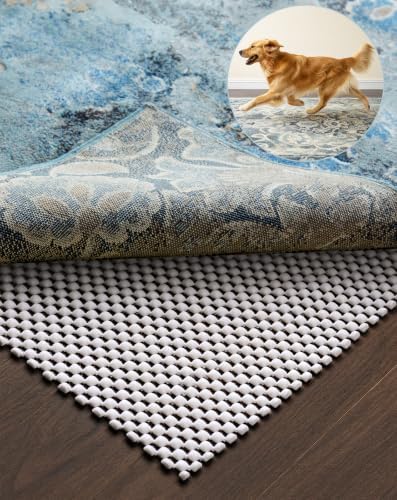
- Non-slip Protection: Our pad’s signature grip keeps rugs securely in place, preventing bunching and sliding during daily…
- Durable & Strong: Crafted from durable materials, our non-slip rug pads are built to last. The padding provides added su…
- Floor Protection: The open grid design of our rug pads helps prevent scratches and allows air circulation, keeping dust …
A thin non-slip pad keeps the finished rug exactly where you put it — essential on wood, tile or laminate, with a little extra cushion too.

- Durable Strong Stainless Steel Rust Resistant Blades: Forging press manufacturing process enables high-density steel tha…
- Ultra Sharp Scissors All Purpose: Easy for cutting more than 16 layers of fabrics. Ideal for sewing, tailoring, quilting…
- Multi-color Titanium coating blades. They are strongly resistant to rusting and to adhensives such as glue and tape, mak…
T-shirt yarn is too thick for ordinary craft scissors; heavy duty shears cut it in one clean snip instead of chewing through the jersey.
Abbreviations (US Terms)
- ch = chain
- hdc = half double crochet
- hdc3tog = half double crochet 3 together (decrease): yarn over, pull up a loop in each of the next 3 stitches (7 loops on hook), yarn over and pull through all 7 loops
- st(s) = stitch(es)
- rep = repeat
The Wave Carpet Crochet Pattern, Step by Step
Step 1 — Materials, Gauge and Size

Gather everything above and make your swatch first: chain 12, work 8 rows of hdc, lay it flat and measure the middle. You want 7 stitches and 5 rows inside 4 inches. Too many stitches? Go up to a 9.0 mm hook. Too few? Drop to a 7.0 mm. The rug’s maths is simple: one wave repeat = 14 stitches, and this size uses 3 repeats = 42 stitches. Keep that number in mind — every row starts and ends with exactly 42 stitches.
Step 2 — Foundation Chain and Set-Up Row

With navy, chain 44. Keep the chain relaxed — a tight chain makes a tight, curling first row.
Row 1 (set-up row): Hdc in the 3rd chain from the hook (the 2 skipped chains are the turning edge, they do not count as a stitch) and in every chain across. (42 hdc)
Lay it flat: a straight, even strip about 24 inches wide. Every wave row is worked into these 42 stitches, and the count never changes.
Step 3 — The Wave Row, Stitch by Stitch

Here is the heart of this wave carpet crochet pattern. The wave is built from four moves: 5 plain stitches up the slope, 3 stitches in one stitch at the peak, 5 plain stitches down the slope, and 3 stitches worked together in the valley. The peak adds 2 stitches; the valley removes 2 — they cancel out, which is why the count holds.
Row 2 (wave row): Ch 2 (does not count as a stitch), turn. *Hdc in the next 5 sts, 3 hdc in the next st (peak), hdc in the next 5 sts, hdc3tog over the next 3 sts (valley); rep from * 2 more times. (42 sts)
Count it through once: each repeat uses 5 + 1 + 5 + 3 = 14 stitches and produces 5 + 3 + 5 + 1 = 14. Three repeats use and produce 42. The top edge already ripples — peaks above the 3-in-1 stitches, dips above the valleys. Every wave row from now on is identical to Row 2, so each peak stacks above the peak below and the waves run in straight columns across the rug.
Count to 42 at the end of every row until your hands trust the rhythm.
Step 4 — Repeating Waves and Changing Colours

Keep repeating the wave row, changing colour to the stripe plan. Change colour at the end of the last row of the old colour: work the final hdc3tog until 7 loops sit on your hook, yarn over with the NEW colour and pull through all 7. The next row starts with the new colour, and the join hides in the valley.
T-shirt yarn is too thick to carry up the side, so cut the old colour at each change, leaving a 6-inch tail to weave in later (Step 6). Work to this plan:
- Rows 1–9: Navy (the set-up row plus 8 wave rows)
- Rows 10–18: Sand (9 rows)
- Rows 19–27: Navy (9 rows)
- Rows 28–36: Sand (9 rows)
- Rows 37–45: Navy (9 rows)
Five stripes of 9 rows each. The colour changes land at the ends of Rows 9, 18, 27 and 36.
Step 5 — Working to Full Length

Continue until you have 45 rows in total, ending with the navy stripe. Measure the rug laid flat on the floor, not on your lap — the yarn’s weight stretches it. At gauge: about 36 inches long and 24 inches wide.
Before you finish, do two quick checks. First, count the final row: 42 stitches — 43 or 41 means a peak or valley drifted somewhere. Second, look down the columns: every peak should sit in a straight line above the peaks below it. A wandering peak means a repeat shifted, and unpicking a few rows now beats living with a wonky wave. Want a longer runner? Keep adding 9-row stripes — each adds about 8 inches of length.
Step 6 — Edging and Finishing the Ends

A ripple rug needs no border — the wavy short ends ARE the design, and a straight border would fight them. Finishing is about tidiness instead:
- Optional tidy row: with navy, work 1 sc into every stitch of the last row (42 sc), one in each stitch so the edge follows the same peaks and valleys, just slightly crisper. Work the same row along the foundation edge, into the bottom of the starting chain, so both ends match.
- Weave in every end with the large needle, running each tail through the backs of stitches in one direction, then back in the opposite direction. T-shirt yarn ends are bulky, so keep them inside the thickest part of the stitches, then trim flush.
- Block by hand: lay the rug flat, pat the waves into even columns, and leave it overnight. Steam can scorch jersey yarn — gravity does the job.
Step 7 — Non-Slip Backing and Care

A crochet rug on a hard floor will travel — the same grip problem our crochet house slipper patterns solve with sole pads. Fix it properly:
- Best option: cut a non-slip rug pad about 1 inch smaller than the rug on every side and lay the rug on top. It grips the floor, adds cushion, and lifts off for washing.
- Budget option: lines or dots of latex rug-backing paint on the underside, dried fully before use — reapply when it wears smooth.
- Avoid adhesive tapes on wood floors; they leave residue and give up within weeks.
Care: most t-shirt yarn is cotton jersey and machine washes cold and gentle. Wash alone the first time (navy dye can run), reshape flat while damp, and dry completely before replacing the pad.
Tips for Flat, Even Waves
Most wave problems start in the first few rows; these habits keep this wave carpet crochet pattern flat and even.
- Count the repeat, not the row. If you lose your place mid-row, count back to the last valley — each 14-stitch repeat is a fresh start.
- Mark every peak. A marker in each 3-in-1 stitch for the first few rows trains your eye faster than any counting trick — the same habit that keeps textured projects like our waffle stitch pillow on track.
- Keep valleys tight. A loose hdc3tog leaves a hole at the bottom of every dip — pull the final yarn-over snug so the valley closes.
- Relax your tension. T-shirt yarn shows every tight stitch as a pucker. If the rug cups instead of waving, your stitches are too tight — loosen up, or go up a hook size.
- Weigh in on stripes. Lay the rug flat at every colour change and check the columns are straight before you commit to the next 9 rows.
Common Mistakes and How to Fix Them
- The rug gets wider or narrower. A peak landed in the wrong stitch, or a valley was skipped. The count gives it away — check for 42 after every row and unpick back to where it changed.
- Peaks wander sideways. You started a repeat one stitch early or late. Peaks must stack in straight columns; count 14 from the last valley to find where the repeat belongs.
- Holes in the valleys. The hdc3tog was worked loosely, or a leg was missed. Work all three legs and pull the closing yarn-over firmly.
- The whole rug curls or cups. Tension, almost always — t-shirt yarn worked too tightly pulls the fabric in. Unpick to a flat point, loosen your grip, and consider the 9.0 mm hook.
- Lumpy colour joins. The new colour was joined mid-row, or a tail sticks out. Always change at the final stitch of the row, and weave tails through stitch backs, never across the top.
Frequently Asked Questions
Is this wave carpet crochet pattern suitable for beginners?
Yes, for a confident beginner — you need the half double crochet, one increase (3 in a stitch) and one decrease (hdc3tog), all spelled out above. The repeat is only 14 stitches, so by the third row your hands know it. New to crochet entirely? Practise on a one-repeat swatch first.
How much yarn does the rug actually take?
About 700 g in total (roughly 450 g navy, 250 g sand) for the 24 × 36 in size — but brands differ wildly in thickness and cone size. Short on yarn? One 9-row stripe uses about 140 g.
Can I make the rug bigger?
Easily. For width, add one repeat (14 stitches) per extra 8 inches, and add 14 to the foundation chain and every row count (56 sts, ch 58, for a 32-inch width). For length, add 9-row stripes — about 8 inches per stripe. A scaled-up version makes a wonderful play mat, and leftover yarn is perfect for a textured make like our crochet bobble blanket pattern.
Why t-shirt yarn instead of regular yarn?
Weight and grip. A rug in ordinary worsted yarn is light, slides around and wears thin quickly; t-shirt yarn is heavy, cushioned and hard-wearing, and its slight stretch helps the rug lie flat. Two strands of bulky cotton held together can substitute, but expect a lighter result.
Can I wash the rug in the machine?
Usually yes — most t-shirt yarn is cotton jersey. Wash cold and gentle, alone the first time in case of dye run, then reshape and dry flat. Skip the tumble dryer; heat can distort the waves.
Final Thoughts
This wave carpet crochet pattern is the sort of project that changes how a room feels in a weekend: one repeat, two colours, waves rolling from end to end. Keep your count at 42, let the peaks stack, and trust the rhythm — by the second stripe you will barely look at your hands. Make it in navy and sand for a calm coastal feel, or swap in your own colours and watch the same simple row turn into something completely different.