Nothing says cozy fall quite like a slice of pumpkin pie, and now you can crochet one that lasts all season long. This adorable plush pumpkin pie features a soft orange filling, a textured pie crust, and a swirl of whipped cream on top. Whether you’re decorating for autumn, creating play food for kids, or adding handmade charm to your home, this project is both fun and beginner-friendly.
The pie is worked in separate sections before being assembled and lightly stuffed to create a realistic three-dimensional look.
Skill Level
Easy to Intermediate
This pattern uses simple increases, basic shaping techniques, and a decorative edging that gives the crust its signature pie appearance.
Materials
- Super bulky yarn in pumpkin orange
- Super bulky yarn in light tan or beige
- Small amount of white yarn
- 6.0 mm crochet hook
- Polyester fiberfill stuffing
- Stitch marker
- Yarn needle
- Scissors
Crochet Abbreviations
- ch = chain
- sc = single crochet
- inc = increase
- sl st = slip stitch
- hdc = half double crochet
- dc = double crochet
- BLO = back loop only
Pattern Notes
- Work in continuous rounds unless otherwise stated.
- Use a stitch marker to track the first stitch of each round.
- The pie filling and crust are made separately before joining together.
- Adjust yarn and hook size if you’d like a larger or smaller pie.
Make the Pumpkin Filling
Using orange yarn:
Round 1
Chain 2 and work 6 single crochets into the second chain from the hook.
6 stitches
Round 2
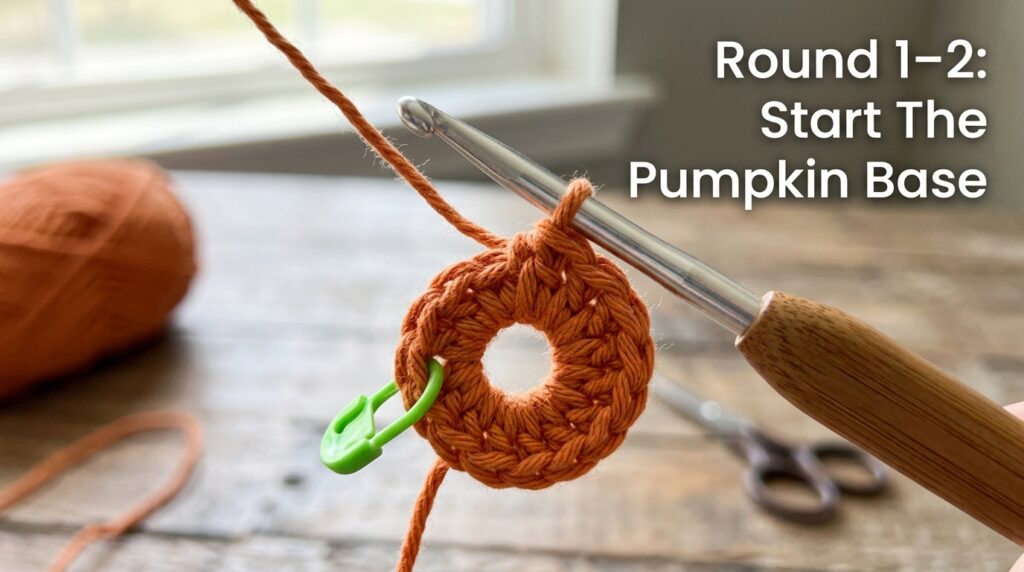
Increase in every stitch around.
12 stitches
Round 3
Alternate one increase and one single crochet around.
18 stitches
Round 4
Work one increase followed by two single crochets around.
24 stitches
Round 5
Work one increase followed by three single crochets around.
30 stitches
Round 6
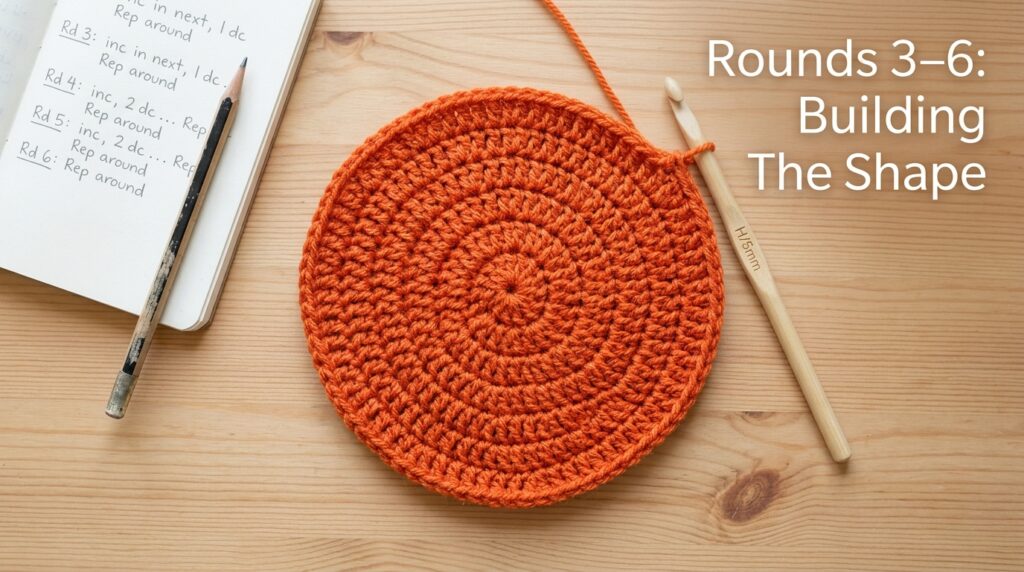
Work one increase followed by four single crochets around.
36 stitches
Round 7
Work one increase followed by five single crochets around.
42 stitches
Round 8
Work one increase followed by six single crochets around.
48 stitches
Round 9
Work one increase followed by seven single crochets around.
54 stitches
Round 10
Work one increase followed by eight single crochets around.
60 stitches
Round 11
Work one increase followed by nine single crochets around.
66 stitches
Round 12
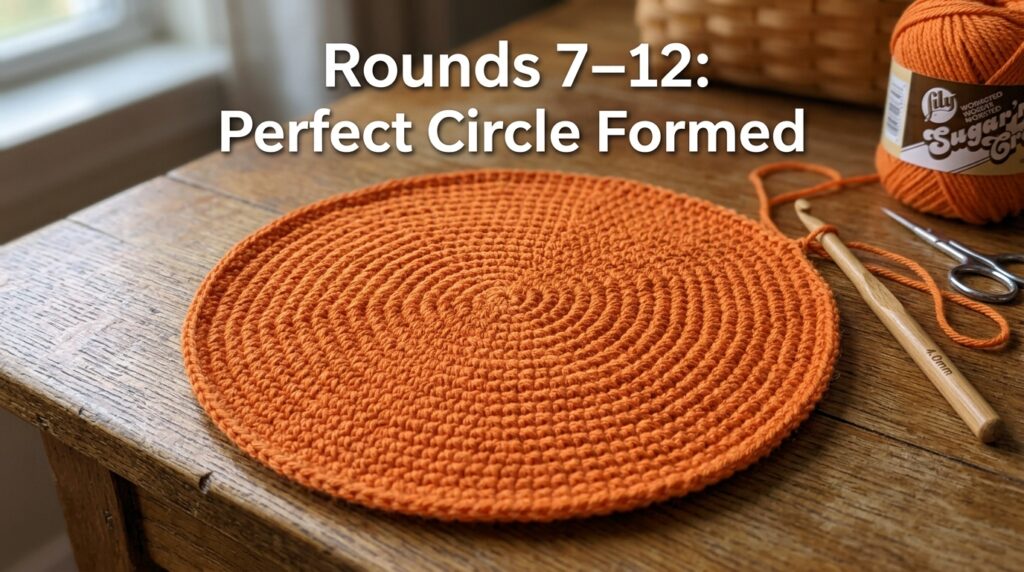
Work one increase followed by ten single crochets around.
72 stitches
Round 13
Single crochet evenly around the entire round.
72 stitches
Finish with a slip stitch, fasten off, and weave in the yarn tail.
Create the Whipped Cream Topping
Using white yarn:
Chain 14.
Beginning in the second chain from the hook, place 3 double crochets into each chain across the row.
Fasten off while leaving a long yarn tail.
The strip will naturally curl as you work. Roll it into a spiral shape until it resembles a dollop of whipped cream. Use the yarn tail to secure the shape and stitch it to the center of the pumpkin filling.
Crochet the Pie Crust
Using tan yarn:
Round 1
Chain 2 and place 6 single crochets into the second chain from the hook.
6 stitches
Round 2
Increase in every stitch around.
12 stitches
Round 3
Alternate one increase and one single crochet around.
18 stitches
Round 4
Work one increase followed by two single crochets around.
24 stitches
Round 5
Work one increase followed by three single crochets around.
30 stitches
Round 6
Work one increase followed by four single crochets around.
36 stitches
Round 7
Work one increase followed by five single crochets around.
42 stitches
Round 8
Work one increase followed by six single crochets around.
48 stitches
Round 9
Work one increase followed by seven single crochets around.
54 stitches
Round 10
Work one increase followed by eight single crochets around.
60 stitches
Round 11
Work one increase followed by nine single crochets around.
66 stitches
Round 12
Work one increase followed by ten single crochets around.
72 stitches
Round 13
Work one single crochet into the back loop only of every stitch.
72 stitches
This round begins shaping the side wall of the crust.
Rounds 14–17
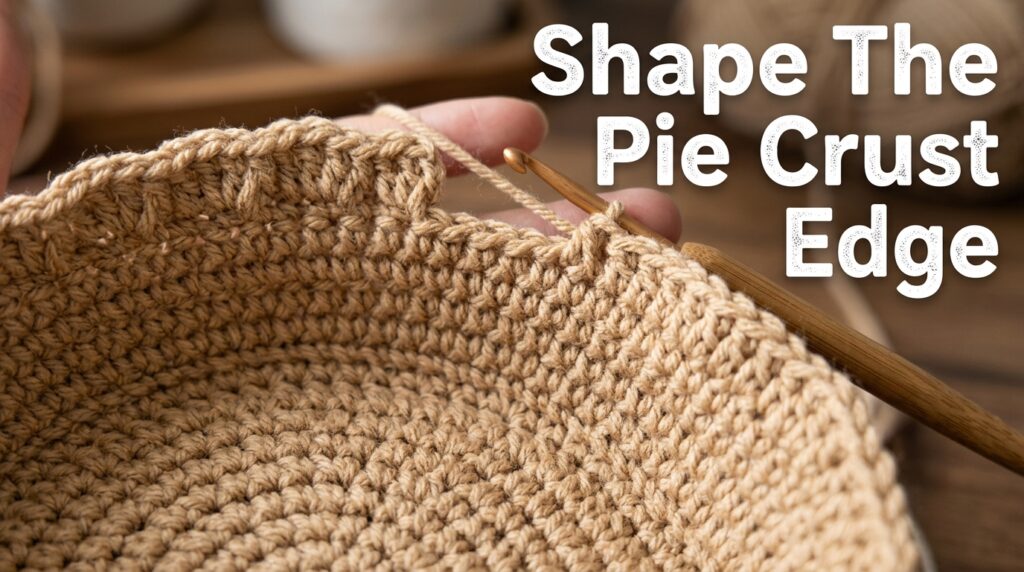
Single crochet evenly around.
72 stitches each round
Finish with a slip stitch.
Do not assemble yet.
Assemble the Pie
Place the orange pie filling on top of the crust section with right sides facing outward.
Attach tan yarn at any point around the edge.
Joining Round
Chain 1 and work one single crochet into the same stitch.
Continue placing one single crochet through both layers around the entire pie.
Before closing the final section, add fiberfill stuffing until the pie reaches your preferred thickness.
Finish closing the opening.
72 stitches
Join with a slip stitch.
Do not fasten off.
Create the Decorative Pie Crust Edge
Final Border Round
Chain 1 and place one single crochet into the same stitch.
Repeat the following sequence around:
- 3 half double crochets in the next stitch
- Skip one stitch
- Slip stitch into the following stitch
Continue repeating this decorative pattern around the edge.
When you reach the final stitches, join with a slip stitch and fasten off.
Weave in all remaining yarn tails.
Finishing Touches
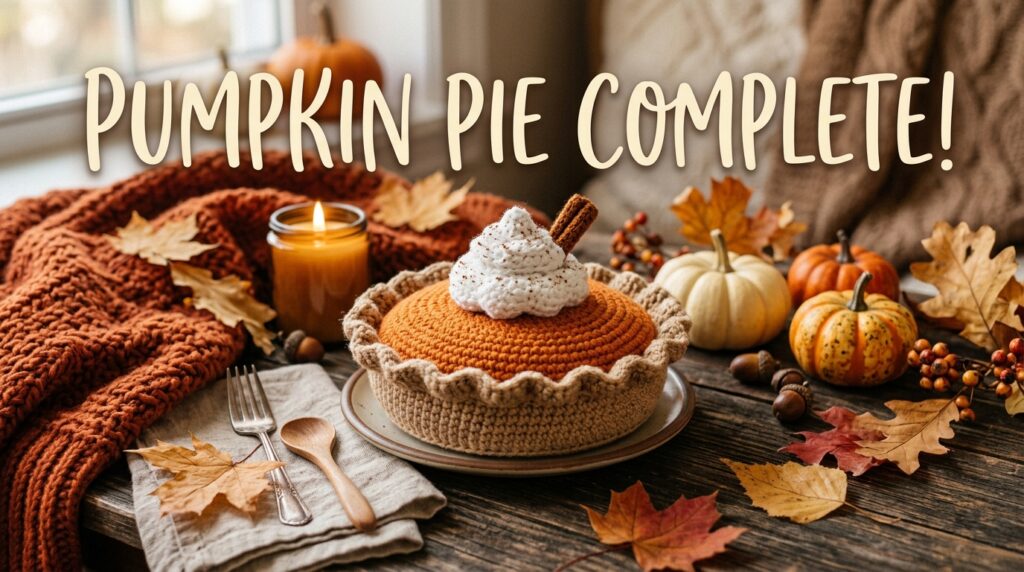
Attach the whipped cream swirl securely to the center of the pumpkin filling. Adjust the shape as needed to create a realistic dollop effect.
Lightly shape the pie with your hands and fluff the stuffing for an even appearance.
Final Thoughts
This crochet pumpkin pie is a fun seasonal project that combines simple stitches with charming details. The soft stuffed center, textured crust, and whipped cream topping create a realistic dessert-inspired decoration that’s perfect for fall displays, pretend play kitchens, Thanksgiving decor, or handmade gifts. Once you’ve made one slice, you’ll probably want to crochet an entire bakery collection.