Strawberry Cardigan Crochet Pattern Free
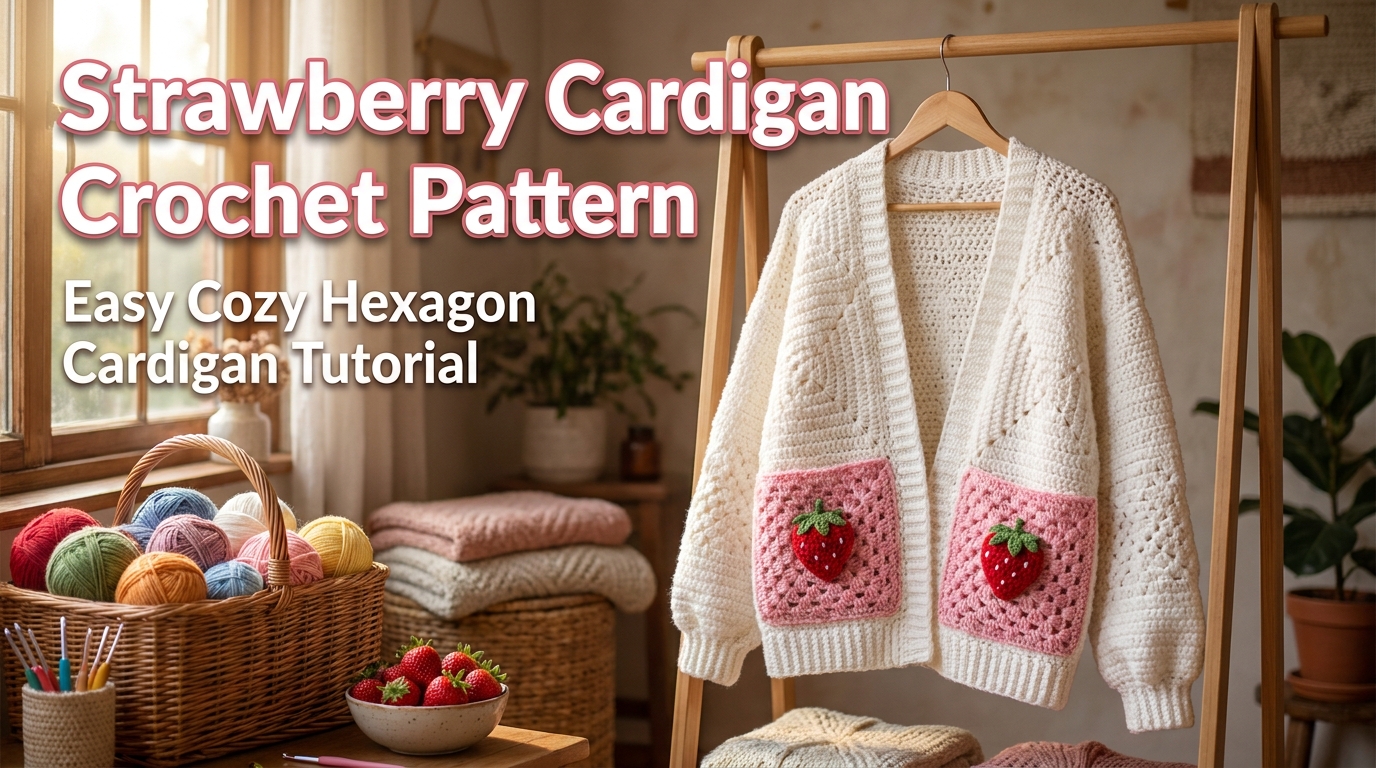
There’s something special about a handmade cardigan, especially when it combines cozy comfort with playful details. This Strawberry Cardigan Crochet Pattern Free transforms a simple hexagon cardigan into a charming statement piece with adorable strawberry pockets and contrasting green ribbing.
The cardigan is built from two oversized crochet hexagons, making it much easier than traditional garment construction. If you’ve been nervous about crocheting clothing, this project is a fantastic introduction because it relies primarily on double crochet stitches, simple shaping, and minimal seaming.
Whether you choose classic strawberry colors or customize the design with your favorite shades, this cardigan creates a fun and wearable piece you’ll enjoy season after season.
Skill Level
Advanced Beginner to Intermediate
You’ll need familiarity with:
- Chain stitches
- Double crochet
- Single crochet
- Slip stitches
- Front post double crochet
- Back post double crochet
- Basic increases and decreases
Finished Size
The cardigan can easily be customized by adjusting the number of hexagon rounds.
Suggested Sizes
| Size | Hexagon Rounds |
|---|---|
| Small | 15 rounds |
| Medium | 17 rounds |
| Large | 19 rounds |
| XL | 21 rounds |
For a relaxed oversized fit, add additional rows to the front, back, and bottom sections after completing the main hexagons.
Materials
Yarn Colors
- White yarn for cardigan body
- Pink yarn for pockets
- Red yarn for strawberries
- Green yarn for cuffs, border, stems, and leaves
Tools
- 4 mm crochet hook
- 5 mm crochet hook
- 5.5 mm crochet hook
- Tapestry needle
- Scissors
- Stitch markers (optional)
Crochet Abbreviations
- ch = chain
- mr = magic ring
- sc = single crochet
- dc = double crochet
- sl st = slip stitch
- inc = increase
- dec = decrease
- fpdc = front post double crochet
- bpdc = back post double crochet
Pattern Notes
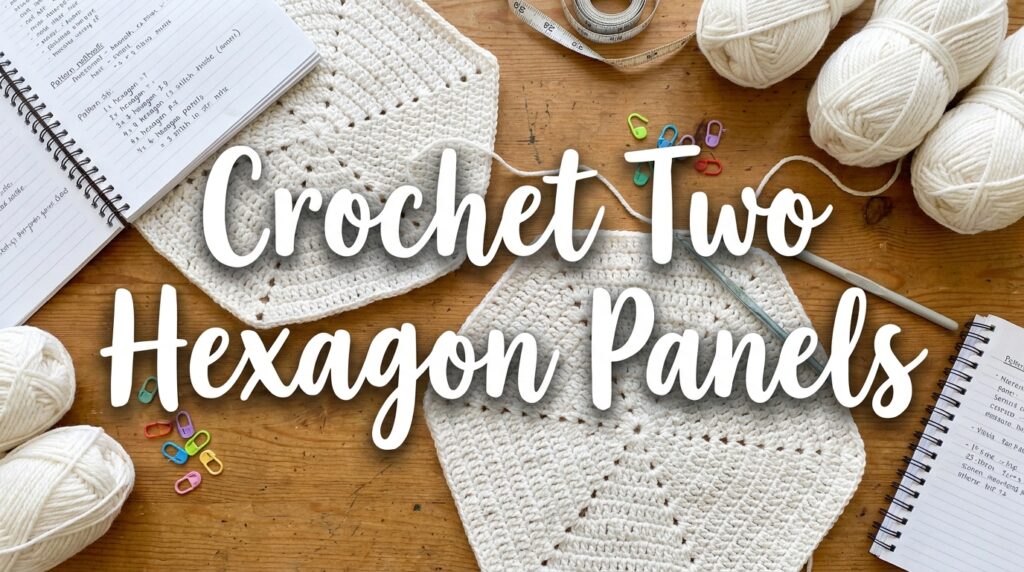
This cardigan is created from two matching hexagon panels.
The hexagons naturally fold into an L-shape, which forms the sleeves and body of the cardigan.
Unlike traditional garments, there’s very little shaping required, making this an excellent project for crocheters who want to try wearable crochet for the first time.
After completing the hexagons, you’ll simply join the back seam and sleeves before adding ribbing and decorative details.
How To Crochet The Hexagon Panels
Round 1 — Create The Center
Using a 5 mm crochet hook:
Chain 6.
Join with a slip stitch to form a ring.
Chain 2.
Work 2 double crochets into the center ring.
Chain 2, work 3 double crochets into the ring.
Repeat from * to * until you have six clusters total.
Chain 2 and join with a slip stitch.
At this stage, you’ll have six sides that form the foundation of your hexagon.
Round 2 — Begin Shaping
Turn your work.
Slip stitch into the nearest chain-2 corner space.
Chain 2.
Work 1 double crochet into the corner space.
Continue placing double crochets across the side.
In each corner space work:
- 2 double crochets
- Chain 2
- 2 double crochets
Repeat around the entire hexagon.
Join with a slip stitch.
Important Checkpoint
Your hexagon should not lie perfectly flat.
A slight wave or fold is completely normal and actually indicates the shape is developing correctly.
Fold the piece in half.
If it naturally forms an L-shape, you’re on the right track.
This shape eventually becomes the sleeve and body of the cardigan.
Rounds 3–15, 17, 19, or 21
Continue repeating the same pattern.
Chain 2 at the beginning of each round.
Work one double crochet into every stitch across each side.
In every corner work:
- 2 double crochets
- Chain 2
- 2 double crochets
Join with a slip stitch at the end of each round.
Turn your work and begin the next round.
Continue until you’ve reached the desired size:
- Small: 15 rounds
- Medium: 17 rounds
- Large: 19 rounds
- XL: 21 rounds
Keep Your Stitch Count Consistent
One of the most common mistakes when making a hexagon cardigan is accidentally losing stitches near the join.
At the end of every round:
- Count stitches on each side.
- Make sure all six sides match.
- Check corners carefully.
- Maintain even tension.
Consistent stitch counts will ensure both cardigan panels are identical and fit together correctly during assembly.
Make A Second Hexagon
Once the first panel reaches your desired size:
- Fasten off.
- Weave in loose ends.
- Repeat the entire process to create a second matching hexagon.
Both panels should be the same size before moving on to assembly.
Assemble the Cardigan & Crochet the Sleeves
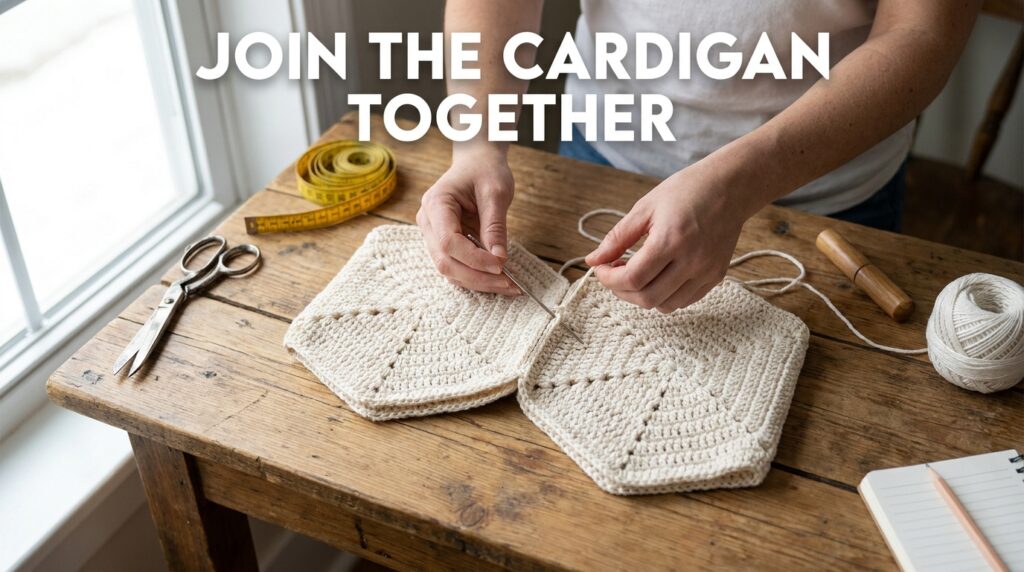
Now that both hexagon panels are complete, it’s time to transform them into a cozy cardigan. This is where the project really comes together. With only a few seams and some simple rounds of double crochet, you’ll have the basic cardigan finished before adding the decorative strawberry details.
Step 1 — Fold the Hexagons
Lay each completed hexagon flat on a table.
Fold each one in half so it naturally forms an L shape. This fold creates the sleeve and body sections of the cardigan.
Before sewing, make sure both folded pieces are identical and the corners line up evenly.
Step 2 — Join the Back Panels
Place the two folded panels next to each other with the right sides facing inward.
Using a tapestry needle and matching yarn, sew the long back edges together with your preferred joining method. Work slowly to keep the seam straight and neat.
When finished, you’ll have the basic cardigan body with an open front.
Step 3 — Sew the Sleeves
Each folded hexagon already creates the shape of a sleeve.
Fold each sleeve section together and sew along the open edge to create a tube.
Leave the arm opening completely open so the sleeves remain comfortable to wear.
Once both sleeves are sewn, weave in any loose yarn tails before continuing.
Optional Body Length
If you’d like a longer cardigan, you can easily extend the bottom before adding the ribbed edging.
To add extra length:
- Join the yarn to the bottom edge.
- Chain 2.
- Work one double crochet into every stitch across.
- Turn your work and repeat.
Continue adding rows until you reach your preferred length.
This adjustment works well if you prefer a tunic-style cardigan instead of a cropped fit.
Extend the Sleeves
After the cardigan body has been assembled, you can make the sleeves longer.
Join your yarn where the sleeve seam meets.
Sleeve Round 1
- Chain 2.
- Work one double crochet into every stitch around the sleeve opening.
- Join with a slip stitch.
Sleeve Round 2
Chain 2 and turn your work.
Working in turned rounds helps keep the stitch texture consistent with the rest of the cardigan.
Crochet one double crochet into every stitch around.
Join with a slip stitch.
Sleeve Rounds 3–6
Repeat the previous round.
Continue working one double crochet into every stitch until the sleeve reaches your preferred length.
Feel free to add or remove rounds depending on whether you want short, three-quarter, or full-length sleeves.
Shape the Sleeve Cuffs
To create a comfortable fitted cuff, gradually decrease the sleeve opening.
Sleeve Round 7
Chain 2 and turn.
Repeat this sequence around the sleeve:
- Double crochet two stitches together (dc2tog)
- One regular double crochet
Continue alternating these stitches until you reach the end of the round.
Join with a slip stitch.
Sleeve Round 8
Repeat the previous decrease round.
These decreases gently taper the sleeve without making it feel tight.
Repeat the same process for the second sleeve.
Crochet Ribbed Sleeve Cuffs
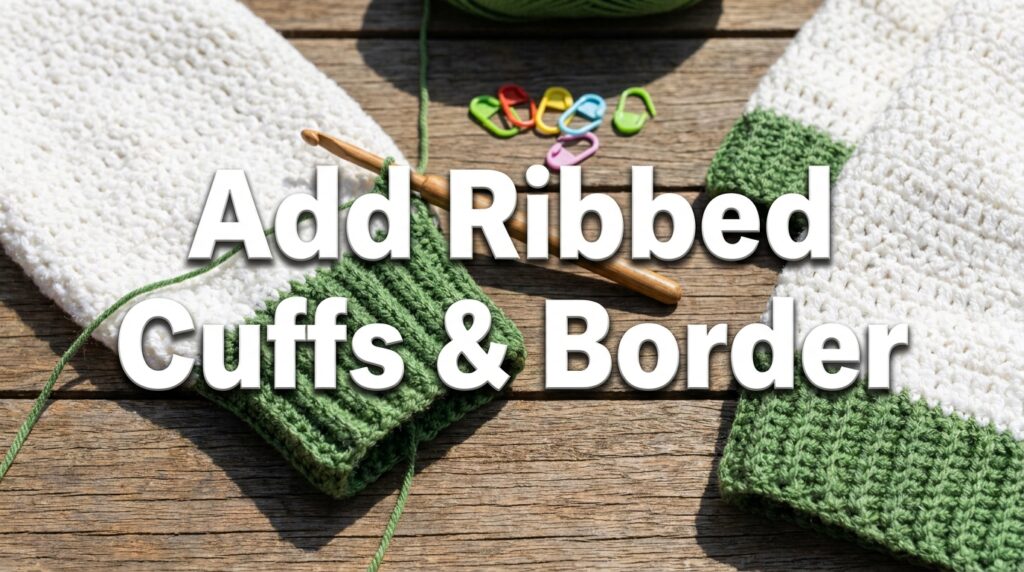
Switch to the 4 mm crochet hook and green yarn.
The ribbed cuffs give the cardigan a polished finish while adding a fun strawberry-inspired accent color.
Ribbing Round 1
Join the green yarn anywhere around the cuff.
Chain 2.
Work one double crochet into every stitch around.
Join with a slip stitch.
Ribbing Round 2
Chain 2.
Alternate the following stitches around the cuff:
- Front Post Double Crochet (FPDC)
- Back Post Double Crochet (BPDC)
Continue alternating until you complete the round.
Join with a slip stitch.
Ribbing Rounds 3–7
Repeat the previous round.
Always work:
- FPDC into the previous FPDC
- BPDC into the previous BPDC
This creates stretchy vertical ribbing that looks similar to knitted cuffs.
When finished, fasten off and weave in the yarn ends.
Repeat the same ribbing for the second sleeve.
Add the Cardigan Front Border
Switch back to the 5 mm crochet hook while keeping the green yarn attached.
This border frames the entire front opening and neckline.
Border Round 1
Join the yarn anywhere along the front edge.
Chain 2.
Work one double crochet into every stitch around the cardigan opening.
Whenever you reach raw row edges, work approximately 2 double crochets for every row to keep the border lying flat.
At each corner, crochet 3 double crochets to help the border turn smoothly.
Join with a slip stitch.
Border Round 2
Chain 2.
Work alternating:
- Front Post Double Crochet
- Back Post Double Crochet
around the entire border.
For the corner stitches, work regular double crochets combined with front post stitches to help maintain a clean shape.
Join with a slip stitch.
Border Rounds 3–5
Repeat the ribbing pattern around the cardigan opening.
Avoid increasing in the corners during these rounds.
If the border begins to curl slightly, simply loosen your crochet tension instead of adding extra stitches.
Crochet the Strawberry Pockets & Finishing Details
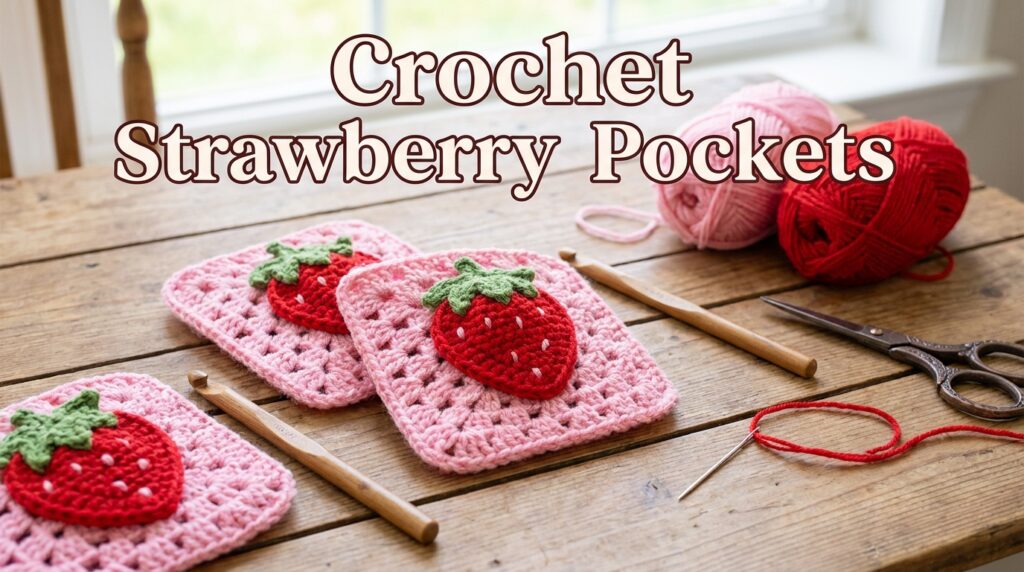
Now it’s time for the most exciting part of this Strawberry Cardigan Crochet Pattern. These adorable granny square pockets and oversized strawberry appliqués transform a simple hexagon cardigan into a fun, eye-catching wearable that you’ll love showing off.
Take your time during this stage, as neat finishing work will give your cardigan a polished, handmade look.
Crochet the Granny Square Pockets (Make 2)
Use the 5 mm crochet hook and your pink yarn.
Each pocket is worked from the center outward using classic granny square construction.
Round 1
- Make a magic ring.
- Chain 3 (counts as the first double crochet).
- Work 2 more double crochets into the ring.
- Chain 2.
- Crochet another group of 3 double crochets.
- Repeat until you have four sides separated by chain-2 corners.
- Join with a slip stitch and tighten the magic ring.
You should now have a small square with four corner spaces.
Rounds 2–6
Continue expanding the square.
For every round:
- Chain 3.
- Work one double crochet into each stitch.
- In every corner space crochet:
- 2 double crochets
- Chain 2
- 2 double crochets
- Join with a slip stitch.
Repeat until each pocket reaches your preferred size.
Fasten off and weave in all yarn tails.
Repeat to make the second pocket.
Crochet the Strawberry Appliqués (Make 2)
Switch to your 5.5 mm crochet hook and red yarn.
The strawberries are crocheted in rows, gradually increasing to create a rounded shape before decreasing toward the top.
Beginning
- Chain 2.
- Work into the second chain from the hook.
Increase Section
Gradually increase at both ends of the rows to widen the strawberry.
Continue adding stitches evenly until the piece reaches its widest point.
Keep your edges smooth and your stitch count consistent to maintain an even shape.
Middle Section
Once the strawberry has reached its full width, crochet several rows without increasing.
This creates the body of the strawberry.
Shape the Top
Begin decreasing at both ends of each row.
Continue until only a few stitches remain.
Fasten off, leaving a long yarn tail for sewing.
If you’d like a slightly larger strawberry, work a neat border of single crochet around the outside before fastening off.
Repeat to make the second strawberry.
Crochet the Strawberry Leaves & Stem
Using green yarn and the 5.5 mm hook, crochet a simple stem followed by several small leaves.
Stem
- Chain a few stitches.
- Work back with single crochet to form a narrow stem.
Leaves
From the top of the stem:
- Chain several stitches.
- Crochet back along the chain using single crochet.
- Slip stitch back to the stem.
- Repeat to create multiple pointed leaves.
Fasten off, leaving a long sewing tail.
Repeat for the second strawberry.
Add Strawberry Seeds
Thread a tapestry needle with white yarn.
Using small embroidered “V” stitches, scatter tiny seeds evenly across each strawberry.
Keep the stitches small and evenly spaced for a realistic look.
This little detail gives the appliqués their signature strawberry appearance.
Assemble the Strawberries
Sew one green leafy top onto each strawberry.
Position the leaves slightly overlapping the top edge of the fruit.
Secure everything firmly with a tapestry needle and weave the yarn tails neatly into the back.
Attach the Pockets
Position one granny square pocket on each front panel of the cardigan.
Before sewing:
- Fold the cardigan.
- Try it on if possible.
- Make sure both pockets are level.
Using matching yarn, sew around the two sides and bottom of each square.
Leave the top edge open to create a functional pocket.
Sew on the Strawberries
Place one strawberry applique in the center of each granny square pocket.
Pin them first if needed.
Sew around the edges using small, nearly invisible stitches.
Avoid sewing through the pocket opening.
Final Finishing
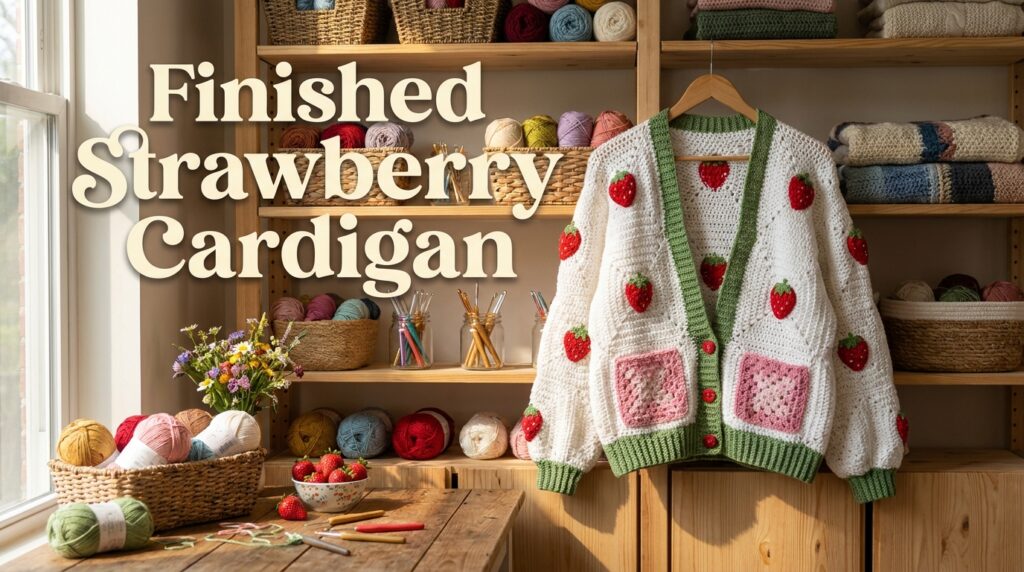
Once everything has been attached:
- Check every seam.
- Weave in loose yarn tails.
- Trim excess yarn.
- Lightly steam or block the cardigan if necessary.
The cardigan should now drape nicely while the ribbing and pockets sit flat.
Customization Ideas
This cardigan is easy to personalize.
You can:
- Make it cropped or longline.
- Add extra sleeve length.
- Use pastel strawberries for spring.
- Crochet larger pockets.
- Add buttons or a zipper.
- Sew on wooden labels.
- Mix different berry colors for a playful design.
Helpful Tips
- Count your stitches every few rounds to keep the hexagons even.
- Turn your work after each round for a balanced stitch texture.
- Use stitch markers to identify corner spaces.
- Don’t make the ribbing too tight.
- Weave in yarn tails securely before assembly.
- Test pocket placement before sewing permanently.
Finished Size
The finished cardigan depends on:
- Number of hexagon rounds
- Yarn weight
- Crochet tension
- Sleeve length
- Added body rows
Simply add more rounds to create larger sizes without changing the overall construction.
Frequently Asked Questions
Can beginners make this cardigan?
Yes. If you’re comfortable with basic crochet stitches such as chains, double crochet, single crochet, and slip stitches, you’ll be able to complete this project with patience.
Can I use different yarn?
Absolutely. Cotton, acrylic, and wool blends all work well. Keep in mind that changing the yarn weight will also affect the finished size and drape.
How do I make it oversized?
Continue crocheting additional hexagon rounds or add extra rows to the front, back, and bottom edges before assembling the cardigan.
Can I skip the strawberry pockets?
Yes. The cardigan looks beautiful as a simple hexagon cardigan even without the appliqués.
Is this cardigan easy to customize?
Very much so. You can easily adjust the length, sleeve size, pocket placement, and colors to create a cardigan that suits your personal style.
Final Thoughts
This Strawberry Cardigan Crochet Pattern is a fun and rewarding wearable project that combines simple construction with charming handmade details. By building the cardigan from just two hexagon panels and decorating it with granny square pockets and strawberry appliqués, you’ll create a cozy piece that’s both practical and unique.
Whether you’re crocheting it for yourself, making a thoughtful handmade gift, or adding a standout piece to your wardrobe, this cardigan is a wonderful project you’ll enjoy wearing for many seasons to come.