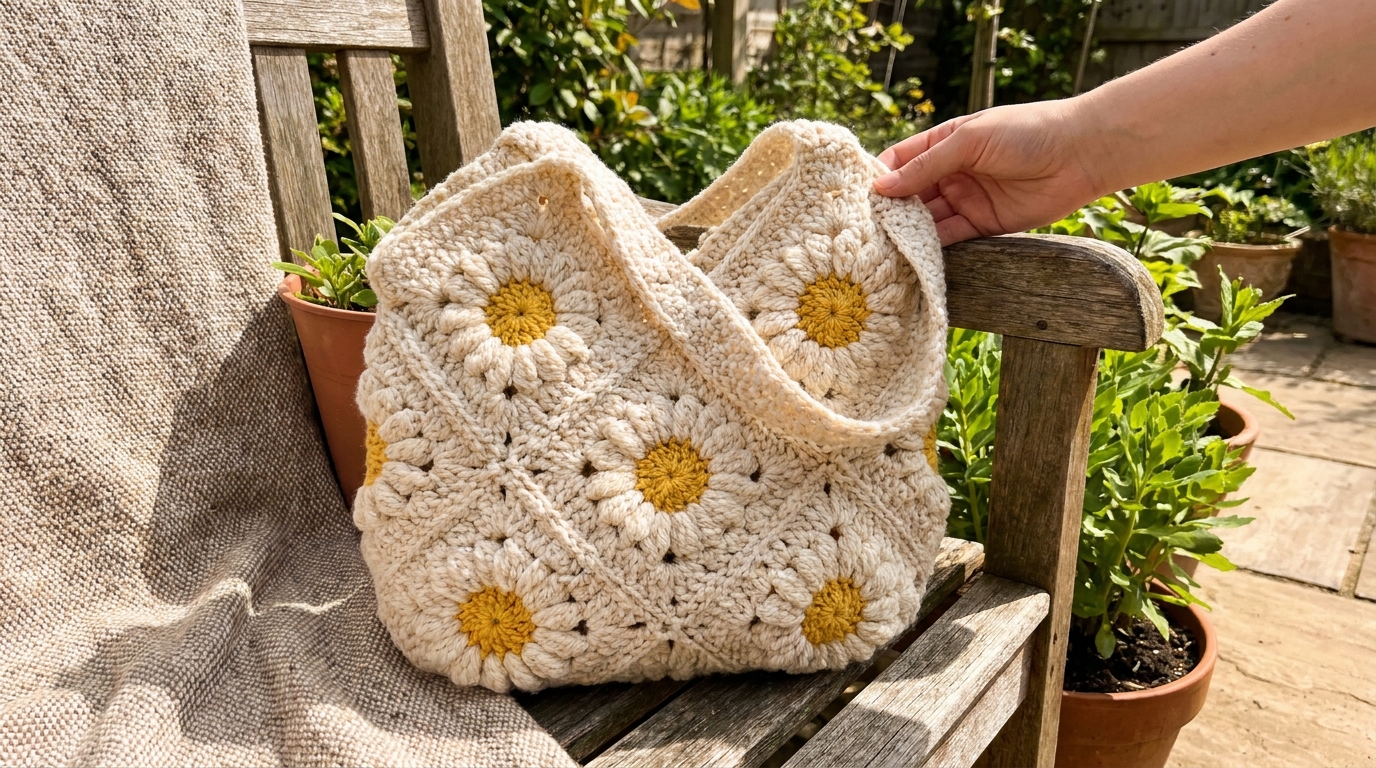
This crochet daisy bag pattern creates a large floral granny square tote with beautiful textured petals and a sturdy shoulder strap. The oversized flower design gives the bag a cozy handmade look while also reducing the amount of sewing compared to smaller granny square bags.
The bag is made using two large daisy granny squares connected with a long crochet strap section.
It’s a perfect crochet project for:
- Spring and summer outfits
- Farmers market totes
- Beach bags
- Everyday crochet handbags
- Granny square lovers
Materials Needed
- White yarn
- Yellow yarn
- Green yarn
- 5 mm crochet hook
- Tapestry needle
- Optional fabric lining
Crochet Abbreviations
- mr – magic ring
- ch – chain
- sl st – slip stitch
- sc – single crochet
- hdc – half double crochet
- dc – double crochet
- tr – treble crochet
- inc – increase
- dc2tog – double crochet decrease
Pattern Notes
- Each granny square becomes one side of the bag
- The flower center begins with yellow yarn
- White yarn creates the petals
- Green yarn forms the outer square and edging
- Make 2 granny squares total
- The bag is worked in rounds first, then rows for the strap
Daisy Granny Square Pattern

Round 1
Using yellow yarn, create a magic ring.
Chain 3 to count as the first double crochet. Work 11 more double crochets into the ring.
Pull the ring closed and slip stitch into the beginning chain to finish the round.
(12 stitches)
Round 2
Chain 3 and work one double crochet into the same stitch.
Work a double crochet increase into every stitch around.
Slip stitch to join.
(24 stitches)
Round 3
Chain 3 and work one double crochet into the same stitch.
Work:
- 1 double crochet in next stitch
- 2 double crochets in next stitch
Repeat around the circle.
Slip stitch to close the round.
(36 stitches)
Fasten off yellow yarn and attach white yarn.
Round 4
Chain 4.
In the joining stitch work:
- 1 double crochet
- chain 1
- 1 double crochet
Chain 1 and skip 2 stitches.
In the next stitch work:
- 1 double crochet
- chain 1
- 1 double crochet
Repeat around.
Slip stitch to join.
(12 V-shapes)
Round 5
Slip stitch into the chain space.
Chain 3.
Inside the chain space work:
- 2 double crochets
- chain 1
- 2 double crochets
Chain 1 and skip the next V-space.
Repeat around.
Slip stitch to join.
Round 6
Slip stitch into the next chain space.
Repeat the same process from Round 5.
The piece may curl slightly here — this is normal.
Round 7
Slip stitch into the chain space.
Chain 3.
Inside the space work:
- 3 double crochets
- chain 1
- 3 double crochets
Chain 1 and skip the next space.
Repeat around.
Slip stitch to join.
Round 8
Slip stitch into the chain space.
Chain 3 and work 8 double crochets into the same space.
Chain 1 and skip the next space.
Repeat around to create large petal shells.
Slip stitch to join.
Fasten off white yarn.
The flower petals should now be clearly visible.
Adding the Green Floral Details
Round 9
Attach green yarn to the middle stitch of any petal shell.
Single crochet across the petal.
Between petals, create chain and slip stitch sections that work downward toward the flower center, then back upward.
Repeat this process around all petals.
This creates the green floral separation lines between petals.
Round 10
This round shapes the flower into a circle.
Work combinations of:
- single crochet
- half double crochet
- double crochet
- double crochet decreases
- increases
Repeat evenly around the flower.
The shape should begin flattening more here.
Turning the Flower Into a Square
Round 11
Create corners using:
- treble crochet
- chain 2 spaces
- additional treble crochet stitches
Between corners work:
- double crochet
- half double crochet
- single crochet sections
Repeat around all four sides.
Round 12
Slip stitch into the corner space.
Work:
- treble crochet corners
- chain spaces
- side stitch sections
The square shape becomes more defined during this round.
Round 13
Work:
- double crochet corner groups
- side stitch sections
- half double crochet center areas
Repeat around the square evenly.
Fasten off yarn and weave in ends.
Top Edge Rows
Only one side of each granny square needs extra rows.
Row 1
Attach green yarn to a corner space.
Double crochet evenly across one side of the square.
Chain 1 and turn.
Row 2
Slip stitch across the row.
Fasten off yarn.
Repeat on the second granny square.
Crochet Bag Strap Pattern
Row 1
Using green yarn, chain 225.
Row 2
Starting in the second chain from the hook:
- single crochet across the row
Chain 1 and turn.
Rows 3–5
Single crochet in every stitch across.
Chain 1 and turn after each row.
After Row 5, fasten off while leaving a long tail for sewing.
Sewing the Bag Together
Place the two granny squares on each side of the long strap section.
Make sure:
- the extra top rows face upward
- corners line up evenly
Using the yarn tail and tapestry needle:
- sew down one side
- across the bottom
- back up the other side
Repeat for the second granny square.
Attach the loose strap ends together.
Weave in all remaining yarn ends.
Optional: Add fabric lining inside the tote for extra structure.
Final Thoughts

This crochet daisy bag pattern creates a beautiful oversized floral tote that feels both practical and decorative.
The large daisy granny squares make the bag stand out immediately, while the textured petals and green edging give it a soft spring-inspired aesthetic.
And because the project uses only two large squares instead of dozens of small ones, it feels much more manageable than traditional granny square bags.