Tulip Stitch Crochet Pattern — 3 Rows to Neat Columns of Tulips
This tulip stitch crochet pattern builds a little row of spring flowers from just three working rows: a single crochet base, a green row of double crochet stems, and a row of plump 5-dc shells that bloom as flower heads. Repeat those rows and the tulips stack in straight columns, one directly above the other, like a well-kept garden bed. A cheerful stitch for baby blankets, cushions, totes and scarves — after two repeats you will not need the instructions again.
What makes this version dependable is the counting: the multiple is stated up front, and the stem and flower rows consume and produce exactly the same number of stitches, so edges stay straight and columns never wander. If you can work single and double crochet, you can work this stitch.

What Is the Tulip Stitch Crochet Pattern Made Of?
Three rows, always in the same order:
- The soil row — single crochet the stems stand in, worked in green so the base reads as the garden bed itself.
- The stem row — double crochet in green, worked as pairs with a chain-1 space at the top of each pair. That little space is where the flower will sit.
- The flower head row — a 5-dc shell in each chain-1 space, anchored by single crochet between flowers. It fans at the top and pinches at the base — exactly a tulip’s shape.
A fourth row, the reset row, is another soil row worked over the shells: it levels the flower tops and hands back a clean, counted row for the next stems. Rows 2–4 below are the repeat.
If you like floral stitches, try my honeycomb stitch crochet pattern and fan stitch crochet pattern next — three very different flowers from the same basic stitches.
Materials
- DK yarn (weight 3): green for stems and soil rows, plus one or more petal colours. The swatch below needs roughly 25 g of green and 15 g of a petal colour. Check substitutes against the Craft Yarn Council yarn weight system.
- 4.0 mm (US G-6) crochet hook
- Yarn needle for ends (colour changes mean a few)
- Scissors
- Blocking mat and pins for the crispest finish
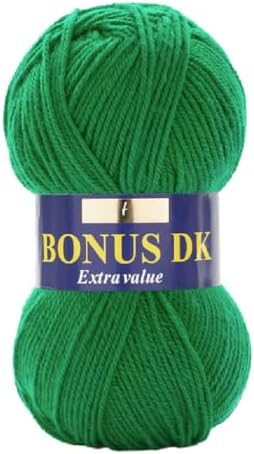
- 100% Acrylic
- VERSATILE DOUBLE KNITTING YARN: A best-selling DK weight yarn perfect for knitting and crochet projects for the whole fa…
- SOFT AND AFFORDABLE: Surprisingly soft acrylic yarn that combines excellent quality with great value, ideal for all skil…
A leaf-green DK is the backbone of this stitch: it works the soil, stem and reset rows — three of every four rows. Choose a smooth, non-splitty yarn; fluffy yarn blurs the stem-to-flower gap and tulips lose their shape.

- Premier Minikins Yarn 9-pack bundled as shown with Bella’s Crafts stitch markers
- 50% Cotton, 50% Acrylic, #2 Fine Weight, Made in Turkey
- Each ball: 1.5oz/ 50g, 158yds/145m
Small balls in mixed petal colours are ideal: each row of tulips uses surprisingly little yarn. A pastel pack lets you run pink, then coral, then lemon, so the pattern reads as a flower bed, not a stripe.
Gauge, Sizing and the Stitch Multiple
- Stitch multiple: the tulip stitch crochet pattern is worked on a multiple of 6 stitches, plus 1. Your starting chain is a multiple of 6, plus 2 extra chains.
- Gauge: one tulip (6 stitches) ≈ 5 cm wide; one full repeat (stem, flower and reset rows) ≈ 4 cm tall, in DK with a 4.0 mm hook.
The swatch below starts with 38 chains — 37 stitches per row, 6 tulips across. Every single crochet row ends at exactly 37: that count proves the tulips stack straight.
Abbreviations (US Terms)
- ch — chain
- sc — single crochet
- dc — double crochet
- sp — space
- st(s) — stitch(es)
- rep — repeat
Step-by-Step: The Tulip Stitch Crochet Pattern
Step 1 — The Foundation Chain and the Soil Row
Using green, chain 38 (a multiple of 6, plus 2). Work 1 sc in the second chain from the hook and 1 sc in every chain across. (37 sc) Chain 1 and turn at the end of every single crochet row from here on.
This plain green row is the soil: firm, flat and unglamorous, and it decides whether everything above stands straight. Count to 37 before moving on — every later row depends on it, as the neat rows of the leaf stitch crochet pattern depend on a counted base.

- 【Ergonomic Grip Crochet Hooks Set】Crochet hooks set including 9 ergonomic soft handle hooks, size ranges:B(2.25mm), C(2….
- 【Crochet Hooks with Handles】Knitting needles with soft grip handles, can reduces or eliminates hand, wrist or finger pai…
- 【Easily Identify Extra Long Crochet Hooks】Smooth knitting needles set is longer than all our competitors, each needle…
This stitch lives or dies by its counts, so a comfortable hook and stitch markers are genuinely useful: mark the soil row’s end stitches and you will never eat one.

Step 2 — The Stem Row (Green)
Still using green: chain 3 (counts as the first dc) and turn. Work this repeat across the row: skip the next 2 sc, work (1 dc, chain 1, 1 dc) into the next sc — that pair is one set of stems — skip the next 2 sc, work 1 dc in the next sc. Repeat until you reach the end; on the swatch it fits exactly 6 times, and the final dc of the last repeat lands in the very last sc. (19 dc and 6 chain-1 spaces: 6 stem pairs plus 7 single dc, the first of which is your chain-3)
You have seven single stems and six stem pairs, each pair topped with a chain-1 space — each pair marks where one tulip will bloom.

Step 3 — The Flower Head Row (Petal Colour)
Change to your petal colour (Step 6 explains the neat join). Chain 1 and turn. Work 1 sc in the first dc. Then repeat across: work 5 dc into the chain-1 space at the top of the next stem pair — that shell is one tulip head — then work 1 sc in the next single dc. Repeat to the end, finishing with 1 sc in the top of the turning chain. (37 stitches in total: 6 shells of 5 dc = 30 dc, plus 7 sc)
There they are: six tulips — each shell pinches into its chain space, fans open at the top, and is held in its own plot by the sc anchors. The count is back to exactly 37, precisely what the stem row set up.

Step 4 — The Reset Row (Green)
Change back to green. Chain 1 and turn, then work 1 sc in every stitch across — one in each of the 5 dc across the top of every shell, and one in each sc between the flowers. (37 sc)
Do not skip this row, and do not work the next stem row straight into the shells. The reset row levels the fan tops into a straight, countable edge; without it the next stems land wrong and the columns drift.

Step 5 — Repeating the Pattern and Keeping the Tulips Straight
From here the stitch is simply: repeat the stem row (Step 2), the flower head row (Step 3) and the reset row (Step 4) until your piece is tall enough. Each tulip lands exactly on the one below because all three rows are keyed to the same count.
Three habits keep the columns straight:
- Count the sc rows. Every soil and reset row must end at 37 (your multiple of 6 plus 1) — catch a mistake here and it costs one row, not three.
- Mind the edges. Missing a row’s last sc, or working into the turning-chain space on the stem row, are the commonest errors. Mark both edge stitches.
- Check the pairs line up. Before each flower row, every stem pair should sit directly above a flower below; if one is offset, the stem row beneath went wrong.
The fabric stays flat and rectangular — the same discipline that makes the flowers blanket crochet pattern grow evenly.

Step 6 — Colour Changes: Green Stems and Petal Colours
The rhythm is simple: green works soil, stem and reset rows; colour works only flower rows. To change cleanly, work the last sc until two loops remain, then finish it with the new colour (10 cm tail). Change back to green the same way.
- Cut and weave. Cut a tail at every change and weave ends in afterwards, in three directions each. Cleanest edges, more ends.
- Carry the green up the side. Green returns every other row, so leave it attached to travel up the edge; only flower colours get cut. The strand hides in the border.
One petal colour throughout gives formal columns; alternating two or three gives the cottage-garden look — the cheerful, colour-blocked style of the honeycomb crochet baby blanket.

Step 7 — Worked Example: A Tulip Stitch Baby Blanket
Here is the tulip stitch crochet pattern as a real project: a baby blanket approximately 80 cm × 100 cm, in DK yarn with a 4.0 mm hook.
- Width: 16 tulips across: 16 × 6 = 96, plus 1 = 97 stitches, so chain 98. At 5 cm per tulip, that gives 80 cm.
- Height: one repeat measures approximately 4 cm, so work 25 repeats for 100 cm: 1 soil row, then the repeats, ending on a reset row so the top edge matches the bottom.
- Yarn: approximately 700 g of DK — about 300 g of green (three rows in four) and 400 g of petal colours, split between pink, coral and lemon. Buy an extra green ball if your tension is loose; stems eat yarn.
- Check as you go: measure after 10 and 20 repeats; if repeats run taller than 4 cm, drop one or two.
A tulip blanket makes a memorable spring gift — see wrapped in love: 7 crochet baby blanket patterns for companions.

Step 8 — Border and Blocking
A fabric worked in the tulip stitch crochet pattern deserves a simple, tidy frame. Work the border in green.
Border round 1: Right side facing, join green in any corner. Work 1 sc in every stitch along the top and bottom, 3 sc in each corner, and 3 sc per pattern repeat along the sides (one per row). Join with a slip stitch to the first sc.
Border round 2 (shell edge): Chain 1, 1 sc in the first sc, then repeat around: skip 2 sc, work 5 dc in the next sc (a small shell echoing the tulip heads), skip 2 sc, 1 sc in the next sc. At corners, work the shell into the centre corner stitch; a side may need one stitch of quiet fudging there. Join, fasten off, weave in ends.
Blocking: Tulip fabric curls gently because of the shells; blocking persuades it flat and shows off the columns. Soak for ten minutes in lukewarm water, press in a towel, then pin to finished measurements, squaring the corners. Leave until completely dry: shells open evenly and stems line up.

- WHAT YOUR PURCHASE COMES WITH: 9 premium EVA blocking boards (12.6″ × 12.6″ × 0.75″), 150 rust-resistant T-pins, a gray …
- EASY TO USE & CARE: Made from durable extra-thick EVA foam, each board holds pins securely and stays firmly in place. Th…
- INTERLOCKING & EXPANDABLE SET: Interlocking tiles create a stable 36″ × 36″ blocking surface or can be arranged in any s…
Grid-printed interlocking foam mats make blocking a blanket square easy: pin corners to the measurements first, then ease the sides straight against the lines. Stainless pins will not mark damp yarn.

Tips for Perfect Tulips
- Keep shells at exactly 5 dc. Four makes a shy flower; six makes a cabbage. Five is the tulip.
- Work the flower row loosely. A relaxed shell fans into a rounder head; a tight one stays pointy.
Final Thoughts
The tulip stitch crochet pattern proves a memorable stitch needs no long list of techniques — just stems, shells and a counted reset row. Learn it on the swatch, trust the numbers, then let it loose on a blanket, cushion or spring tote — and see why this stitch has charmed crocheters for generations.