
Pretty Handbag Crochet Pattern: 1 Elegant Bag in 9 Simple Steps
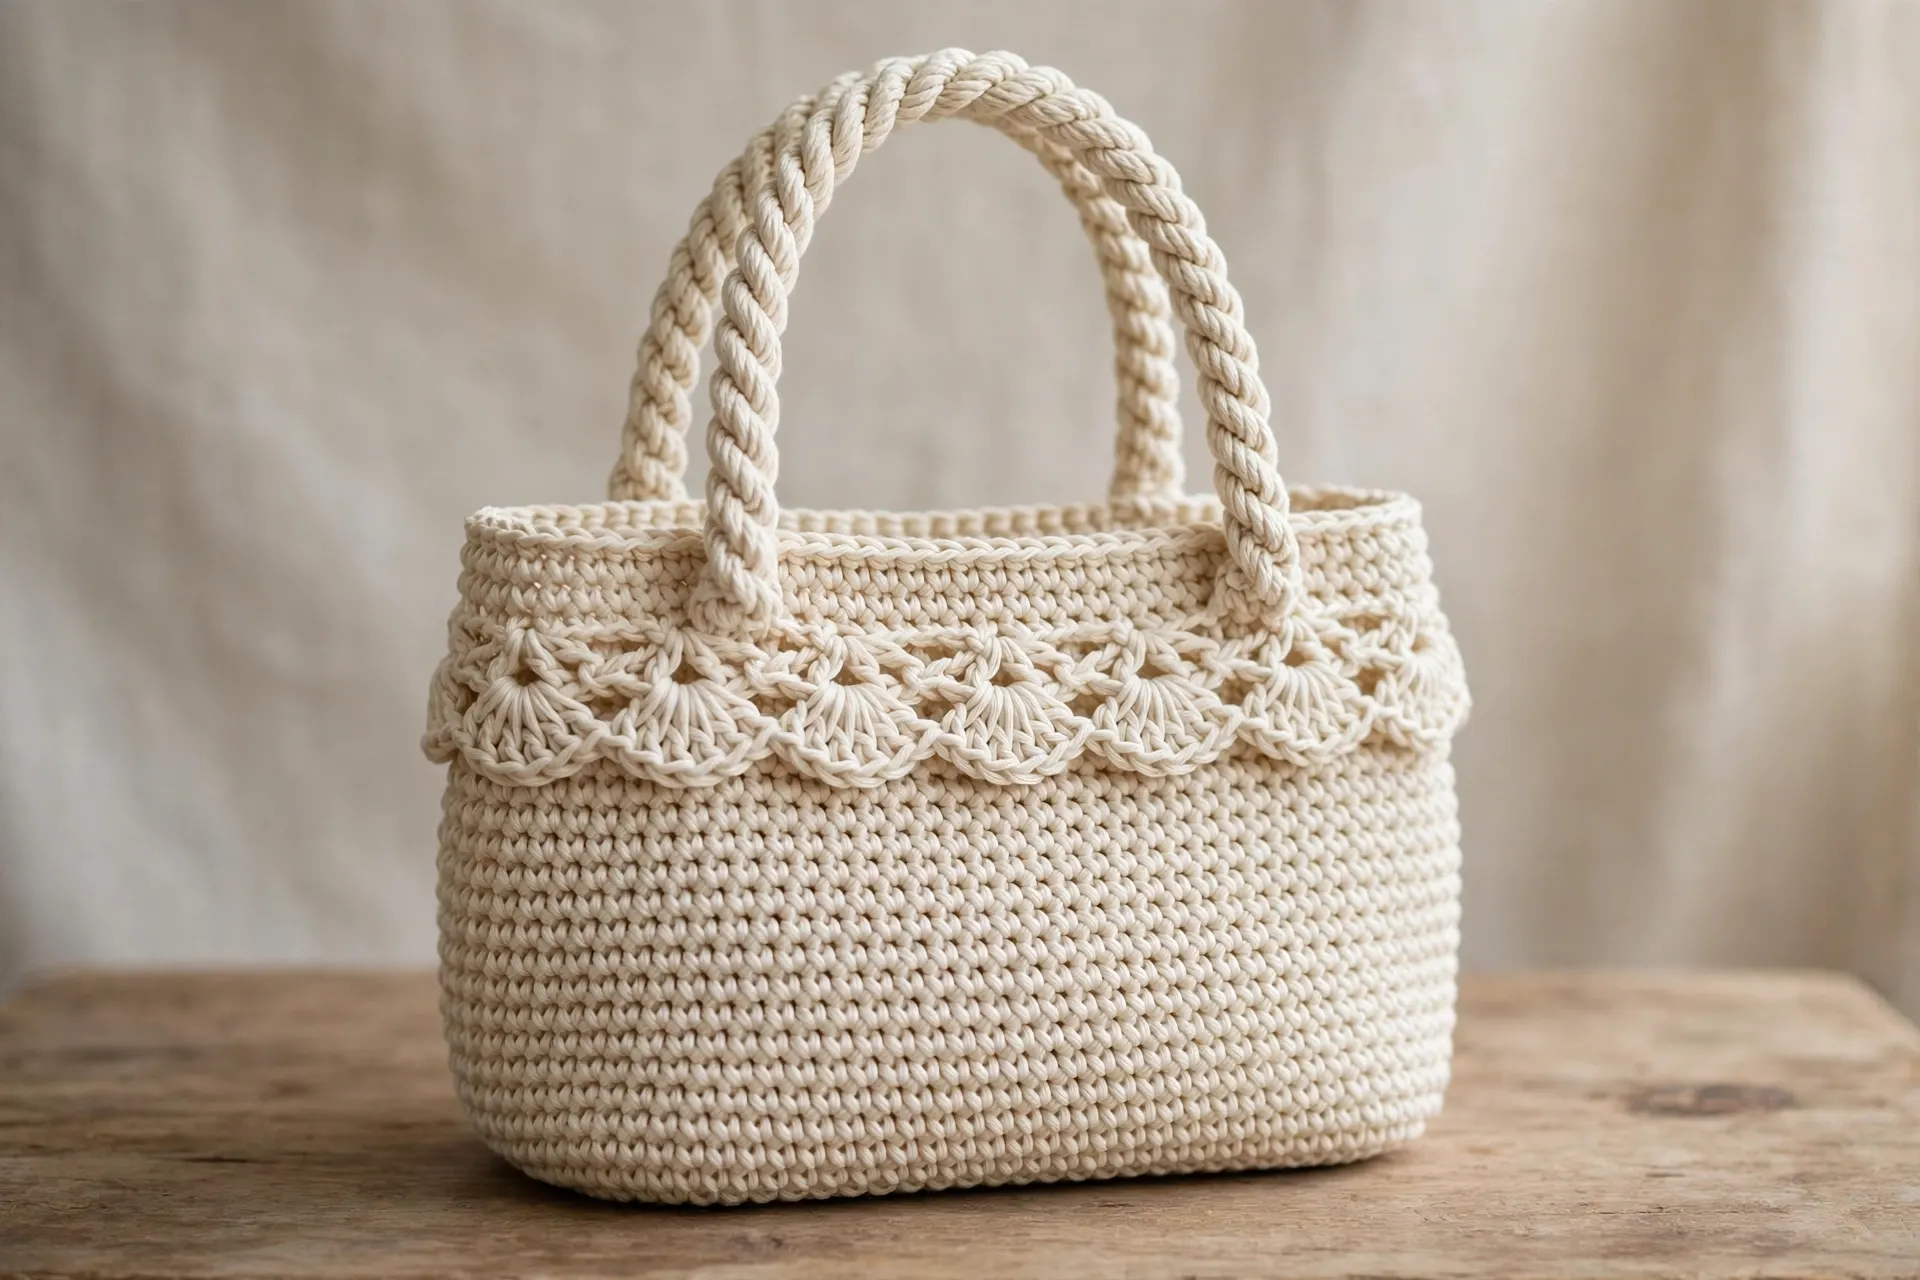
Every crocheter reaches the point where they want a bag that looks bought, not homemade — and this handbag crochet pattern is designed to be exactly that bag. Worked in sturdy worsted cotton, it has an oval base counted round by round, plain half double crochet sides, and one decorative band of shells near the top. Rope-style crocheted handles finish it off, with an optional lining inside. If you can chain, single crochet and half double crochet, you can make this bag in a weekend.
What Makes This Handbag Crochet Pattern Different
Many bag patterns wave vaguely at the base and leave you guessing, but a bag stands or falls on its base. In this handbag crochet pattern the oval base is written out with the exact stitch count at the end of every round, and the sides are worked straight up from that final count with no increases at all — if your count is right at the base, the whole bag stays right. For more shapes, see our elegant crochet handbag pattern and the round-up of 7 crochet handbag patterns.
Materials for This Handbag Crochet Pattern
- Worsted weight cotton yarn (weight 4): about 300 g (roughly 480 m / 525 yd)
- 5.0 mm (US H-8) crochet hook
- Stitch markers (at least 4)
- Yarn needle with a large eye
- Scissors
- Optional lining: a fat quarter (about 50 x 55 cm) of cotton fabric, thread and a sewing needle
Cotton is not a suggestion here — it is what stops the bag stretching out of shape under a purse, phone and keys. If you swap yarns, the Craft Yarn Council yarn weight standards will help you match the weight-4 thickness.

- Includes Lion Brand Yarn 24/7 Cotton Knitting Yarn Navy 3-Skein Factory Pack (Same Dye Lot) 761-110 with 1 Craft Project…
- DESCRIPTION: Lion Brand24/7 Cotton is a reliable yarn for all your apparel projects
- WEIGHT CATEGORY: 4; Content: 100% mercerized cotton; Putup: 3.5oz/100g, approximately 186yd/170m; Gauge: 20sx28r = 4in/1…
A worsted weight cotton with a tight, smooth ply resists sagging and keeps shells crisp. Three 100 g balls in cream, stone or sage cover body and handles.
Gauge, Size and Abbreviations
Gauge: 14 half double crochet and 11 rows = 10 cm (4 in). Gauge matters here: too loose gaps, too tight shrinks the bag.
Finished size: about 28 cm (11 in) wide and 24 cm (9.5 in) tall, not counting the handles. The oval base measures about 26 x 10 cm.
Abbreviations (US terms): ch = chain · sc = single crochet · hdc = half double crochet · dc = double crochet · sl st = slip stitch · st(s) = stitch(es) · BLO = back loop only · rep = repeat
Pattern notes: Work in joined rounds; join each round with a slip stitch into the first stitch and chain 1 (sc rounds) or chain 2 (hdc rounds, counts as the first hdc). Mark the first stitch of every round — on a one-colour bag it is easy to drift past the join.
The Handbag Crochet Pattern, Step by Step
Step 1 — The Oval Base Rounds
Chain 27. You will work around both sides of this chain to form the oval, increasing only at the two rounded ends.
Round 1: Work 1 sc into the 2nd chain from the hook and into each of the next 24 chains (25 sc). Work 3 sc into the last chain to turn the corner. Working along the underside of the chain, work 1 sc into each of the next 24 chains, then 2 sc into the final chain (the same chain that holds your first sc). Join with a sl st. (54 sc)
Round 2: Ch 1. Work 2 sc into each of the next 3 stitches, then 1 sc into each of the next 24 stitches. Repeat once more. Join. (60 sc)
Round 3: Ch 1. Work (1 sc into the next stitch, 2 sc into the next stitch) 3 times, then 1 sc into each of the next 24 stitches. Repeat once more. Join. (66 sc)
Round 4: Ch 1. Work (2 sc into the next stitch, 1 sc into each of the next 2 stitches) 3 times, then 1 sc into each of the next 24 stitches. Repeat once more. Join. (72 sc)
Round 5: Ch 1. Work (1 sc into each of the next 3 stitches, 2 sc into the next stitch) 3 times, then 1 sc into each of the next 24 stitches. Repeat once more. Join. (78 sc)
Lay the base flat: a neat oval about 26 x 10 cm. Remember 78 — every side round uses this count.


- 【 Ergonomic Soft Grip Design 】: The crochet hooks feature a contoured silicone handle with a flat thumb rest to support …
- 【 Smooth Aluminum & Extended Shaft 】: Polished aluminum tips are tapered to enter stitches smoothly and minimize yarn sp…
- 【 Complete Crochet Set Options 】: This crochet hook set is available in two configurations – Set A includes 14 hooks (2….
A 5.0 mm ergonomic hook and locking markers are the kit this bag needs — marking each end of the oval stops increases landing in the wrong place.
Step 2 — First Side Round in Back Loops
Chain 2 (counts as the first hdc) and work 1 hdc into the back loop only of every stitch around, joining into the top of the chain 2. (78 hdc) Working in the back loops leaves a neat ridge around the base and turns the sides sharply upwards instead of flaring out. From here on, work through both loops as normal.

Step 3 — Plain Side Rounds to Height
Chain 2 and work 1 hdc into every stitch around, joining each round with a slip stitch: that is Round 7. Repeat this plain round until you have completed Round 23 — 17 plain rounds in total, all with 78 hdc each. Count every few rounds; if your count comes out at 77 or 79, find the mistake now, because the shell band is counted to fit 78 exactly. The sides should measure about 15–16 cm (6–6.25 in) from the base ridge.

Step 4 — The Shell Band Round
Round 24 (set-up): work one plain hdc round as before. (78 hdc)
Round 25 (shells): Chain 1. Work 1 sc into the next stitch, skip the next 2 stitches, work 5 dc into the next stitch (one shell made), skip the next 2 stitches. Repeat around and join with a sl st into the first sc. Since 78 divides exactly by the 6 stitches each repeat uses, you finish with 13 shells and 13 single crochet.
Round 26 (levelling): Chain 2 and work 1 hdc into every stitch around — into each sc and into each of the 5 dc of every shell. (78 hdc) This tames the scallops and restores a clean 78 for the rim. The same shell trick finishes the tote in our crochet daisy bag pattern.

Step 5 — The Rim Rounds
Round 27: Chain 1 and work 1 sc into every stitch around. Join. (78 sc)
Round 28: Repeat Round 27. (78 sc)
Two tight single crochet rounds pull the top edge in slightly and give a firm rim that will not curl or stretch under the handles. For an extra-neat finish, add Round 29 (optional): crab stitch (reverse single crochet) in every stitch around, for a twisted, corded edge. Fasten off and weave the end in inside the rim. The bag body is complete at about 24 cm tall. Browse our 10 crochet bag patterns for your next project.

Step 6 — Making the Handles (Make 2)
Each handle is a crocheted tube — a spiral of single crochet that behaves like a soft rope.
With the main colour, chain 5 and join with a slip stitch into the first chain to make a ring. Round 1: work 1 sc into each chain. (5 sc) From here, work in a continuous spiral — 1 sc into every stitch, round after round, without joining or turning, moving a marker up every few rounds. Each round adds just under 1 cm, so keep going until the tube measures about 45 cm (17.75 in) — roughly 55 rounds. Fasten off, leaving a 25 cm (10 in) tail. Make a second handle the same way.


- PREMIUM QUILT SHOP QUALITY: Made from 100% high-quality cotton. The fabric offers superior durability, minimal shrinkage…
- PRE-CUT FOR CONVENIENCE: Each bundle contains professionally cut Fat Quarters measuring approximately 18″ x 22″. These r…
- PROFESSIONALLY CURATED PALETTE: Take the guesswork out of color matching. This bundle features a cohesive, designer-sele…
If you plan to line your bag, a fat quarter of plain cotton in a matching tone is all you need. Pre-wash it before cutting, so the lining never shrinks tighter than the bag.
Step 7 — Attaching the Handles
Fold the bag flat: each face is 39 stitches wide. On the front face, mark the 10th and 30th stitches counting from one side fold; repeat on the back face. Flatten the last 4 cm (1.5 in) of one handle end, pin it inside the rim centred on the first marker, and sew it on with the tail and yarn needle, using firm whip stitches through the rim rounds — across once and back again, so the join is doubly secure. Attach the other end at the second marker, checking the handle is not twisted, then attach the second handle to the back face the same way. Weave all tails into the rim.

Step 8 — Optional Lining, Explained Simply
A lining stops keys and pens poking through the stitches. Measure the bag’s front: about 28 cm wide and 24 cm from base to rim. Cut two pieces of fabric, each the width plus 2 cm (0.75 in) for seams and the height plus 4 cm (1.5 in). Sew them together along the sides and bottom with a 1 cm seam, right sides facing. Fold the top edge down 2 cm and press. Slip the fabric pocket inside the bag, fold the pressed edge to sit just below the rim, and hand-sew it to the inside of the rim rounds with small stitches. Leave the handles outside the lining — it tucks in below them.

Step 9 — Finishing and Care
Your handbag crochet pattern is now complete — check the details: weave in any end you missed, trim tails flush, and give the shell band a gentle steam from a distance to set the scallops (never press the iron directly onto the stitches). Test both handles by loading the bag with what you actually carry and lifting it a few times; the joins should feel rock solid. Hand wash or machine wash on a gentle cycle in cool water, reshape while damp and dry flat.


- AMERICA’s #1 SELLING GARMENT STEAMER BRAND*: Trusted performance for fast, convenient wrinkle removal at home or on the …
- 2-IN-1 STEAM + PRESS: This 2-in-1 steamer and iron offers vertical steaming and horizontal ironing. The ceramic-coated s…
- CUSTOMIZABLE FABRIC CARE: Three steam settings, a bristle brush, and fabric spacer help this handheld garment steamer fo…
A small handheld steamer is the kindest way to finish cotton crochet: a few passes of steam set the shell band and flatten the base without squashing the stitches.
Final Thoughts
This handbag crochet pattern rewards careful counting with a bag that genuinely earns compliments — a firm oval base, straight sides, one pretty band of shells and handles that take real weight. Make the first in a neutral; the second, in a colour for a friend, will be on your hook before you know it.


