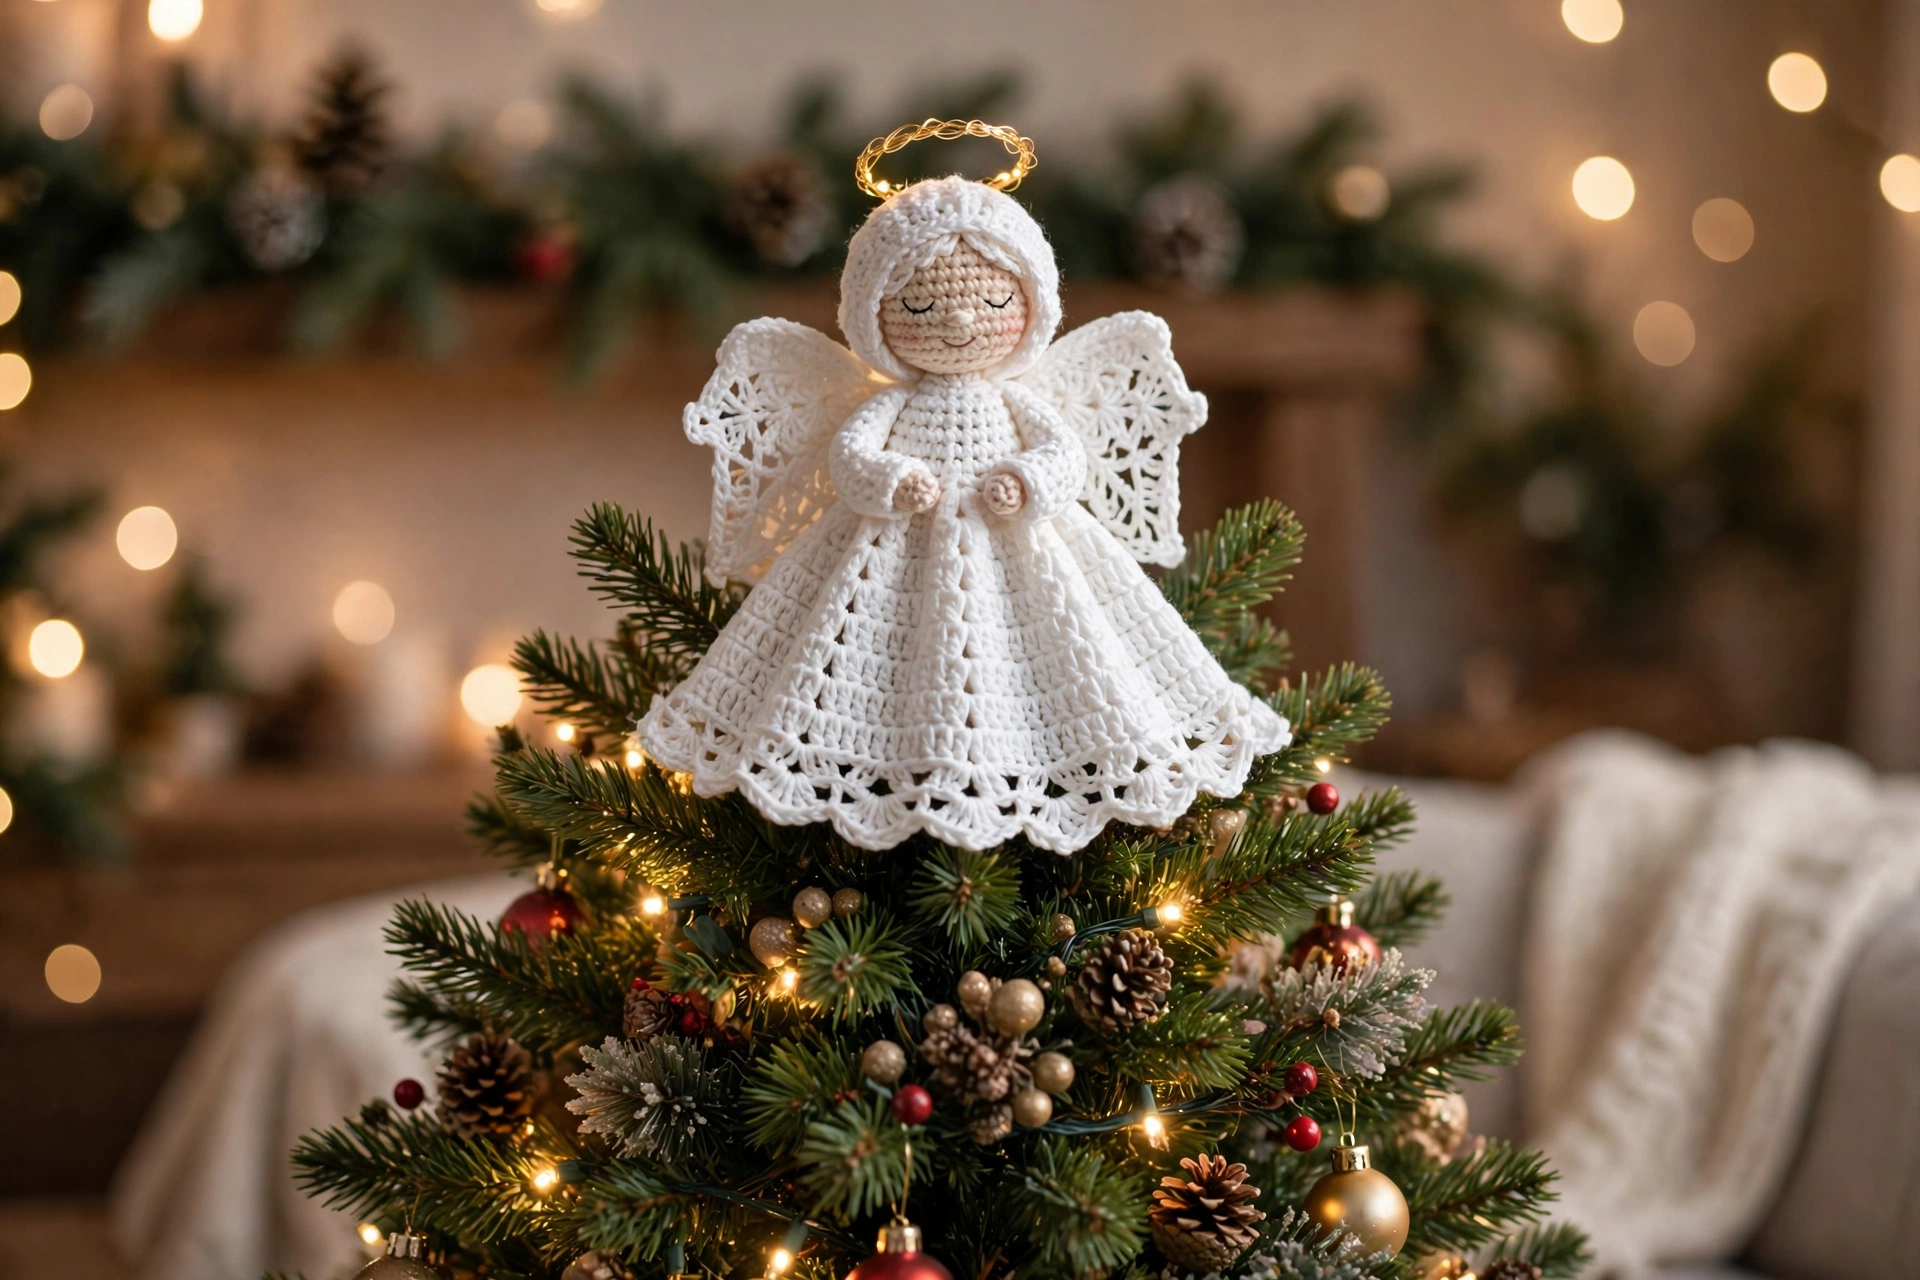
Crochet Christmas Angel Pattern — Easy Amigurumi Angel Ornament and Tree Topper
Crochet Christmas angel is sweet, sturdy little figure that works beautifully as tree topper, mantel decoration, or handmade gift. Worked mostly in single crochet in rounds, shaping simple and stitch counts easy to follow. Dress crocheted from base upward into gentle bell shape, so angel stands on her own. Head, arms, wings, halo made separately and sewn on, which makes assembly forgiving — can adjust tilt of wings and position of halo until looks just right. Take time with stuffing, especially in head, use stitch marker to mark first stitch of each round. Original design.
Materials
Worsted-weight yarn (medium, size 4) in four colours: Main dress colour, white or cream approx. 110 yards (100 metres); Skin tone approx. 45 yards (41 metres); Gold or yellow for halo and trim approx. 35 yards (32 metres); Hair colour, such as soft brown, blonde, or grey approx. 35 yards (32 metres). 3.75 mm crochet hook (US F/5). Polyester fibre stuffing, small amount. 9 mm safety eyes, 1 pair, or black embroidery thread if prefer embroidered eyes. Tapestry needle, stitch marker, scissors. Optional: pink embroidery thread or blush for cheeks, small amount white or gold yarn for waist sash.
Gauge
18 single crochet stitches and 20 rows = 4 inches (10 cm) in single crochet, using 3.75 mm hook. Gauge not critical for ornament, but tighter gauge will make smaller, firmer angel, looser gauge larger, softer one. If can see stuffing through stitches, go down hook size.
Finished Size
Approximately 9 inches (23 cm) tall from base of dress to top of halo, and approximately 6 inches (15 cm) across at widest point of wings when attached.
Abbreviations (US Terms)
ch — chain; sl st — slip stitch; sc — single crochet; hdc — half double crochet; dc — double crochet; inc — increase: work 2 sc in same stitch; dec — decrease: sc 2 together; BLO — back loop only; MR — magic ring; st(s) — stitch(es); rep — repeat; [ ] — total stitch count at end of round or row. Pattern Notes: Work in continuous rounds unless row stated, do not join rounds unless instructed, move stitch marker up at start of each round. Numbers in brackets at end of round or row are total stitch count. ‘Work even’ means work one sc in each stitch around, no increases or decreases. Dress worked from base upward, base closed, so angel stands flat. Make two arms and two wings; second piece worked exactly same as first.
Step 1: Dress — Base and Bell-Shaped Skirt
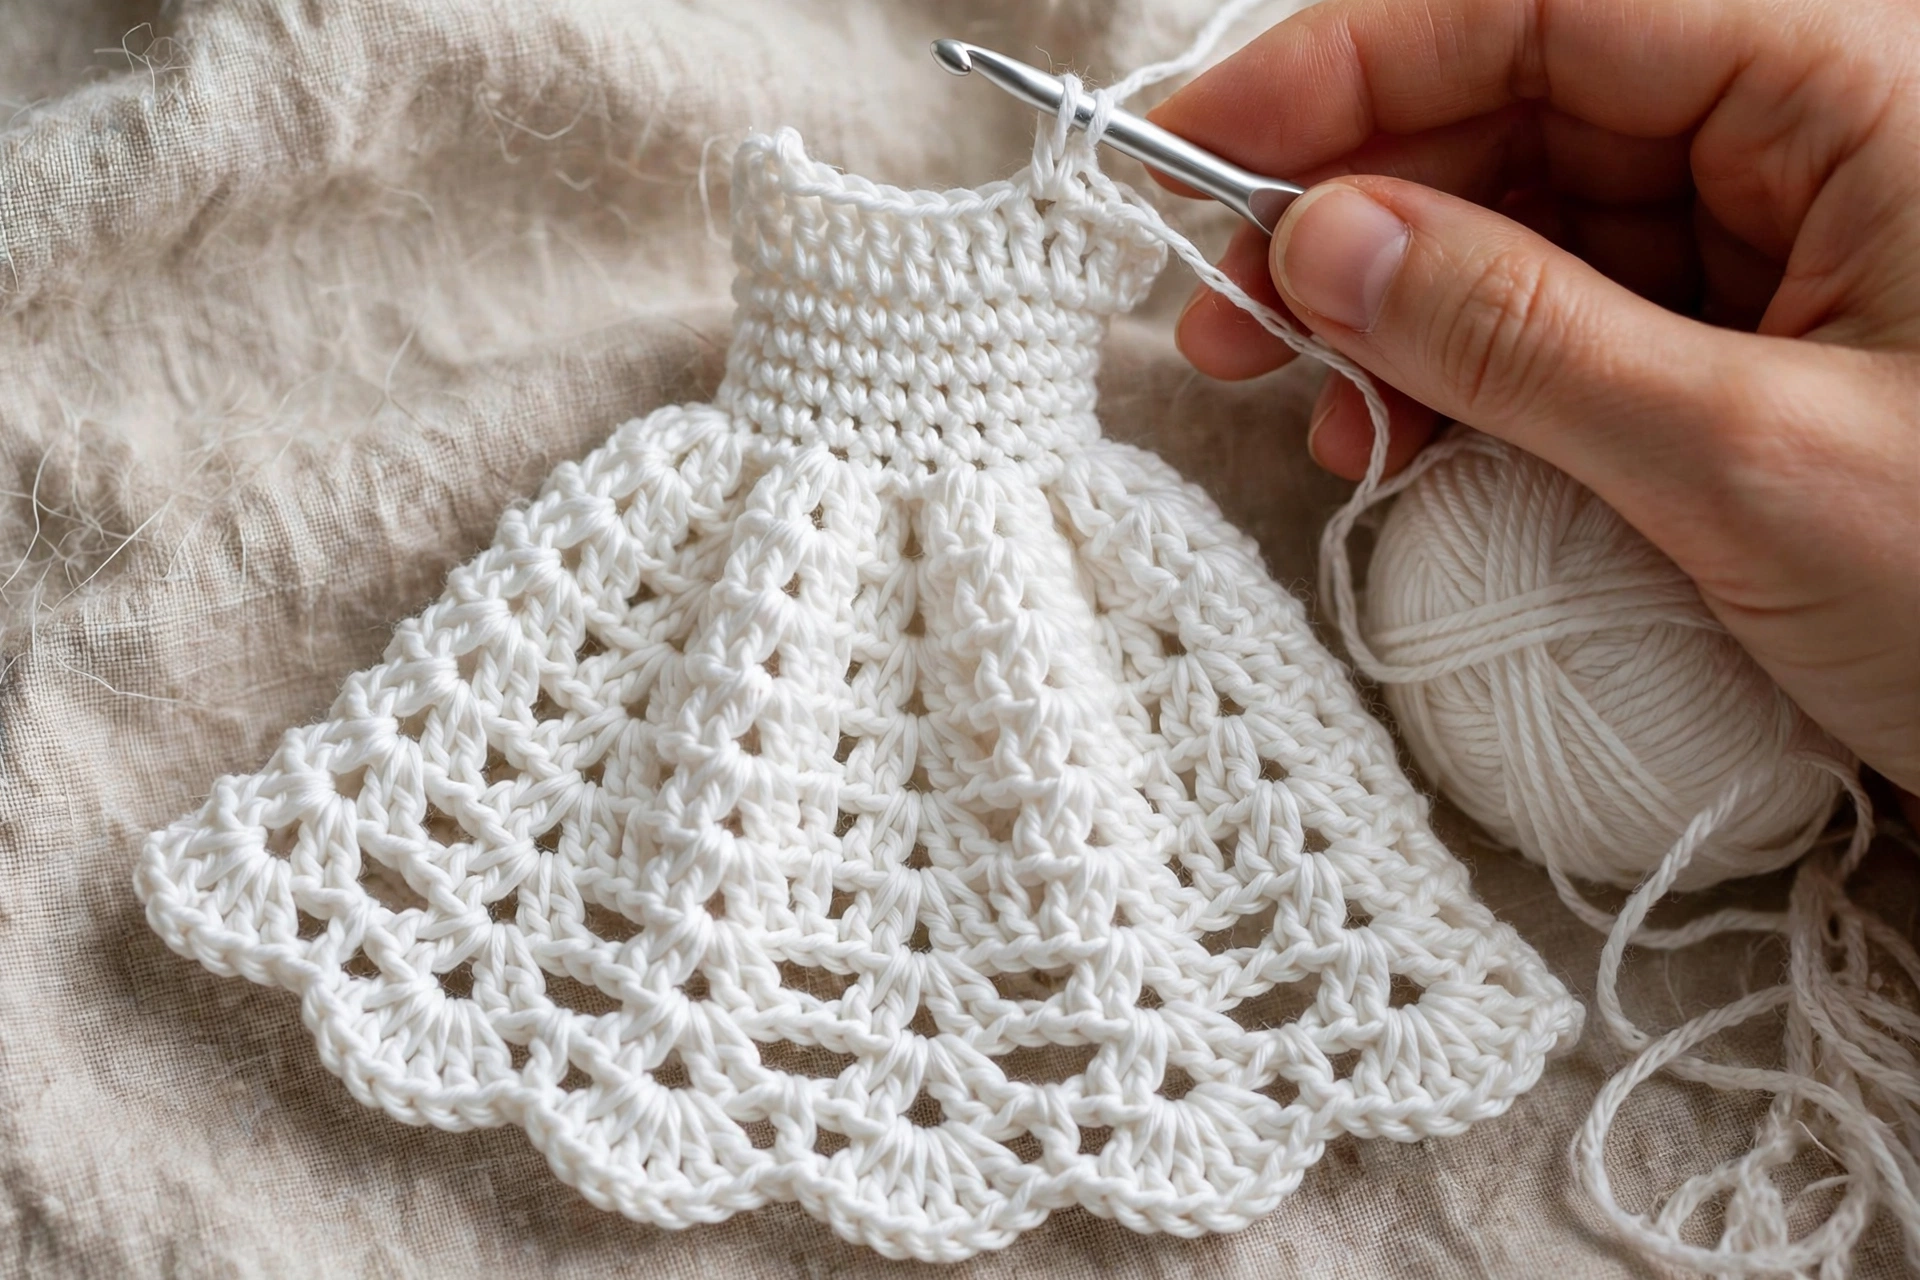
Worked in rounds, from base upward, main dress colour. Round 1: 6 sc in MR. [6]. Round 2: Inc each st. [12]. Round 3: (1 sc, inc) rep 6. [18]. Round 4: (2 sc, inc) rep 6. [24]. Round 5: (3 sc, inc) rep 6. [30]. Round 6: (4 sc, inc) rep 6. [36]. Round 7: (5 sc, inc) rep 6. [42]. Round 8: (6 sc, inc) rep 6. [48]. Round 9: (7 sc, inc) rep 6. [54]. Round 10: Working in BLO only, sc each st. [54]. Rounds 11–14: Sc each st. [54].
Step 2: Bodice, Gold Hem Trim and Stuffing
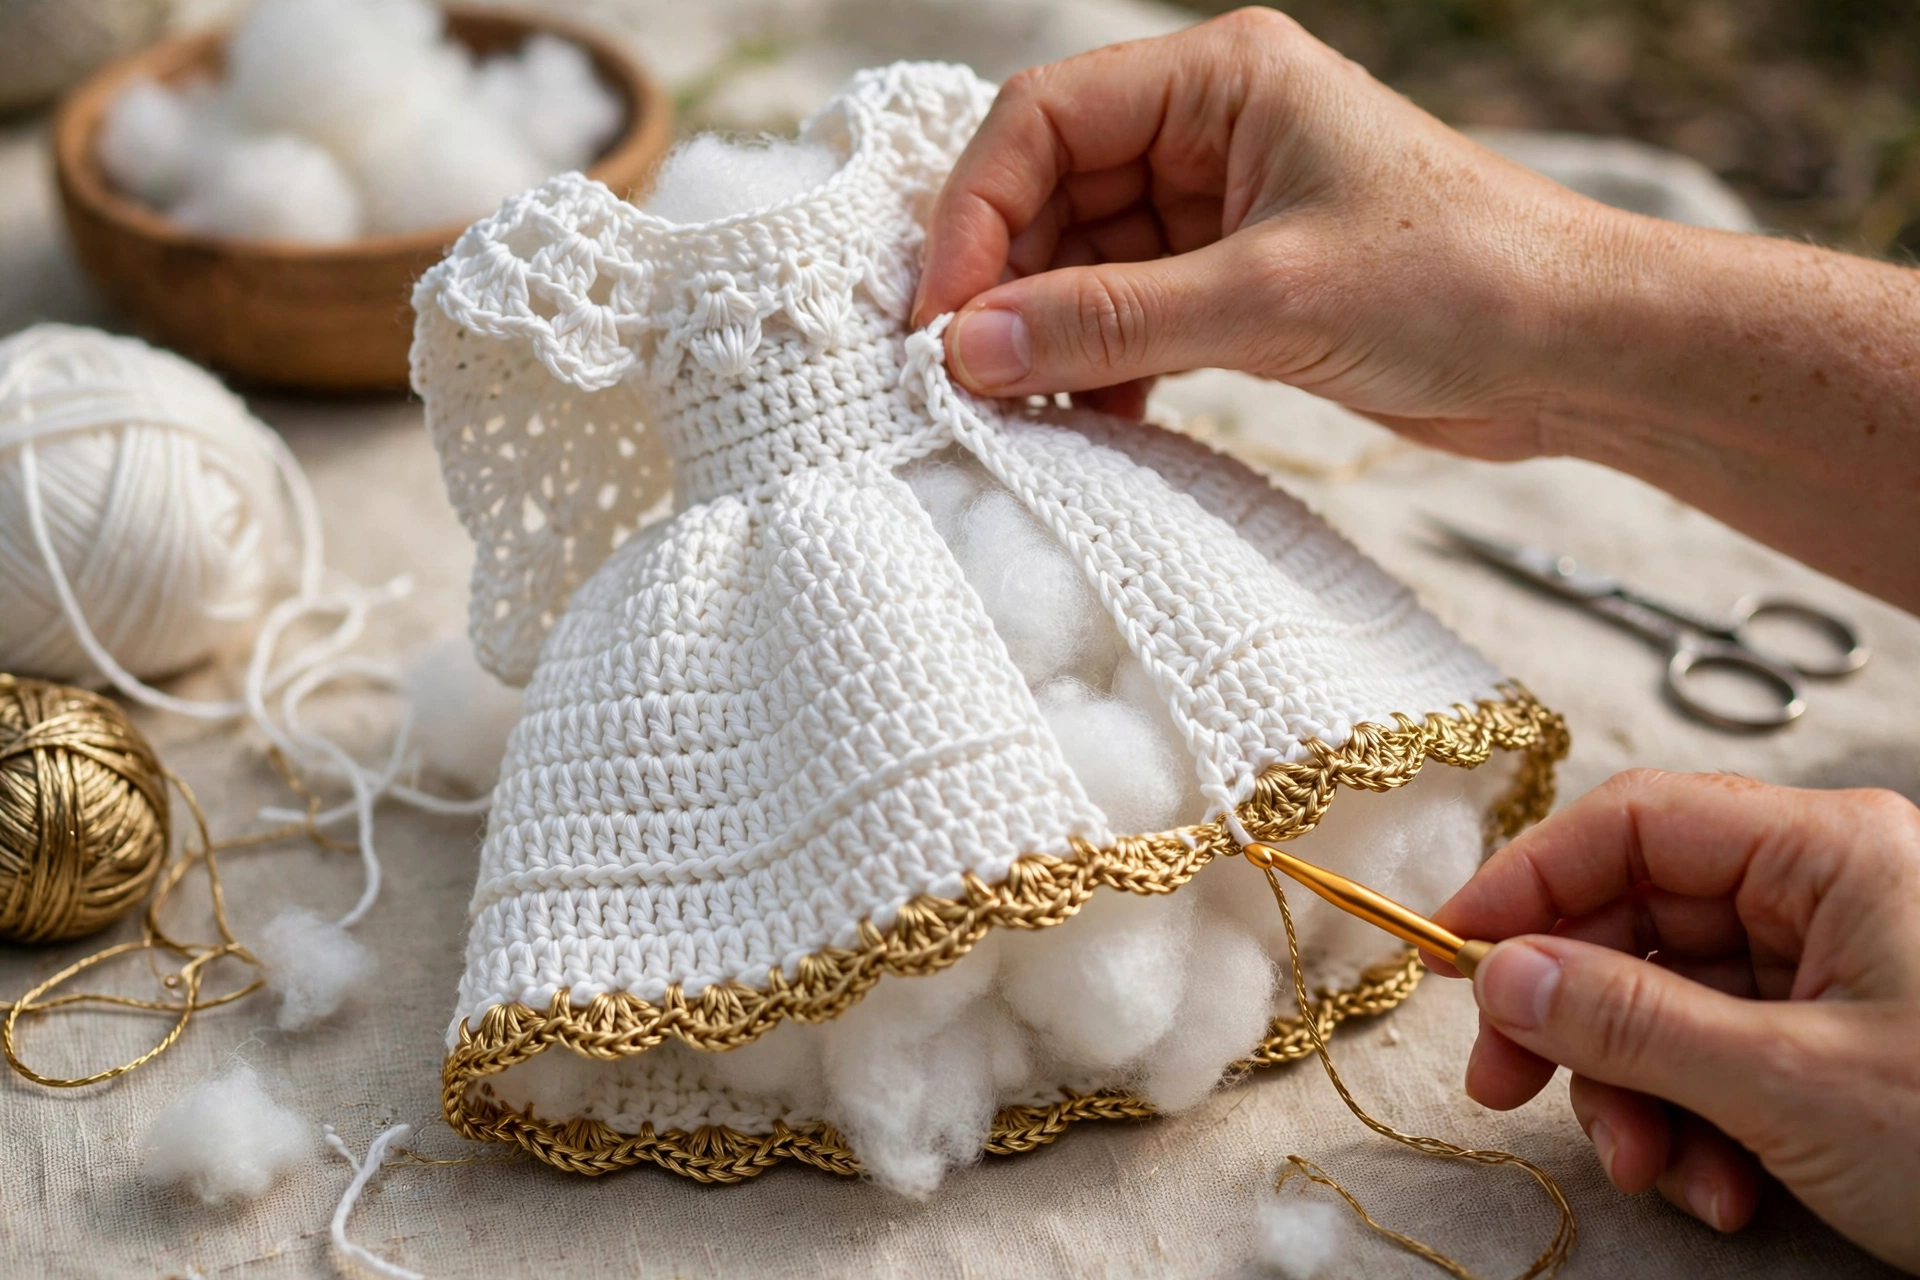
Round 15: (7 sc, dec) rep 6. [48]. Round 16: Sc each st. [48]. Round 17: (6 sc, dec) rep 6. [42]. Round 18: Sc each st. [42]. Round 19: (5 sc, dec) rep 6. [36]. Round 20: Sc each st. [36]. Round 21: (4 sc, dec) rep 6. [30]. Round 22: Sc each st. [30]. Round 23: (3 sc, dec) rep 6. [24]. Round 24: Sc each st. [24]. Fasten off, leaving long tail for sewing. Stuff dress firmly at base and more lightly toward top, so bell shape holds but top stays soft enough to sew head over it. Set aside. Dress Hem Trim (optional, gold): Join gold yarn with sl st in any free front loop left from Round 9 — loops left free when Round 10 worked in back loops only. Work around hem: ch 3, sl st in next front loop; rep around full round, working one picot into each front loop. Sl st to first sl st to join, fasten off, weave ends. Waist Sash (optional): With gold or white yarn, ch 60. Fasten off. Wrap chain around waist at about Round 21, cross at back, bring ends to front, tie small bow, trim ends evenly.
Step 3: Head — Round Head, Eyes and Smile
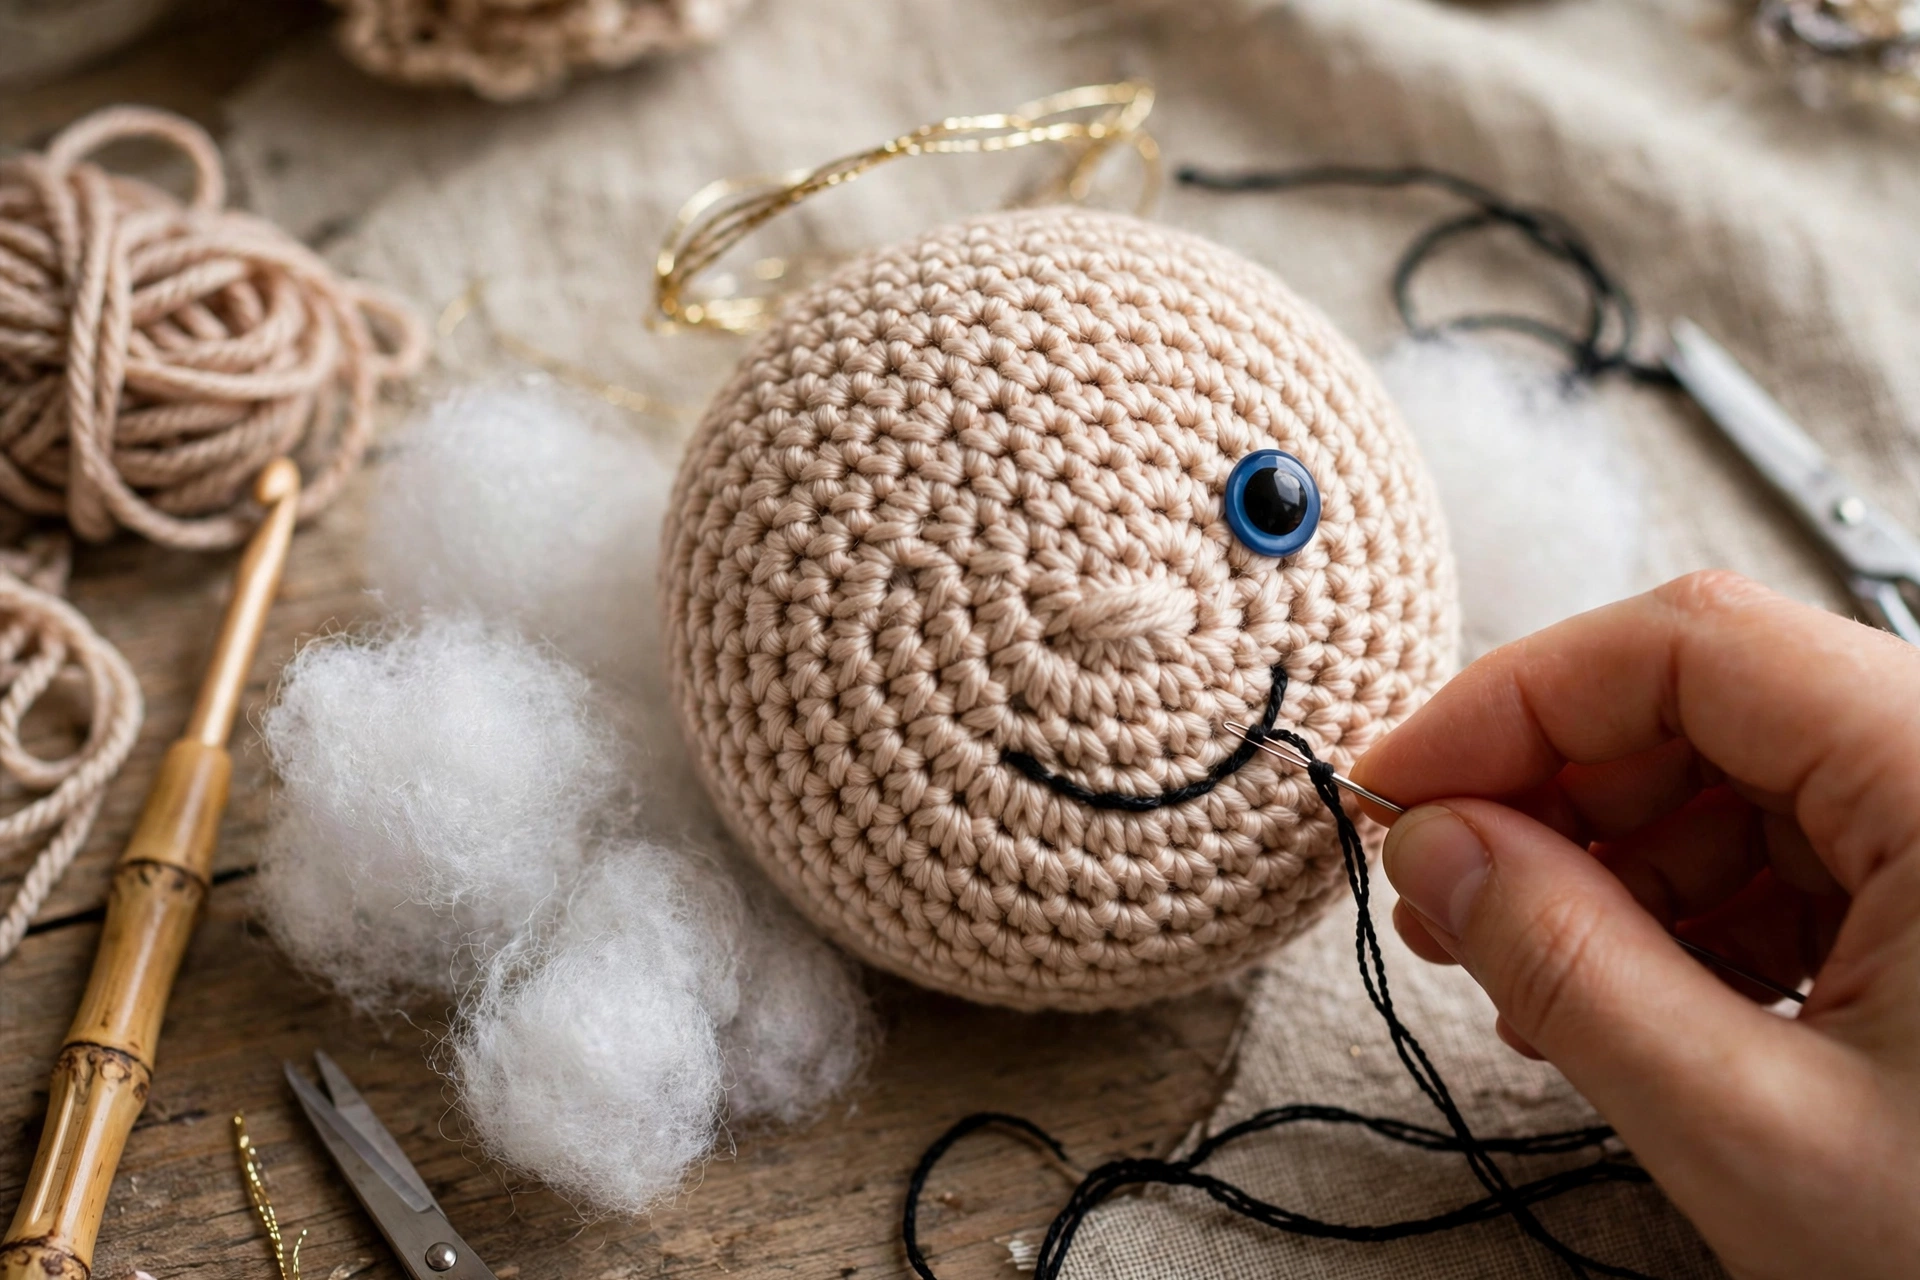
Worked in rounds, skin-tone yarn. Round 1: 6 sc in MR. [6]. Round 2: Inc each st. [12]. Round 3: (1 sc, inc) rep 6. [18]. Round 4: (2 sc, inc) rep 6. [24]. Round 5: (3 sc, inc) rep 6. [30]. Round 6: (4 sc, inc) rep 6. [36]. Round 7: (5 sc, inc) rep 6. [42]. Rounds 8–13: Sc each st. [42]. Round 14: (5 sc, dec) rep 6. [36]. Round 15: (4 sc, dec) rep 6. [30]. Round 16: (3 sc, dec) rep 6. [24]. Round 17: (2 sc, dec) rep 6. [18]. Pause here to place face before opening gets too small. Insert safety eyes between Rounds 10 and 11, about 6 stitches apart, centre of face between them. If embroidering eyes instead, mark positions now and embroider after stuffing. Stuff head firmly, shaping into smooth round ball. Round 18: (1 sc, dec) rep 6. [12]. Round 19: Dec 6 times. [6]. Fasten off, thread tail through remaining 6 stitches, pull closed, weave end. Face Details: With black embroidery thread, embroider small gentle smile centred below and between eyes, about two rows below eyes. If like, add tiny stitch or touch of blush on each cheek, about one stitch out from each eye.
Step 4: Hair Cap and Curls
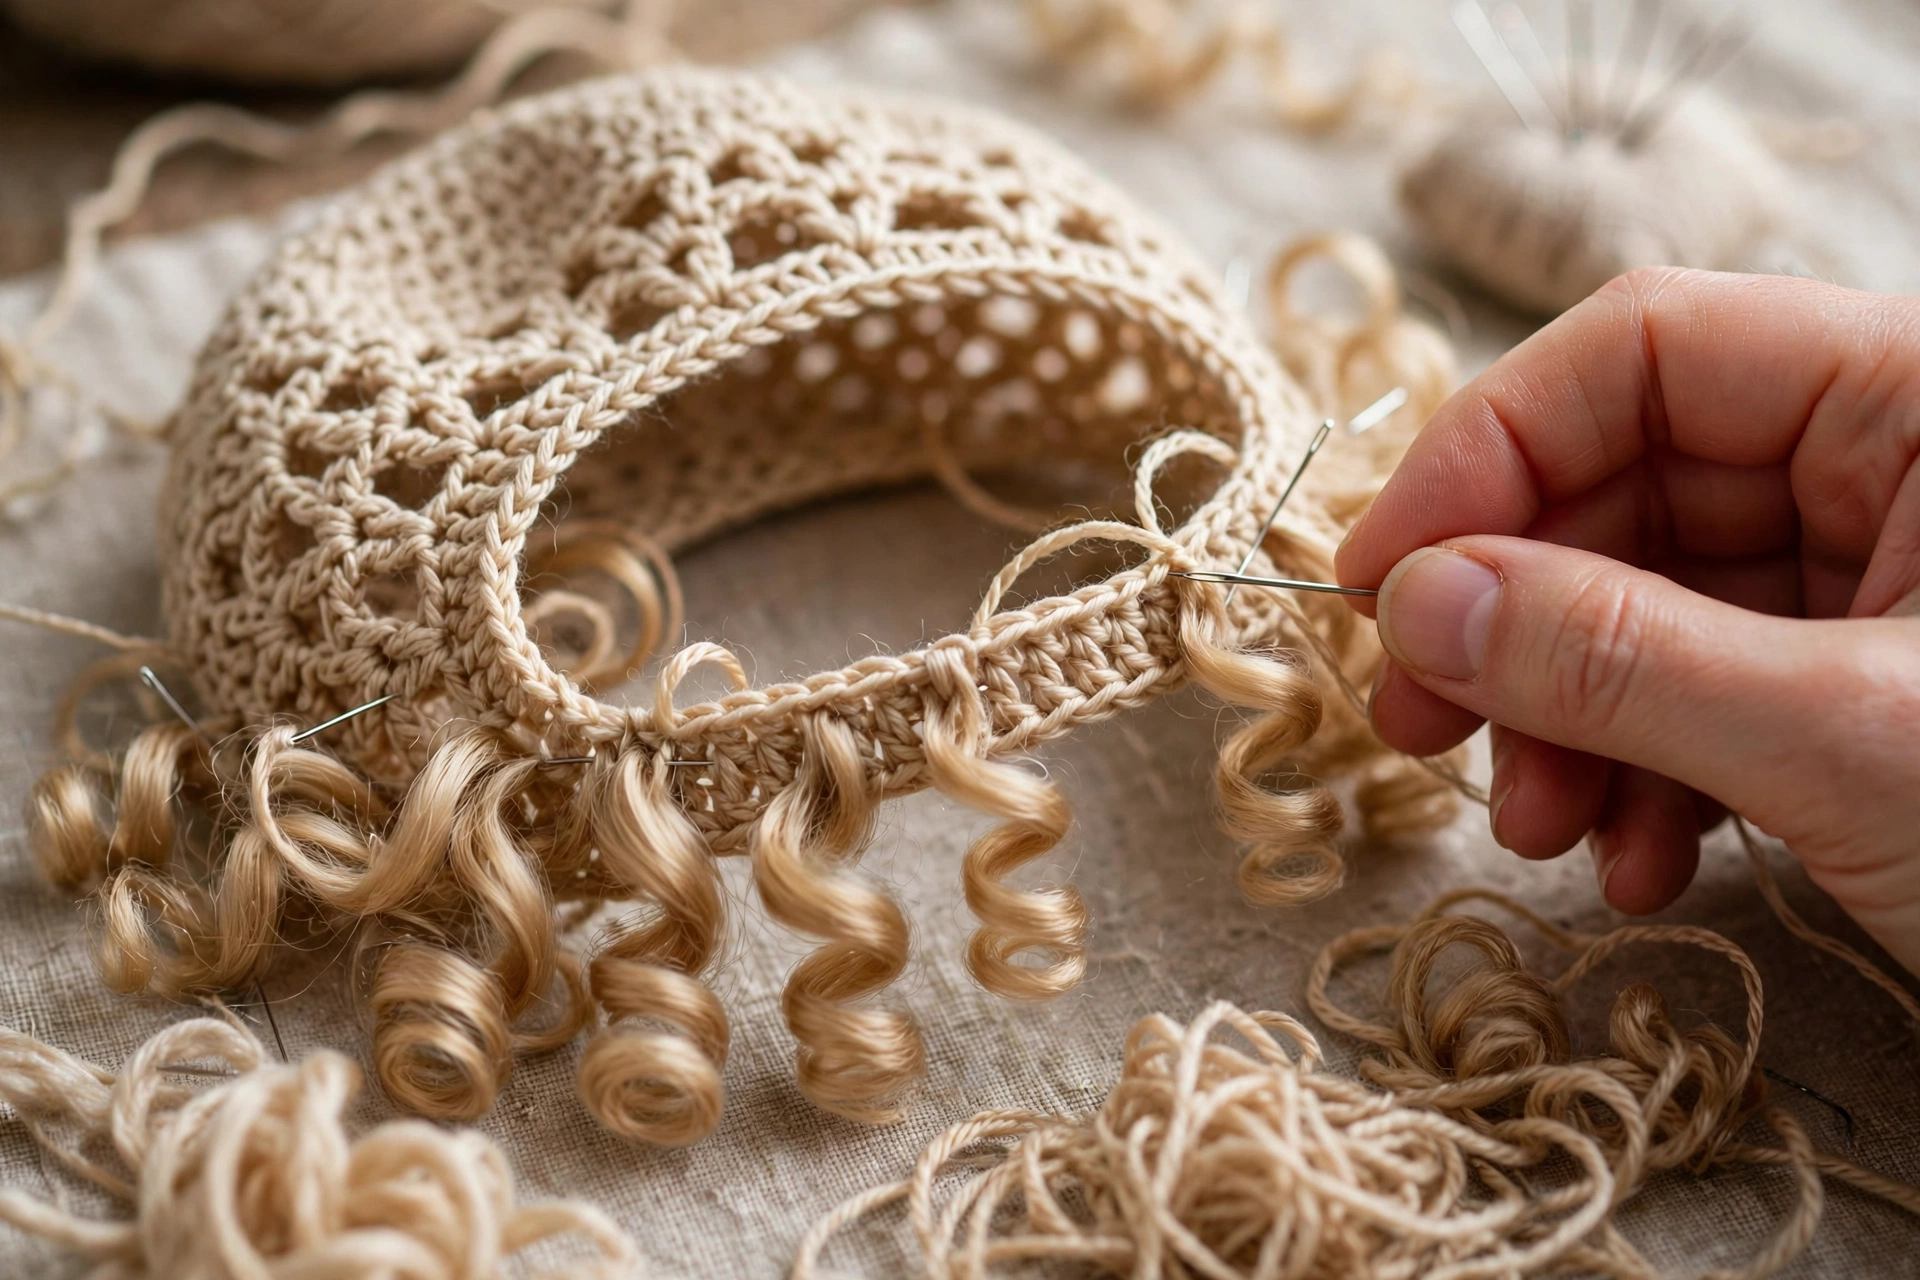
Worked in rounds, hair colour. Round 1: 6 sc in MR. [6]. Round 2: Inc each st. [12]. Round 3: (1 sc, inc) rep 6. [18]. Round 4: (2 sc, inc) rep 6. [24]. Round 5: (3 sc, inc) rep 6. [30]. Round 6: (4 sc, inc) rep 6. [36]. Round 7: (5 sc, inc) rep 6. [42]. Rounds 8–9: Sc each st. [42]. Fasten off, leaving long tail for sewing. Hair Curls (make 6): Ch 12. Starting in 2nd ch from hook, work 2 sc in each of next 11 ch. [22 sc per curl]. Fasten off, leaving tail for sewing. Piece will curl naturally. Sew three curls to each side of hair cap, near lower edge, so they frame face.
Step 5: Arms (Make 2)
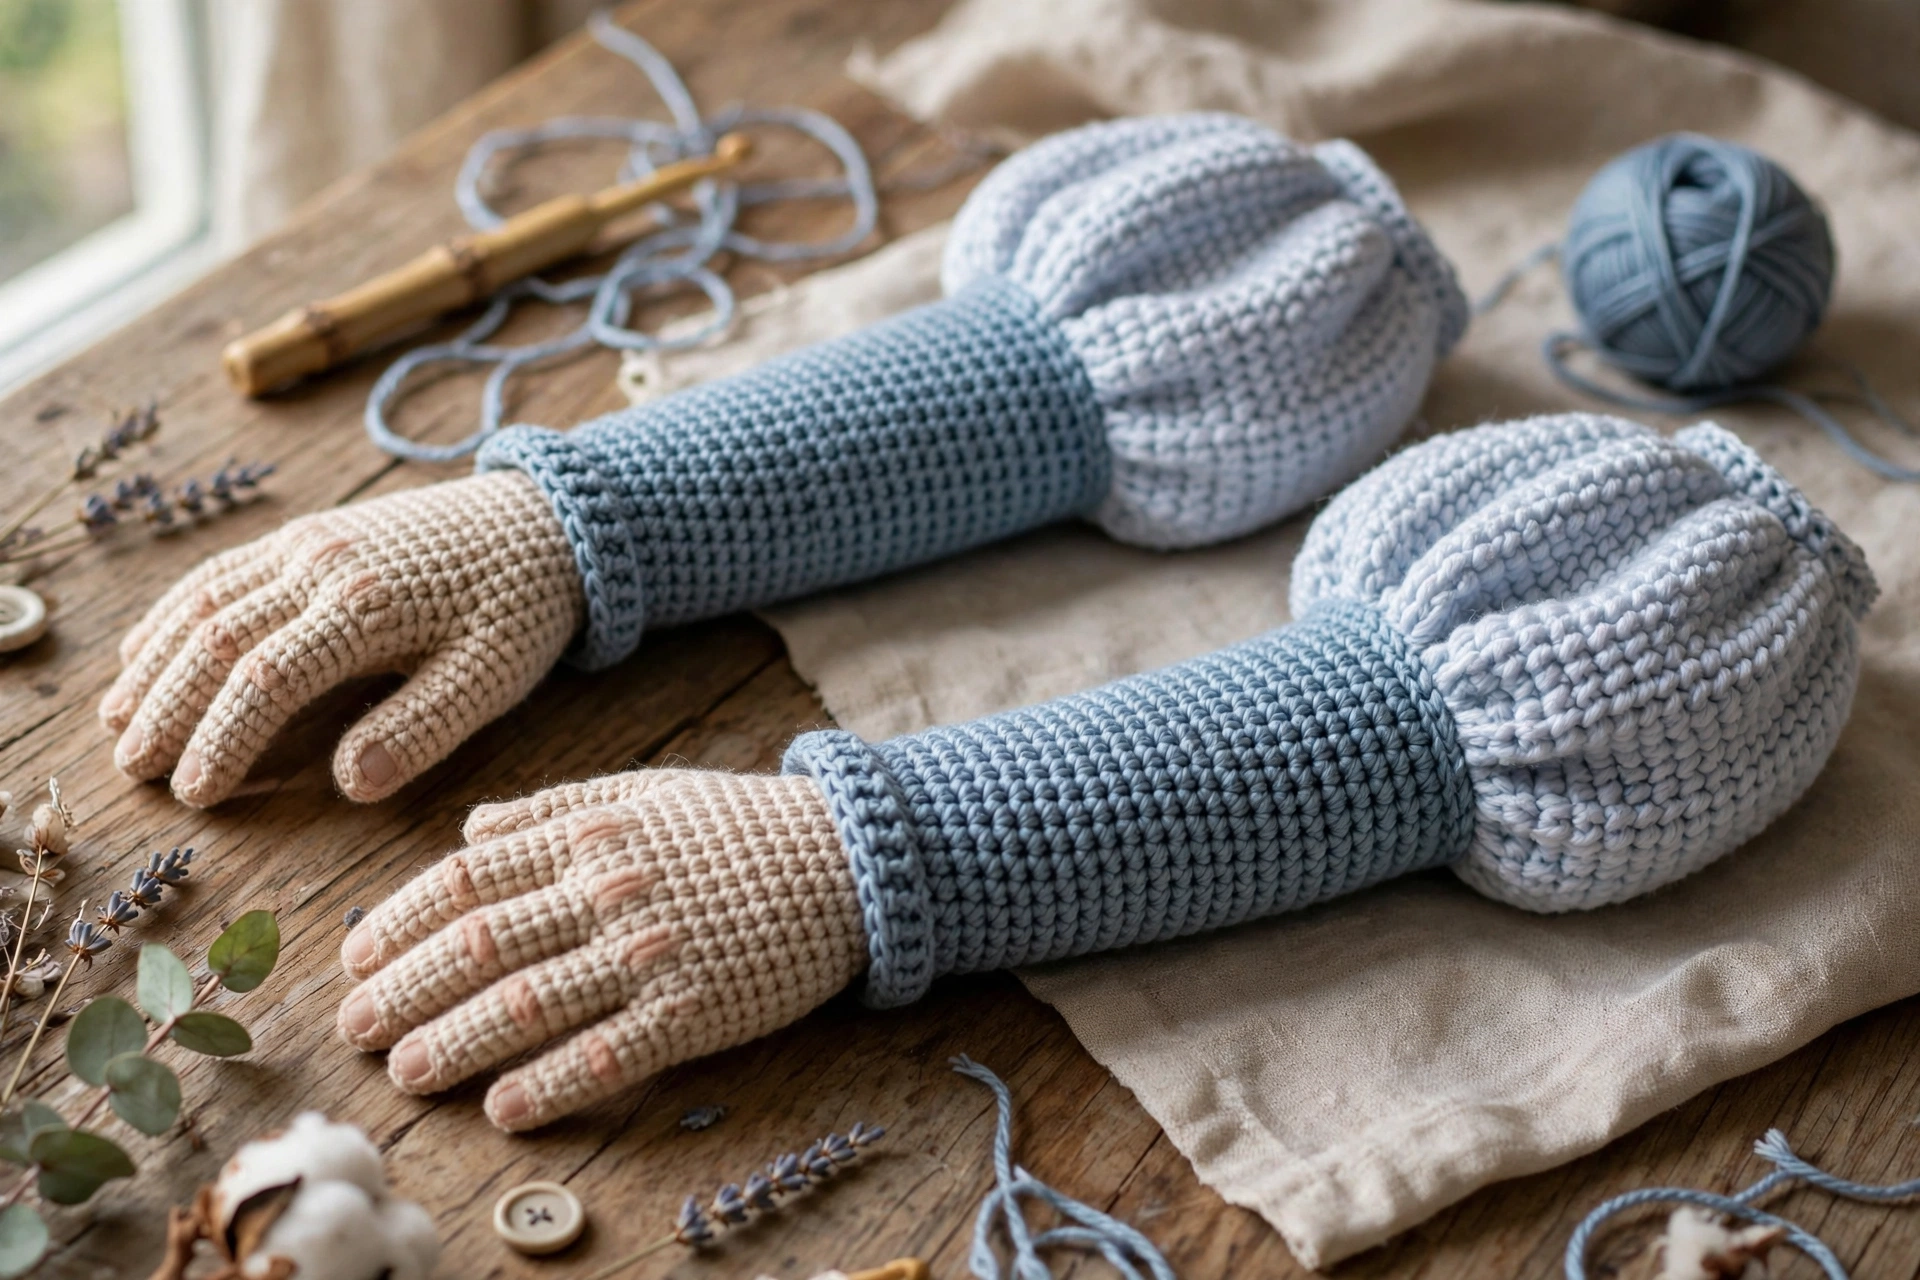
Start in skin-tone yarn. Round 1: 6 sc in MR. [6]. Round 2: (1 sc, inc) rep 3. [9]. Rounds 3–4: Sc each st. [9]. Change to main dress colour for sleeve; do not cut skin-tone yarn until colour change complete; carry new colour through last stitch of Round 4. Rounds 5–9: Sc each st. [9]. Round 10: (1 sc, dec) rep 3. [6]. Fasten off, leaving long tail for sewing. Stuff very lightly — just enough to keep arm rounded, not stiff — then flatten top of arm and sew opening closed with tail.
Step 6: Wings (Make 2)
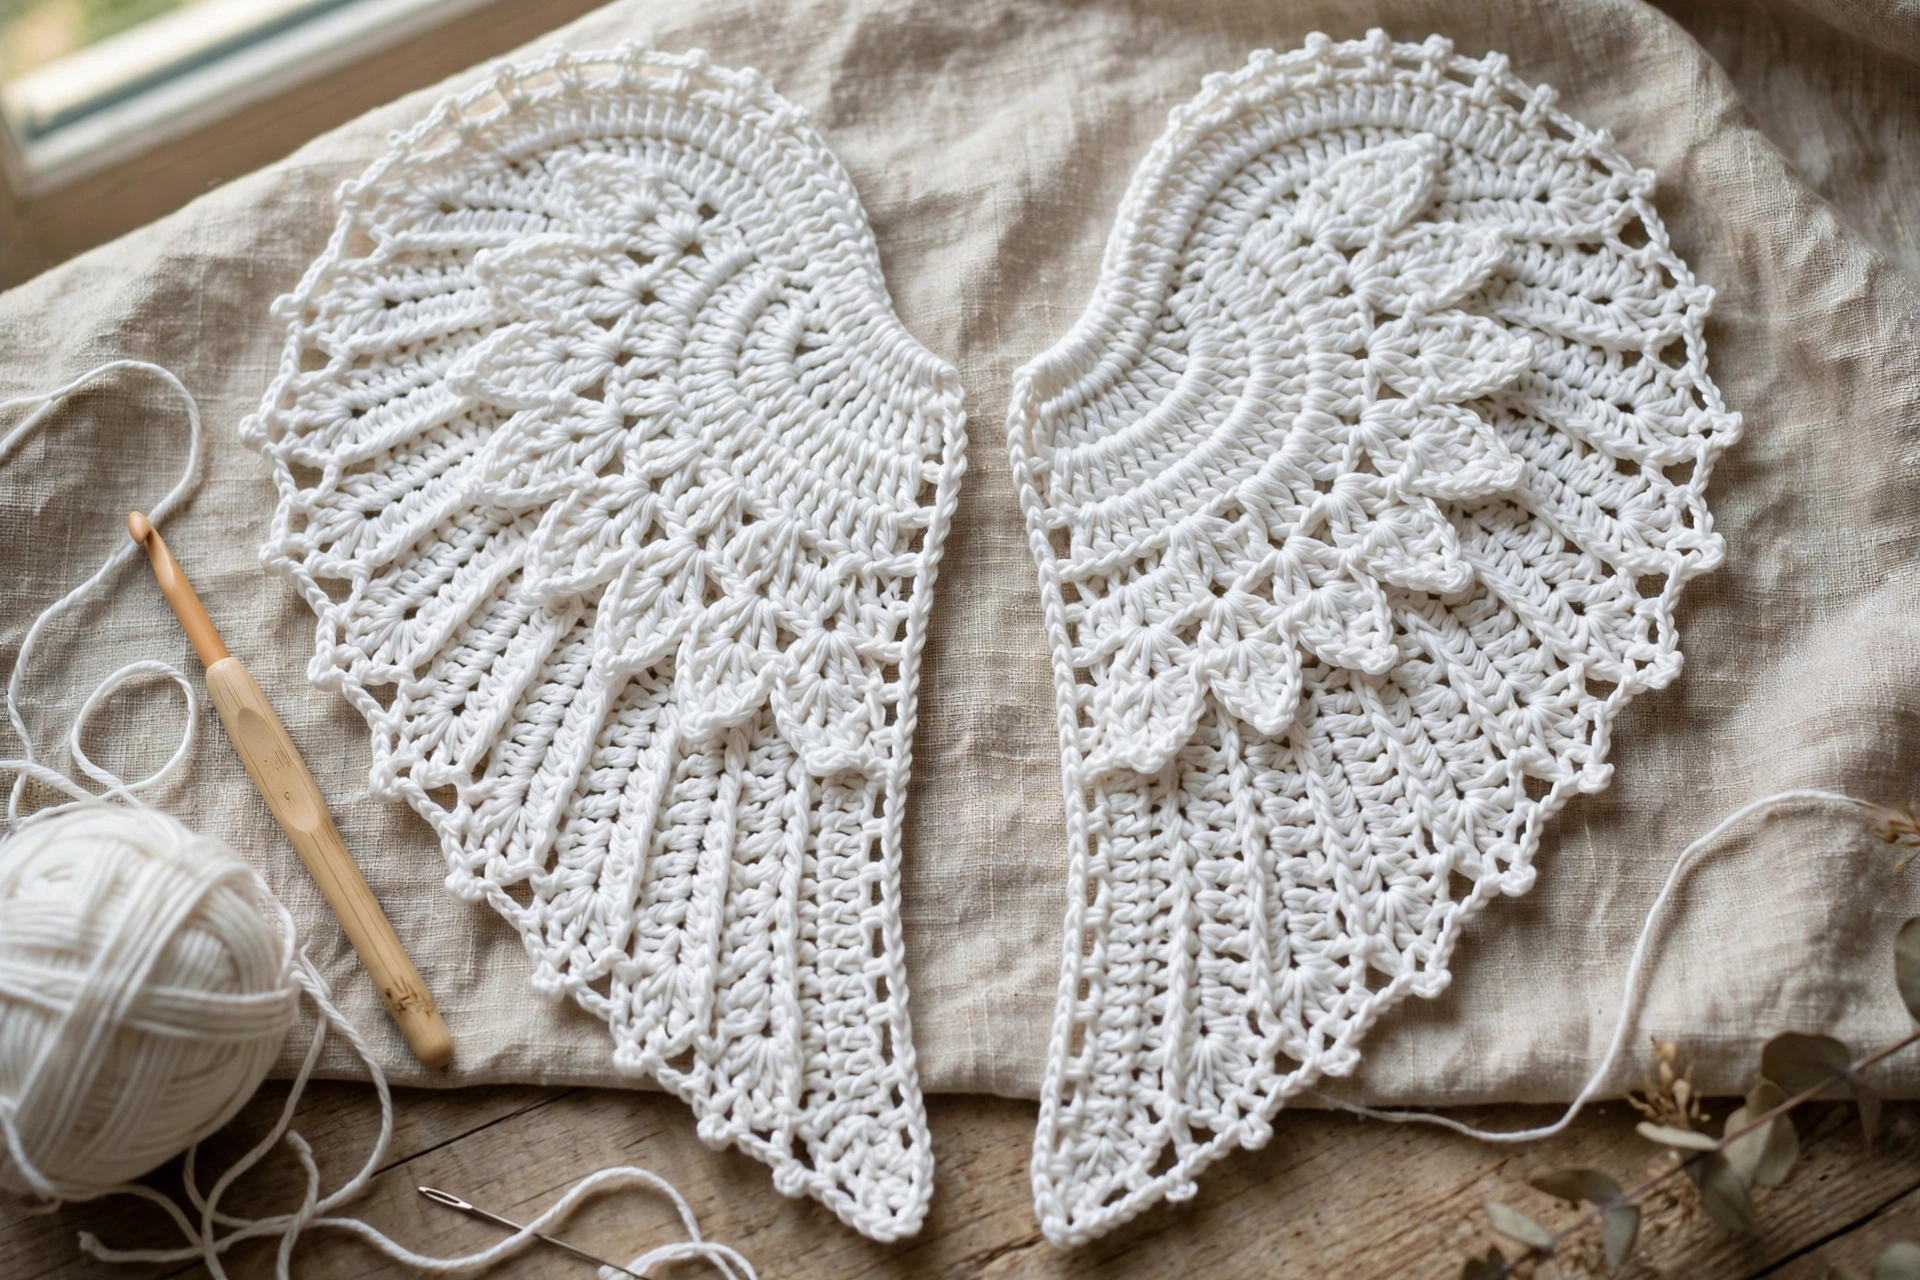
Worked in flat rows, white or cream yarn. Turn at end of each row. Row 1: Ch 19. Sc in 2nd ch from hook and each ch across. [18]. Row 2: Ch 1, turn, sc each st. [18]. Row 3: Ch 1, turn, dec, sc next 14, dec. [16]. Row 4: Ch 1, turn, sc each st. [16]. Row 5: Ch 1, turn, dec, sc next 12, dec. [14]. Row 6: Ch 1, turn, sc each st. [14]. Row 7: Ch 1, turn, dec, sc next 10, dec. [12]. Row 8: Ch 1, turn, sc each st. [12]. Row 9: Ch 1, turn, dec, sc next 8, dec. [10]. Row 10: Ch 1, turn, sc each st, working picot after each sc as follows: sc in next st, ch 2, sl st in first ch of ch-2 just made. [10 sc, plus picots]. Fasten off, leaving long tail for sewing. Wide end is Row 1, sewn to back of angel; narrow, picot end is wing tip. Optional feather lines: with tapestry needle and length of white yarn, work two straight surface slip stitches lengthwise down each wing, following rows, to suggest feathers; do not pull tightly.
Step 7: Halo and Support
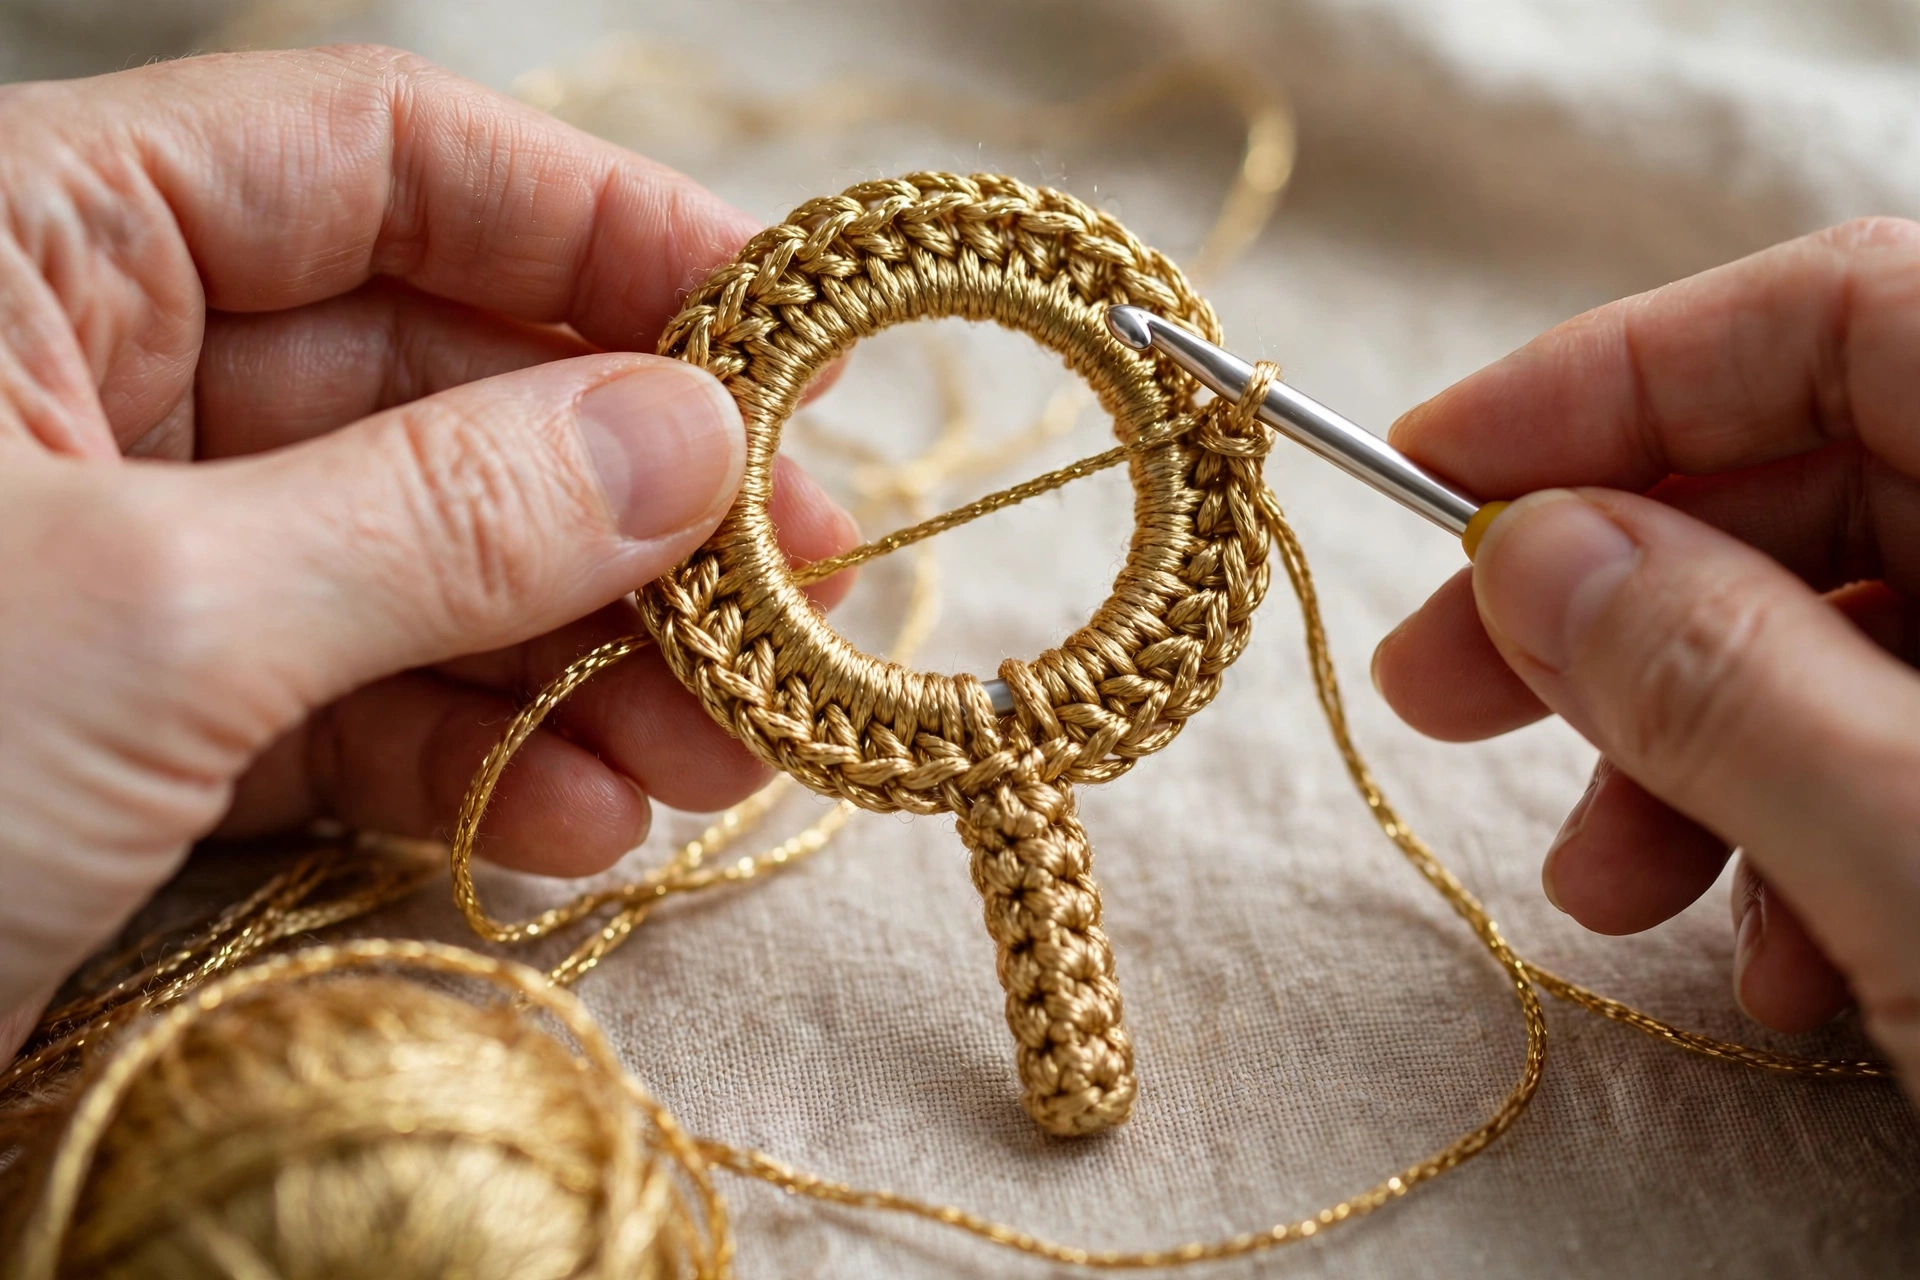
Worked in rounds, gold yarn. Ch 28. Join with sl st to first ch to form ring, taking care not to twist chain. Round 1: Sc each ch around. [28]. Round 2: Sc each st around. [28]. Sl st to first sc of Round 2, fasten off, weave ends. Gently shape ring into neat circle. Halo Support: Ch 8. Sc in 2nd ch from hook and each ch across. [7]. Fasten off, leaving tail at each end for sewing. Short stem holds halo above head.
Finishing and Assembly
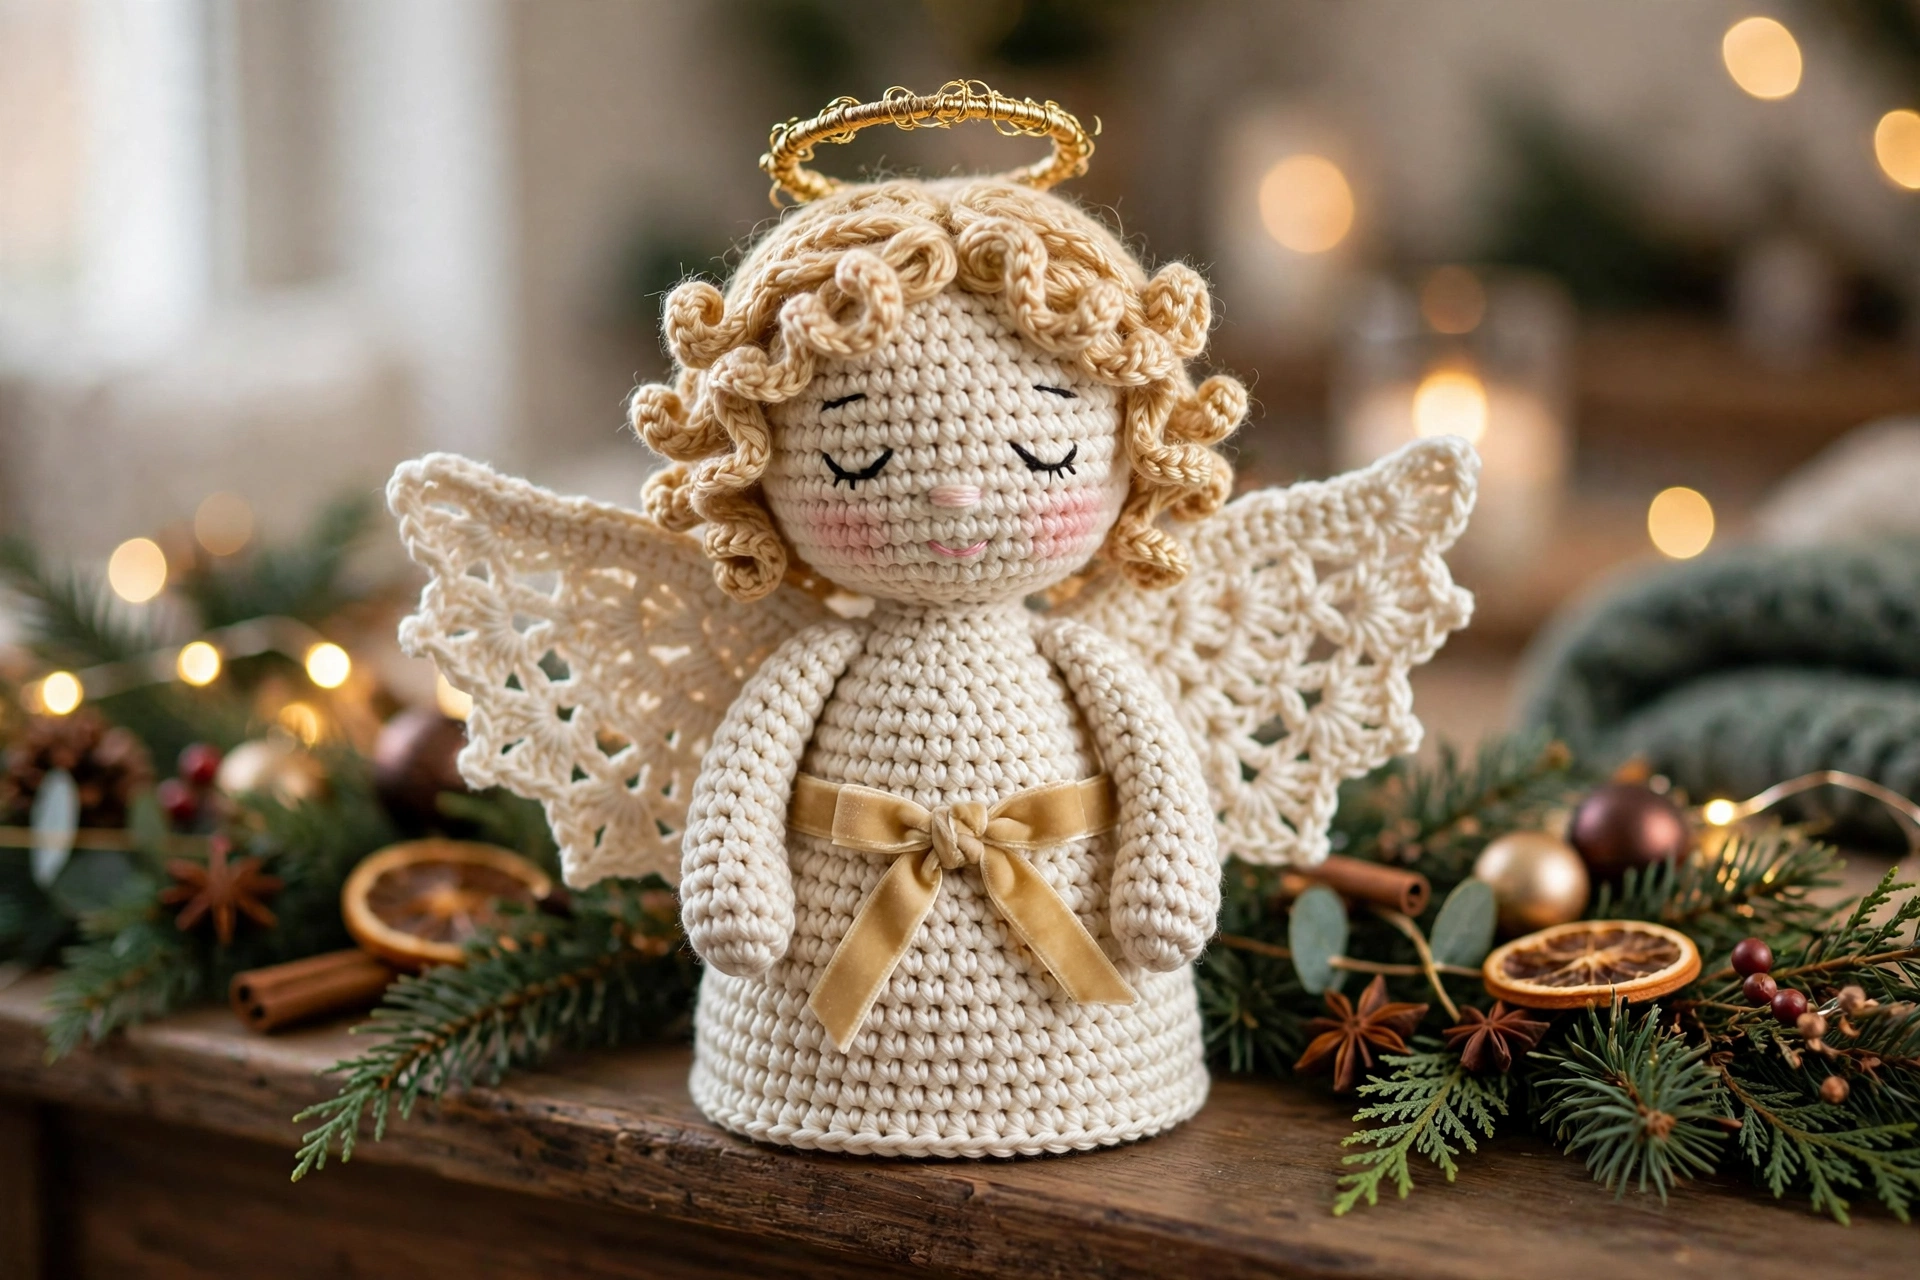
Work in order, pinning each piece before sew, checking angel from front and side. 1. Head to dress: Sew head onto top opening of dress, covering Round 24 opening completely. Head should sit centred on dress, with face forward. Sew around join firmly, checking head does not wobble. 2. Hair cap: Place cap on head, slightly back from face, so lower edge sits just above eyes. Sew around lower edge, easing cap to fit head. Sew each curl at top end only, so curls hang and move slightly. Place three curls on each side of cap, framing face. 3. Arms: Sew arms to sides of dress at about Round 22 of dress, angled slightly downward and forward. If prefer prayer position, bring arms together in front of body, stitch hands together lightly, then sew shoulders in place. Arms should look balanced from front. 4. Wings: Sew wings to back of angel. Wide Row 1 ends sit against upper back, just below head, with narrow picot ends as wing tips pointing outward and slightly upward. Wings should overlap slightly in centre of back. Sew along wide end and a little way down inner edge of each wing, so wings stand away from body at tips rather than lying flat. 5. Halo: Sew one end of support stem to top-back of head, just behind hair cap. Sew other end to back of halo ring. Halo should sit centred above head, tilted very slightly forward, so visible from front. Adjust angle before final stitches. 6. Final check: Weave in all ends securely on inside or back of pieces, where they will not show. Trim sash if made, so bow sits neatly at front waist. Reshape dress by smoothing bell skirt, adjust head tilt, spread wings evenly, and centre halo. If angel leans, add little more stuffing to base of dress and press base flat on table until stands steadily.
Tips
Keep tension even on dress — uneven tension shows most on long straight rounds of skirt, work at relaxed, steady pace. Stuff in small pieces — push small amounts of fibre in at time, especially into head, so no lumps or thin spots; use blunt end of hook to reach base of dress. Safety eyes or embroidered eyes? Safety eyes give clear, neat face and are quick; embroidered eyes are safer choice if angel for young child and gives softer look. Add tree-topper loop — if plan to use angel on top of tree, crochet small loop or sew ribbon loop to back of head before attaching halo, so loop sits hidden behind halo. Try colour variations — dress in soft red, green, or pale gold still reads as Christmas angel; keep hair and halo colours contrasting with dress so face and halo stand out. Block wings lightly — if wings curl, press very lightly with steam or damp cloth, then lay flat to dry, so wings hold shape without going stiff.
FAQ
Is angel suitable for beginners? Yes, if comfortable with single crochet, increases, decreases in rounds, and simple seaming. Hair curls and picot wing edge are only slightly fiddly parts, and both forgiving. How long does angel take to make? Most crocheters finish in a few relaxed evenings — dress and head are quickest, wings and hair curls take little longer because small and repeated. Can I use different yarn weight? Yes, but finished size will change. Chunky yarn will make larger, softer angel, DK yarn smaller, neater one. Keep hook size slightly smaller than yarn label suggests, so stitches stay firm and stuffing does not show. Will angel stand on its own? Yes, when dress stuffed firmly at base and base pressed flat. If leans, add stuffing to base and reshape. If used as tree topper, add loop or place over top branch for support. Can I make angel without safety eyes? Yes, embroider eyes with black thread, using small straight stitches or French knots. Mark eye positions before sewing head on, so face stays centred. How do I clean finished angel? Spot-clean with damp cloth and mild soap, reshape while slightly damp, air-dry flat. Avoid machine washing, which can flatten wings and loosen halo support.