
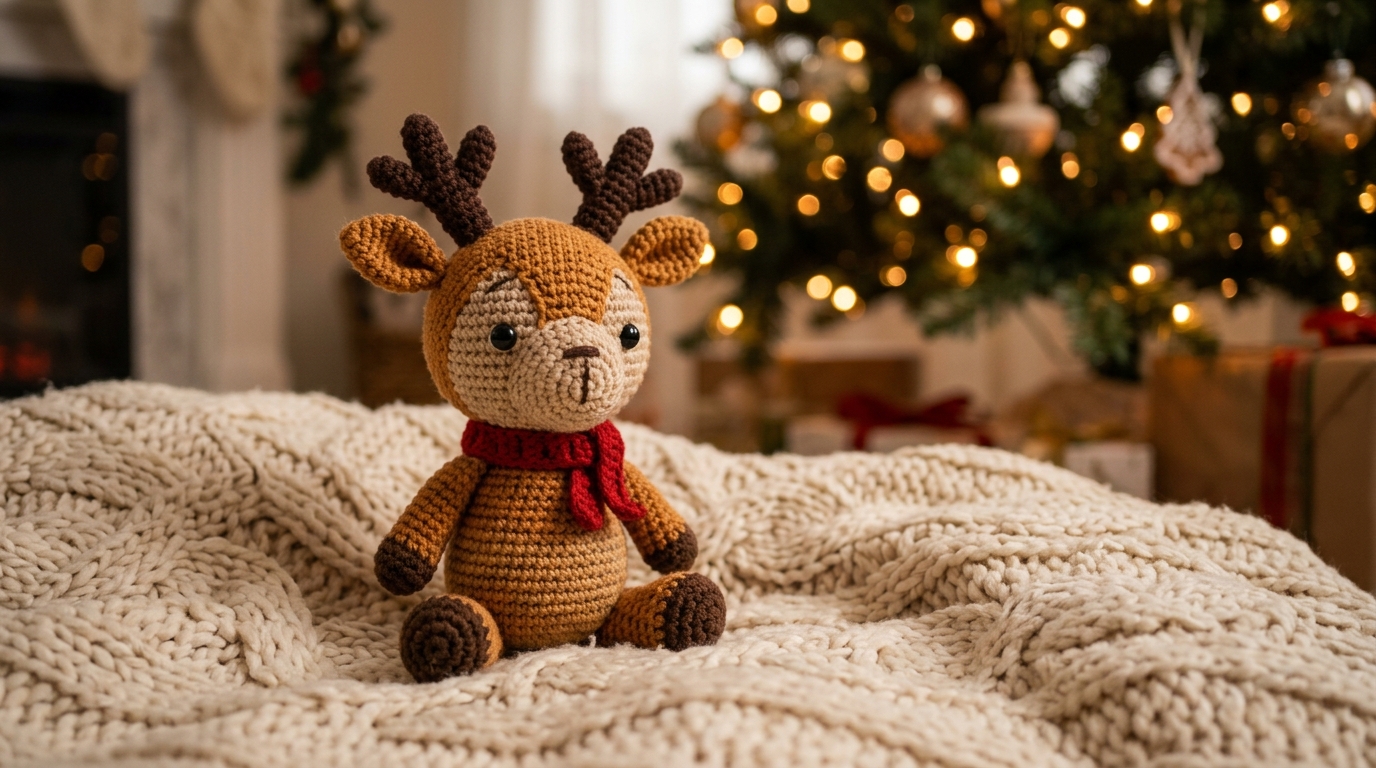
Christmas Amigurumi Reindeer: A Complete Crochet Pattern
A cuddly, chibi-style reindeer with cream hooves, a button-round red nose, tan antlers and a striped holiday scarf. Beginner-friendly, worked entirely in continuous spiral rounds.
Introduction
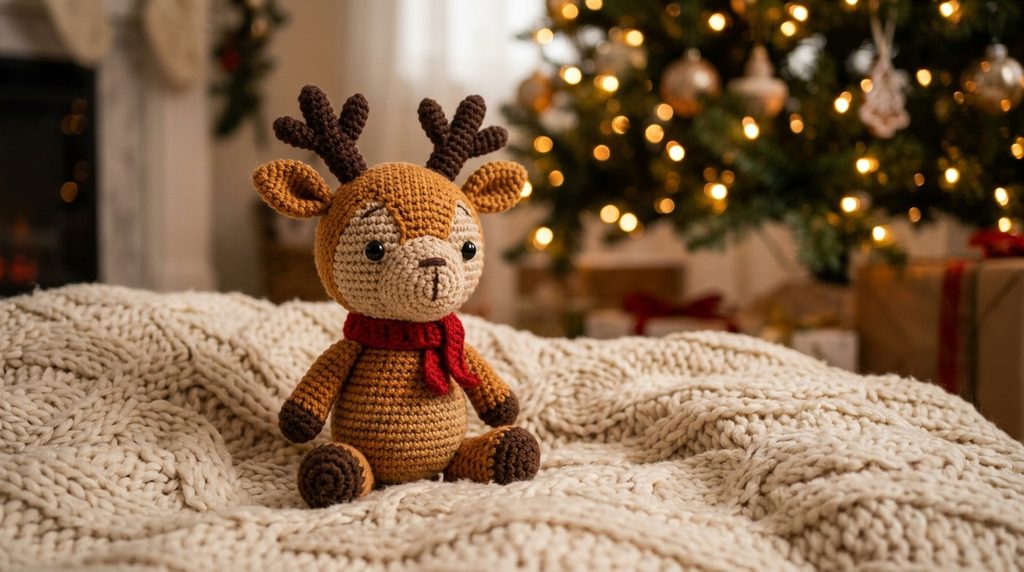
Few handmade gifts say “Christmas” like a little crocheted reindeer. This amigurumi is designed to be quick, forgiving and charming: a big round head, a small pear-shaped body, stubby limbs and a bright scarf. Every part is made from simple shapes (spheres, tubes and cones), so if you know how to crochet a magic ring, single crochet, increase and decrease, you can make it in one or two evenings.
Use it as a tree ornament (skip the legs and add a loop), a mantel decoration, a stocking-filler or a gift for someone special. This article walks you through materials, gauge, every body part in detail, assembly, finishing and common troubleshooting.
Finished Size
Approximately 18 cm (7 in) tall including antlers, and about 8 cm (3 in) wide at the head, when made with worsted-weight yarn and a 3.0 mm hook. Use thinner yarn and a smaller hook for a mini version, or bulkier yarn for a larger one.
Materials
Yarn (worsted weight / Aran, cotton or acrylic; approximate amounts)
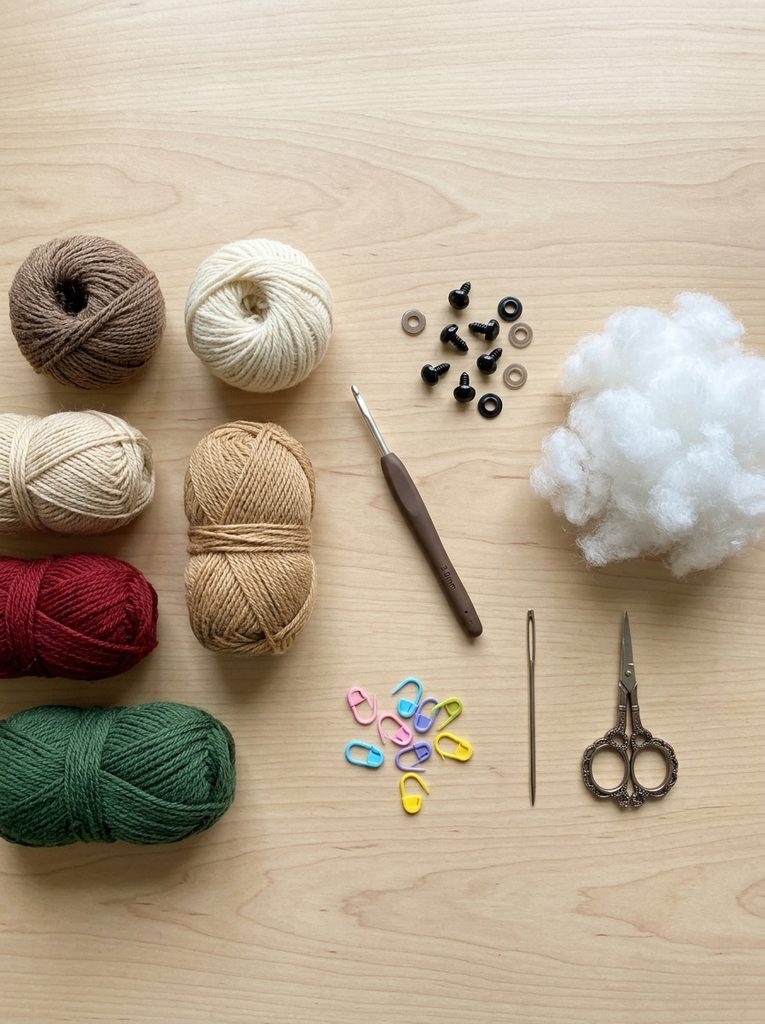
- Brown (main colour): about 50 g (90 m)
- Cream or beige: about 20 g (35 m) – hooves, muzzle, belly, tail
- Tan or light brown: about 10 g (18 m) – antlers
- Red: about 10 g (18 m) – nose and scarf
- Green: about 5 g (9 m) – scarf stripes
- Black embroidery thread or scrap yarn – mouth
Tools
- 3.0 mm crochet hook (use a hook 1–1.5 mm smaller than the yarn label suggests so the fabric is tight and the stuffing does not show)
- A pair of 8 mm black safety eyes (or black yarn/thread for embroidered eyes if the toy is for a child under 3)
- Polyester fibre-fill
- Stitch marker
- Tapestry (yarn) needle
- Sharp scissors
- Pins (optional, for positioning parts before sewing)
- Pink blush or pink embroidery thread for cheeks (optional)
- Small jingle bell (optional, only for toys not meant for young children)
Abbreviations (US terms)
- MR – magic ring (magic circle)
- sc – single crochet
- inc – increase: 2 sc in the same stitch
- dec – invisible decrease: insert hook into the front loop only of the next 2 stitches, yarn over, pull through both loops, yarn over, pull through the remaining 2 loops
- BLO – back loop only
- ch – chain
- sl st – slip stitch
- st(s) – stitch(es)
- FO – fasten off
- ( ) x N – repeat the instructions inside the brackets N times
- [ ] – number of stitches at the end of the round
General Notes
- Everything except the scarf is worked in a continuous spiral. Do not join rounds and do not turn. Mark the first stitch of every round with a stitch marker and move it up as you go.
- Crochet tightly. Stuffing must not peek through the stitches.
- Stuff each piece as you go, before the opening becomes too small.
- Leave a long tail (about 30 cm / 12 in) when fastening off any piece you will sew on.
- Count your stitches at the end of each round. Mistakes caught early are easy to fix.
Pattern
1. Head (brown)
The head is a large sphere with a slightly flattened base.
- R1: MR, 6 sc [6]
- R2: inc x 6 [12]
- R3: (1 sc, inc) x 6 [18]
- R4: (2 sc, inc) x 6 [24]
- R5: (3 sc, inc) x 6 [30]
- R6: (4 sc, inc) x 6 [36]
- R7: (5 sc, inc) x 6 [42]
- R8 to R15: sc in each st around [42] (8 rounds)
Eyes: Insert the safety eyes between R10 and R11, about 8 stitches apart (leave 8 stitches between them). Secure the washers on the inside now, before you close up the head.
- R16: (5 sc, dec) x 6 [36]
- R17: (4 sc, dec) x 6 [30]
Start stuffing firmly.
- R18: (3 sc, dec) x 6 [24]
- R19: (2 sc, dec) x 6 [18]
Add more stuffing to make the head round and full.
- R20: (1 sc, dec) x 6 [12]
- R21: dec x 6 [6]
FO. Thread the tail through the front loops of the remaining 6 stitches, pull tight to close, weave in the end.
2. Muzzle (cream)
- R1: MR, 6 sc [6]
- R2: inc x 6 [12]
- R3: (1 sc, inc) x 6 [18]
- R4 to R5: sc in each st around [18] (2 rounds)
FO leaving a long tail. Stuff lightly so it is gently rounded, not hard.
3. Nose (red)
- R1: MR, 6 sc [6]
- R2: inc x 6 [12]
- R3: sc in each st around [12]
- R4: dec x 6 [6]
Stuff the ball firmly, FO leaving a tail, and close the hole with the tail.
4. Ears (make 2, brown)
The ears are small unstuffed cones. They are worked from the tip downward.
- R1: MR, 4 sc [4]
- R2: inc x 4 [8]
- R3: sc in each st around [8]
- R4: (1 sc, inc) x 4 [12]
- R5 to R6: sc in each st around [12]
FO leaving a long tail. Do not stuff. Flatten the opening so the cone becomes a flat triangle, ready for sewing.
Optional: Cut a small cream felt oval or embroider a short cream line inside each ear for a lighter inner ear.
5. Antlers (make 2 main beams and 4 tines, tan)
Main beam (make 2):
- R1: MR, 6 sc [6]
- R2 to R10: sc in each st around [6] (9 rounds)
FO leaving a long tail. Stuff lightly with small bits of fibre-fill (a pipe cleaner folded inside also works if the toy is for display only).
Tine (make 4):
- R1: MR, 5 sc [5]
- R2 to R5: sc in each st around [5] (4 rounds)
FO leaving a long tail. Stuff very lightly or leave unstuffed.
Joining tines to beam: Pin one tine to each beam about 3 rounds up from the open end and a second tine about 3 rounds above the first, on the same side of the beam, angled upward at roughly 45 degrees. Sew each tine on with small whip stitches using its tail. Repeat for the second antler (make it a mirror image so you have a left and a right).
6. Body (brown)
A small pear shape, narrower at the neck.
- R1: MR, 6 sc [6]
- R2: inc x 6 [12]
- R3: (1 sc, inc) x 6 [18]
- R4: (2 sc, inc) x 6 [24]
- R5: (3 sc, inc) x 6 [30]
- R6: (4 sc, inc) x 6 [36]
- R7 to R12: sc in each st around [36] (6 rounds)
- R13: (4 sc, dec) x 6 [30]
- R14: (3 sc, dec) x 6 [24]
- R15 to R17: sc in each st around [24] (3 rounds)
- R18: (2 sc, dec) x 6 [18]
Stuff the body firmly, adding stuffing in small pieces to get a smooth shape. FO leaving a long tail (do not close the hole; you will sew this opening to the head).
7. Belly Patch (cream)
- R1: MR, 6 sc [6]
- R2: inc x 6 [12]
- R3: (1 sc, inc) x 6 [18]
FO leaving a long tail. Sew onto the front of the body, centred, between R4 and R10.
8. Arms (make 2)
Start with cream for the hooves, then change to brown.
- R1: with cream, MR, 6 sc [6]
- R2: (1 sc, inc) x 3 [9]
- R3: sc in each st around [9] – change to brown in the last stitch (pull the brown loop through to finish the stitch)
- R4 to R10: with brown, sc in each st around [9] (7 rounds)
Stuff lightly (only up to about two-thirds of the arm so the top stays flat for sewing). FO leaving a long tail.
9. Legs (make 2)
Start with cream for the hooves, then change to brown.
- R1: with cream, MR, 6 sc [6]
- R2: inc x 6 [12]
- R3: (1 sc, inc) x 6 [18] – change to brown in the last stitch
- R4: with brown, BLO sc in each st around [18] (this creates a neat edge between the sole and the leg)
- R5 to R8: sc in each st around [18] (4 rounds)
- R9: (4 sc, dec) x 3 [15]
- R10 to R11: sc in each st around [15] (2 rounds)
Stuff firmly. FO leaving a long tail.
10. Tail (cream)
Work exactly as the nose, in cream:
- R1: MR, 6 sc [6]
- R2: inc x 6 [12]
- R3: sc in each st around [12]
- R4: dec x 6 [6]
Stuff, FO and close.
11. Scarf (red and green)
The scarf is worked flat, in rows.
- Foundation: with red, ch 41
- Row 1: sc in the 2nd ch from the hook and in each ch across, ch 1, turn [40]
- Row 2: sc in each st across, changing to green in the last stitch, ch 1, turn [40]
- Row 3: with green, sc in each st across, ch 1, turn [40]
- Row 4: sc in each st across [40]
FO and weave in the ends. (Optional: add short red fringe to each end by pulling 2 strands through the end stitches and knotting.)
For a bolder look, make the stripes wider by adding extra rows of each colour; just keep the stitch count the same.
Assembly
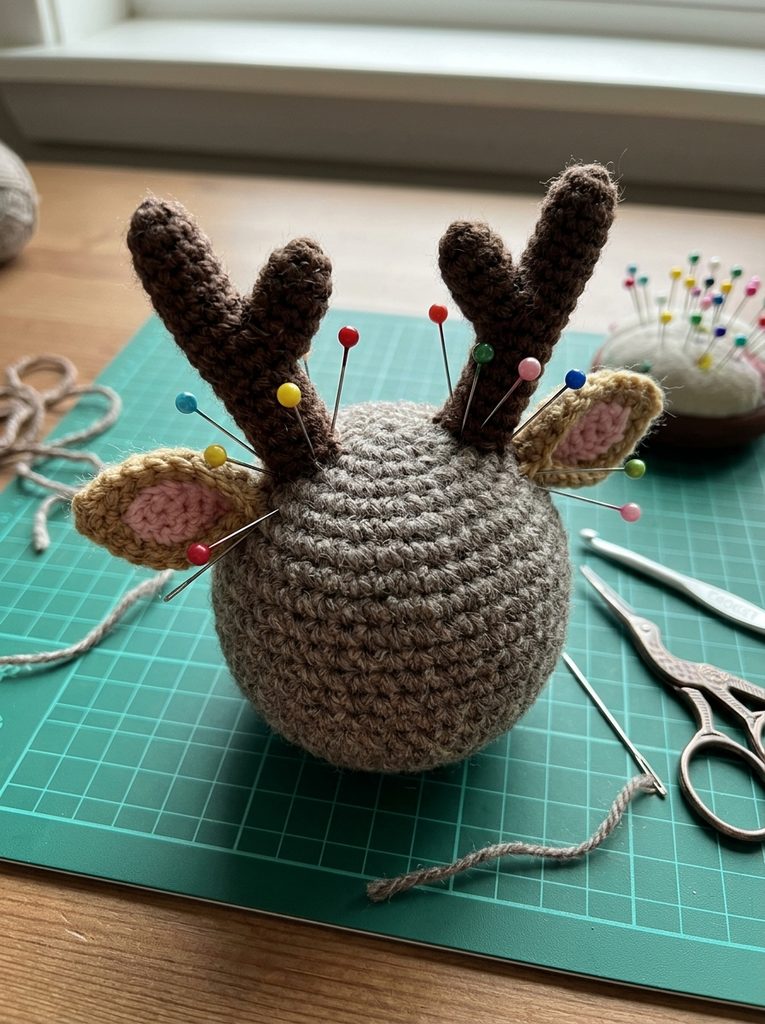
Use pins to check placement before sewing. Always sew with the yarn tails left from each piece, and use small, tight stitches through both pieces.
- Muzzle and nose. Pin the muzzle on the front of the head, centred below the eyes, covering about rounds 12 to 17. Sew all the way around, adding a little extra stuffing before you close the last stitches. Sew the red nose at the top of the muzzle, centred.
- Mouth. With black thread, embroider a short vertical line under the nose, then a small curve on each side to make a smile.
- Ears. Sew the ears at about rounds 6 to 7, on each side of the head, slightly angled outward. Attach the flat folded base firmly.
- Antlers. Sew an antler on each side of the top of the head, around rounds 4 to 5, about 3 stitches from the centre point. Angle the beams slightly outward so they form a V shape. Sew around the whole base.
- Body. Sew the belly patch to the front of the body. Then sew the body to the underside of the head, centred, whip stitching around the open 18-stitch edge.
- Arms. Sew the arms on each side of the body, about 2 to 3 rounds below the neck. Angle them slightly forward.
- Legs. Sew the open end of each leg to the bottom of the body, with a gap of 2 to 3 stitches between them, so that the reindeer sits steadily.
- Tail. Sew the tail ball to the back of the body, low down.
- Scarf. Wrap the scarf around the neck, one end shorter than the other, and sew a few discreet stitches at the back to hold it in place.
- Cheeks (optional). Brush a little pink blush onto the cheeks, or stitch two small pink embroidery stitches.
Weave in all remaining ends.
Tips for a Great Finish
- Invisible decreases. Working a decrease through the front loops only makes the shaping nearly invisible, which gives a much smoother surface.
- Round heads. Stuff the head more than you think you need to; a firm, round head is key to the cute look.
- Symmetry. Count rounds and stitches when sewing ears and antlers so both sides match.
- Colour changes. Complete the last stitch of a round in the new colour so the stripe line stays clean.
- Hiding yarn tails. Pull the tail through the toy before cutting it, so it disappears inside.
- Safety. For babies and toddlers, embroider the eyes and nose, omit the bell and make sure all parts are sewn on securely.
Variations
- Rudolph. Use a larger red nose and add a tiny white highlight with a French knot.
- Tree ornament. Skip the arms and legs, make the body slightly smaller, and sew a ribbon loop to the top of the head.
- Santa-hat reindeer. Make a small red cone with a cream brim and a pom-pom, and sew it between the antlers.
- Different sizes. With DK yarn and a 2.5 mm hook you will get a reindeer about 12 to 14 cm tall; with chunky yarn and a 4.5 mm hook it will be about 25 cm.
- Colour palettes. Try a white snow reindeer, a grey one, or a pastel version for a modern Nordic look.
Troubleshooting
My head looks flat or lopsided. Add more stuffing before the last 3 rounds and gently roll the head between your hands to shape it.
There are gaps between the stitches. Go down a hook size, and keep your yarn tension firm.
The antlers droop. Stuff them a little more firmly or insert a bent pipe cleaner (for display pieces only), and sew the base all the way around.
The reindeer will not sit up. Check that the legs are sewn level and the body is firmly stuffed. Adding a small handful of poly pellets in a fabric pouch inside the lower body helps (not for small children).
Care
Spot-clean with a damp cloth and mild soap. Air-dry away from direct heat. If you used acrylic yarn, avoid hot irons or radiators, which can melt the fibres.
Final Thoughts
This little reindeer is quick to make, easy to customise and sure to be loved. Make a whole team for the mantelpiece, or a single one for a special gift. Happy crocheting, and Merry Christmas!
Pattern notes: This pattern is for personal use. If you sell finished items, please credit the pattern designer and make the toy yourself.

One Comment
Comments are closed.