
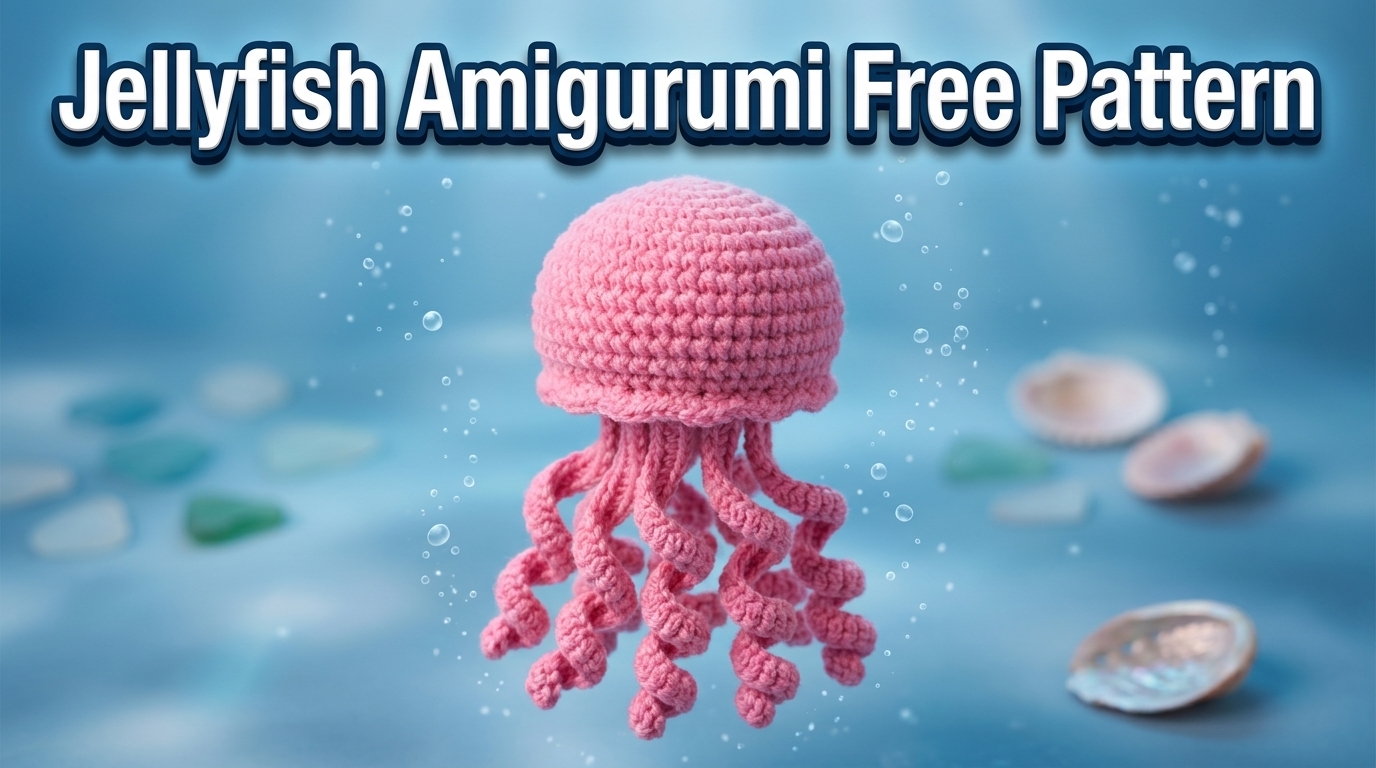
If you’re looking for a cute ocean-inspired crochet project that feels soft, relaxing, and beginner-friendly, this jellyfish amigurumi is a perfect pick. With its round plush body and long curling tentacles, it works beautifully as a nursery toy, sensory item, or handmade gift.
The best part? It’s worked in a continuous structure with simple shaping, so you don’t need complicated assembly skills to finish it.
✨ Why This Jellyfish Pattern Is Special
This design is loved by crocheters because it combines simplicity with a beautiful final look. The body is smooth and rounded, while the tentacles give it a playful floating effect.
Here’s what makes it stand out:
- Seamless construction (no complicated joining)
- Soft and baby-safe design when using proper stuffing
- Curling tentacles for a fun, realistic jellyfish effect
- Beginner-friendly stitches with clear shaping
🧶 Skill Level
Beginner to Intermediate
You’ll need to know:
- Magic ring
- Single crochet (SC)
- Increases and decreases
- Basic chaining
🧵 Materials Needed
- Medium weight cotton yarn (pink or any color you like)
- 2.5–3 mm crochet hook
- Fiberfill stuffing (hypoallergenic recommended)
- Yarn needle
- Stitch markers
- Scissors
- Black thread for facial embroidery
📌 Pattern Notes
- Work in continuous rounds (do not join unless stated)
- Use a stitch marker to track the first stitch of each round
- The body is shaped from a flat circle into a dome
- Tentacles are added after shaping the base
🪼 Crochet Jellyfish Body
🟣 Round 1
Create a magic ring and work 6 single crochets into it. Pull tight to close.
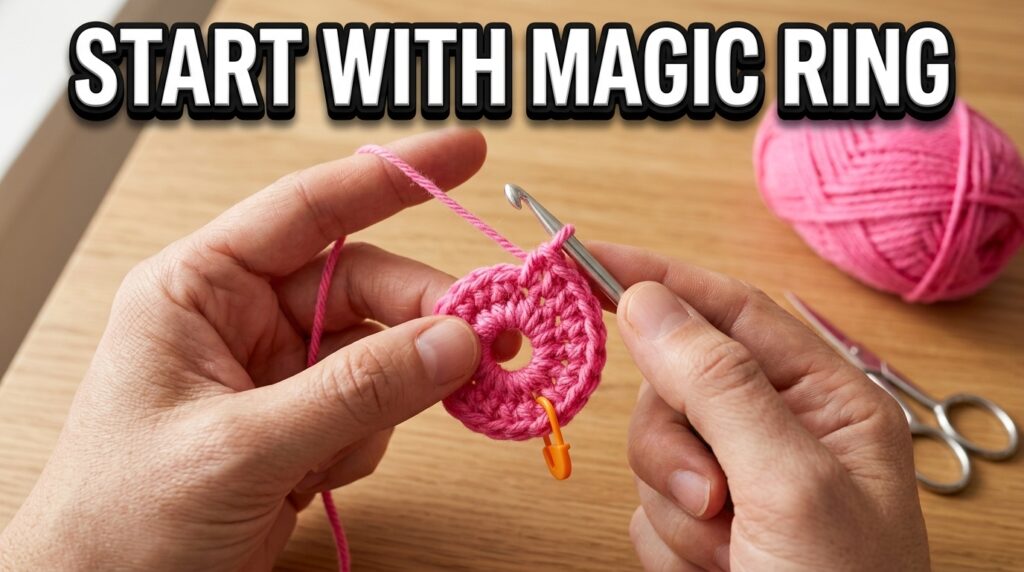
(6 sts)
🟣 Round 2
Increase in every stitch around.
(12 sts)
🟣 Round 3
Work 1 SC, then 1 increase around.
(18 sts)
🟣 Round 4
Work 2 SC, then 1 increase around.
(24 sts)
🟣 Round 5
Work 3 SC, then 1 increase around.
(30 sts)
🟣 Round 6
Work 4 SC, then 1 increase around.
(36 sts)
🟣 Round 7
Work 5 SC, then 1 increase around.
(42 sts)
🌊 Rounds 8–14: Build The Body

Work 1 SC in each stitch around.
This section builds the smooth dome shape of the jellyfish body.
🪼 Rounds 15–19: Start Shaping Down
Now we begin decreasing to close the top:
- Round 15: 5 SC, 1 decrease
- Round 16: 4 SC, 1 decrease
- Round 17: 3 SC, 1 decrease
- Round 18: 2 SC, 1 decrease
- Round 19: 1 SC, 1 decrease
At this stage, gently add stuffing to shape the body.
🧵 Round 20: Close The Top
Work 6 decreases until the opening is fully closed.
Fasten off and secure the yarn.
🪸 Making The Tentacles

Now the jellyfish gets its signature look.
Step 1: Mark Placement
Choose a round near the lower body (around the middle-lower section) and mark 8 evenly spaced points.
Step 2: First Tentacle
Attach yarn at one marked point.
- Chain 55
- Work 2 single crochets in each chain
- This naturally creates a curling effect
Step 3: Attach It Back
Slip stitch the finished chain back into the same round where it started.
Step 4: Repeat
Repeat this process until you have 8 tentacles evenly spaced around the body.
Each one will curl differently, giving a natural underwater movement effect.
🧸 Adding The Face
Using black embroidery thread:
- Stitch two small oval eyes
- Add optional eyelashes for a cute expression
Keep the face minimal for a soft, aesthetic look.
🌊 Finishing Touches
Once all tentacles are attached:
- Shape the body with your hands
- Adjust stuffing evenly
- Make sure tentacles hang naturally
Your jellyfish is now complete!
🪼 Final Thoughts
This jellyfish amigurumi is one of those projects that looks more complicated than it actually is. The simple circular base, easy shaping, and playful tentacles make it a relaxing crochet piece that still feels impressive when finished.
It works beautifully as:
- Nursery décor
- Handmade gifts
- Sensory toys
- Cute desk or room decoration
Once you make one, you’ll probably want to try it in multiple colors — especially pastel shades that give it a dreamy underwater look.