Pom Pom Edging Crochet Pattern
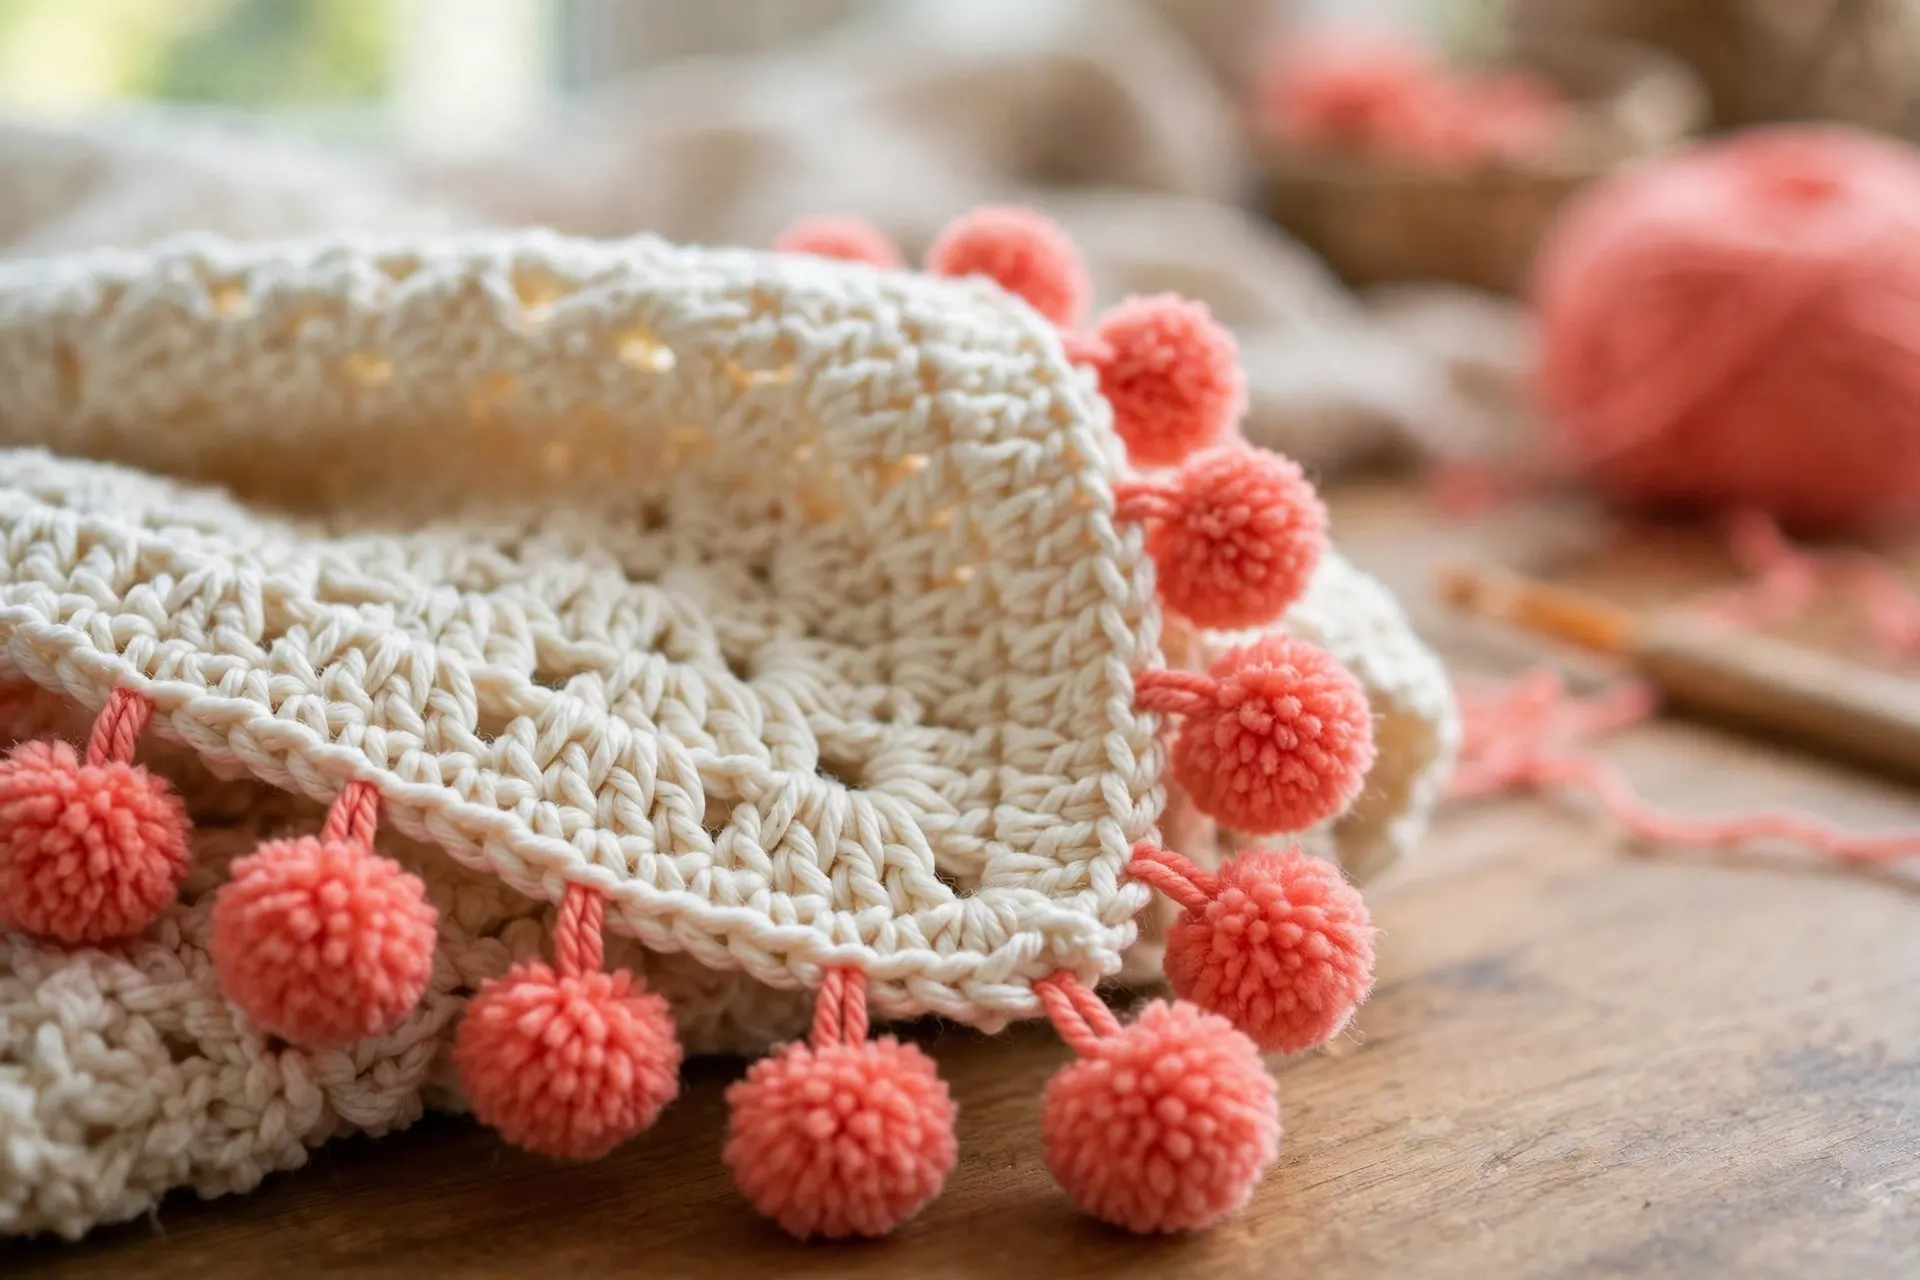
A pom pom edging crochet pattern is the happiest way I know to finish a blanket. Instead of sewing on pom-poms that work loose in the wash, each pom here is crocheted directly onto the edge: two small four-double-crochet clusters on a short chain stem, folded together into a neat, bouncy ball. The poms grow out of a single crochet foundation row, so the trim is part of the blanket and stays put. It suits any project with a straight edge, from a plain honeycomb crochet baby blanket to a textured crochet bobble blanket pattern, and the spacing repeat sizes it to any blanket at all.
Materials for This Pom Pom Edging Crochet Pattern
- Yarn: worsted weight (category 4) acrylic or cotton — acrylic for springy poms that bounce back after washing, cotton for a firmer ball. The Craft Yarn Council’s yarn weight system explains the categories. One 100 g ball (approx. 180 m / 197 yd) edges a 90 × 90 cm (35 × 35 in) baby blanket; a 130 × 160 cm throw needs roughly two.
- Hook: 5.0 mm (H-8), or your blanket’s hook.
- Notions: yarn needle, sharp scissors, four stitch markers, and a tape measure.

- Content: 100% Acrylic. This yarn is great for knitting, crocheting, amigurumi and craft projects. Easy to care for: mach…
- Ball Size: 454g / 16 oz, 742 meters / 812 yards
- Gauge:#4 Worsted (Medium). Knitting Gauge: 4” x 4” (10 cm x 10 cm) 16 sts x 20 rows with 5 mm knitting needle ,Crochet G…
A worsted acrylic is the forgiving choice for a first edging: it slides easily while you learn the fold, poms keep their shape wash after wash, and one ball trims a baby blanket.

- Easy grip handle
- Amour means love
- Love crochet
The pom round asks your hook to hold five loops at once, so a smooth 5.0 mm hook with a soft grip makes the fold-and-close motion far easier.

- [150-Piece Value Set in 10 Colors] Get 150 locking stitch markers in 10 colors (15 per shade) to color-code rows, repeat…
- [Smooth Snag-Free Plastic] Lightweight smooth plastic with a gentle locking clasp slides along yarn without catching or …
- [Works for Knitting & Crochet] The slim profile slips onto standard knitting needles, while the secure locking ring mark…
Locking markers earn their keep twice: one in each corner stitch, and one every twenty foundation stitches to keep your count honest.

- Case: Abs Resin, Polypropylene, Needles: Steel
- Imported
- Chibi bent tip needles
A bent-tip yarn needle tucks starting and colour-change tails into the foundation row, so the back looks as tidy as the front.
Before You Begin: Gauge, Sizes and the Pom Itself
Finished measurements: the edging adds about 2.5 cm (1 in) of depth. Each pom is roughly 1.5 cm (⅝ in) across, repeating every 4 stitches — about every 3 cm (1¼ in).
Gauge: 14 sc and 16 rows = 10 cm (4 in) with a 5.0 mm hook. Gauge is not critical — the Step 8 formula counts stitches, not centimetres — but very tight or loose crochet spaces poms closer or further apart.
Abbreviations (US terms): ch = chain; sc = single crochet; dc = double crochet; dc4tog = double crochet 4 together; sl st = slip stitch; st(s) = stitch(es); yo = yarn over; rep = repeat.
Dc4tog: (yo, insert hook in the place shown, yo, pull up a loop, yo, pull through 2 loops) 4 times in the same place — 5 loops on hook — then yo and pull through all 5 loops.
Anatomy of a pom: every pom in this pom pom edging crochet pattern has the same parts, and the steps use these names. The stem is a chain of 3 lifting the pom off the edge. Cluster 1 is a dc4tog worked into the third chain from the hook, at the stem’s base. Cluster 2 is a second dc4tog on a second chain of 3. Fold Cluster 2 down so the clusters press face to face, closing the pom with a slip stitch into Cluster 1’s base chain. (A stemmed trim — unlike the pompom stitch crochet pattern, whose bobbles sit flat in the fabric.)
The Pom Pom Edging Crochet Pattern, Step by Step
Two rounds make the edging: a single crochet foundation (Step 1), then the pom round (Steps 2–8), whose Steps 2–5 repeat all the way around.
Step 1: Prepare the Edge with a Single Crochet Foundation

Join the edging yarn with a slip stitch in any stitch, chain 1 (does not count as a stitch), and work 1 sc in the same stitch. Continue around, spacing stitches so the edge lies flat — neither ruffled nor pulled in. Work 1 sc in each stitch along the top and bottom edges; along the sides, 2 sc into the end of each double crochet row, 1 sc into the end of each single crochet row, and for half double crochet rows alternate 1 and 2 sc per row end (3 sc per 2 rows). In every corner stitch, work 3 sc and mark the middle one — your corner stitch for the pom round.
Slip stitch into the first sc to close the round; do not fasten off. Count one side’s stitches between the corner stitches: for the pom repeat to land perfectly, the count must divide by 4. If it does not, add an extra sc into one stitch, or skip one stitch, mid-side (invisible there), and repeat for all four sides. The worked example here uses 80 stitches per side: 80 ÷ 4 = 20 repeats.
Step 2: Work the Chain Stem

Every pom in the pom pom edging crochet pattern begins the same way. Work a single crochet into the stitch where the pom will live — the anchor sc — then chain 3. That chain is the stem: it lifts the pom clear of the blanket so it can bounce instead of sitting squashed. Keep the stem chains relaxed; chained tightly, they pull the edge into a scallop.
Step 3: Make the First Cluster

Work a dc4tog into the third chain from your hook. Because you only chained 3, that third chain is the first one you made, at the base of the stem next to the anchor sc. Follow the dc4tog instructions above: four unfinished double crochets into that one chain, then pull through all 5 loops. One dense, puffy cluster now sits at the base of the stem, the two remaining stem chains standing above it like a tiny loop. That is Cluster 1 — half of the pom.
Step 4: Make the Second Cluster and Fold the Pom

Chain 3 again from Cluster 1, and work a second dc4tog into the third chain from the hook, exactly as before. Now fold: bend the strip back down so Cluster 2 rests face to face against Cluster 1. Pinching them together, insert your hook into Cluster 1’s base chain, yarn over and pull through everything on the hook to slip stitch the pom closed. Roll the pom between your fingers: the two clusters should sit as one round ball on its stem. A flat pom means loose clusters — pull each unfinished double crochet up to full height before closing.
Step 5: Anchor the Pom and Work the Spacing Repeat

Your pom is already anchored — it grew out of the anchor sc and hangs from that stitch by its stem, so there is nothing to sew. Continue with the spacing repeat of this pom pom edging crochet pattern: sc in the next 3 stitches, then anchor the next pom in the 4th stitch (an anchor sc there, then Steps 2–4). One pom every 4 stitches, with exactly 3 plain single crochets between pom stitches. On the 80-stitch example side that makes 20 poms (stitches 4, 8, 12 … 80), the last landing exactly at the next corner stitch.
Step 6: Turn a Corner with Poms

Corners get their own pom, exactly on the point. At a marked corner stitch, work into that one stitch: 1 sc, then a complete pom anchored in the same stitch (anchor sc already worked — go straight to the stem, Steps 3–4), then 1 more sc into the same corner stitch. This (sc, pom, sc) group gives the edge the fullness to turn 90 degrees without curling, with the pom on the very tip. Remove the marker as you work the corner, then begin the next side with the Step 5 repeat — which, thanks to Step 1’s adjustment, lands exactly on every corner, even on generous floral designs like the flowers blanket crochet pattern.
Step 7: Join a New Yarn Colour Mid-Edging

Colour changes are cleanest exactly at an anchor sc, so the whole pom comes out in the new colour. Begin the anchor sc in the old colour — insert hook, yarn over, pull up a loop — then drop the old yarn and pull the new colour through both loops to complete the stitch. From here, the stem and both clusters are worked entirely in the new colour. Leave 15 cm (6 in) tails on both yarns to weave in later. For a two-colour rhythm, change at every pom anchor — single crochets in colour A, every pom in colour B — which looks wonderful against the cosy clusters blanket crochet pattern.
Step 8: The Spacing Formula for Any Blanket, and Finishing

You never need a new pattern to size this trim — just count. After the Step 1 foundation round, count each side’s stitches between the corner stitches. Poms per side = side stitch count ÷ 4, plus one pom on every corner. Counts that do not divide by 4 get nudged mid-side during the foundation round (Step 1). In plain words for the whole blanket: add the four side counts together, divide by 4, then add 4 for the corners. A square baby blanket with 80 stitches per side takes (80 ÷ 4 × 4) + 4 = 84 poms; a throw with sides of 120 and 160 stitches takes 30 + 40 + 30 + 40, plus 4 corners = 144 poms. After the last corner, slip stitch into the first sc of the pom round, fasten off, and weave in every tail, burying each inside the foundation row for at least 5 cm before trimming. Smooth the edging flat — no hard blocking needed.
Tips for Neat, Even Poms
- Stuff the clusters. Pull each unfinished double crochet up to full height before closing the dc4tog, and the halves press into a ball, not a pancake.
- Keep stems identical. Count “one, two, three” aloud for every chain-3 stem.
- Check after every side. Lay the blanket flat at each corner — poms should march in a straight, even line, and a mistake found here costs seconds.
- Wash with confidence. Crocheted on, not sewn, these poms survive machine washing.
Frequently Asked Questions
Can I add this edging to a blanket that is already finished?
Yes — that is what Step 1 is for: the foundation round gives any finished edge a clean, counted row for the pom pom edging crochet pattern to build on.
My poms keep twisting to the back. What is wrong?
Tight stem chains torque the pom as it hangs. Relax the chain-3, and roll each pom after closing it to seat it facing forward.
Can I space the poms further apart?
Of course: work 5 plain single crochets between poms instead of 3, adjust each side to a multiple of 6, and divide by 6 in the Step 8 formula. It also suits cushion covers, scarf ends and cardigan fronts.
Final Thoughts
That is the whole pom pom edging crochet pattern: a counted foundation, a chain-3 stem, two clusters folded into a ball, one pom every four stitches. Nothing more advanced than a double crochet worked together — yet it turns a plain blanket into the piece everyone picks up first. By the end of the first side, the rhythm is yours.