Crochet Christmas Cardigan: A Simple Open-Front Cardigan Pattern in Festive Colours
Introduction
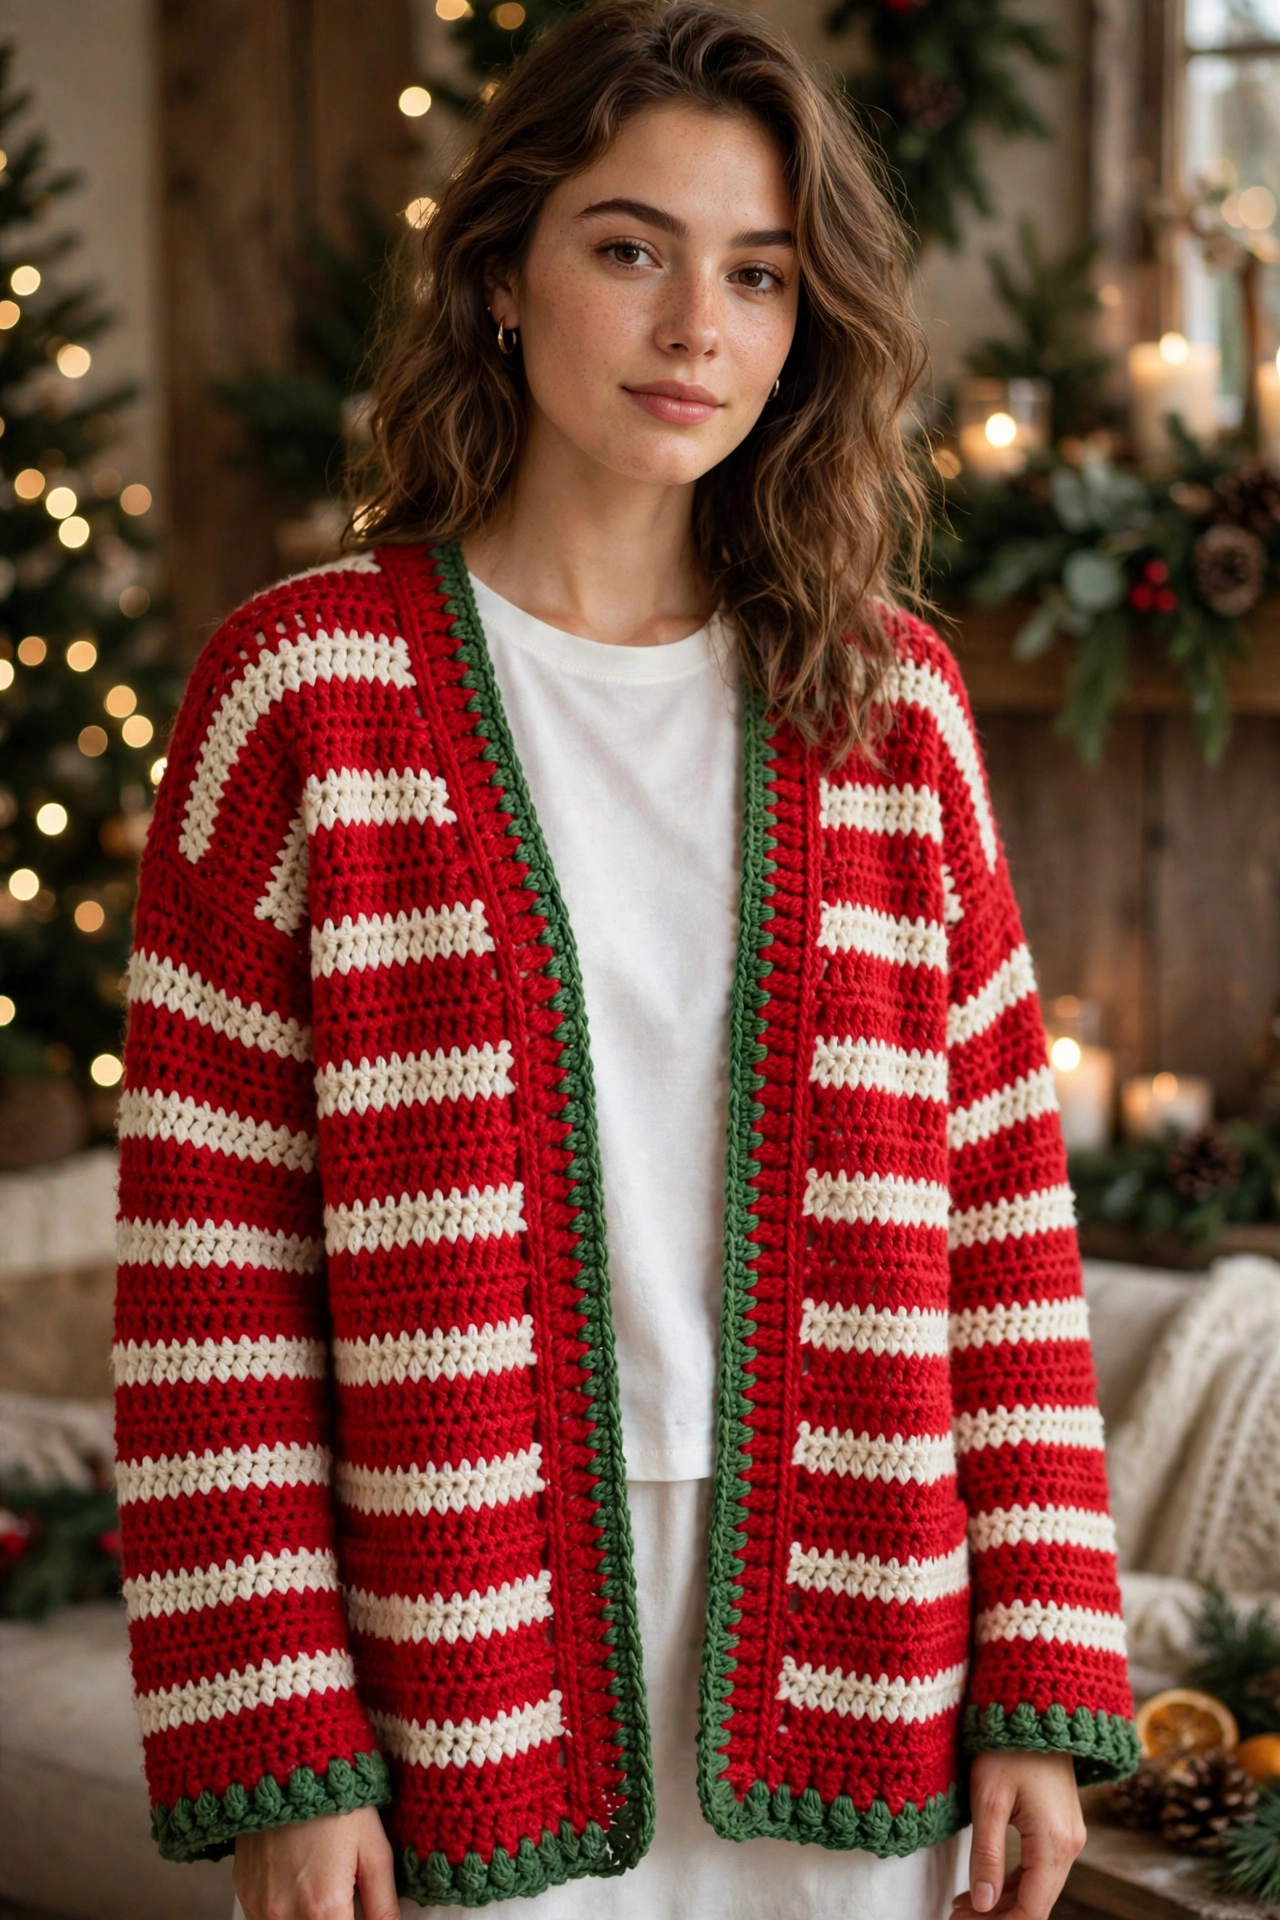
Simple, cosy open-front cardigan made for festive season — no buttons, no complicated shaping, no fiddly neckline. Worked in flat, rectangular pieces in half double crochet, with two cream stripes near hem and cuffs and green edging around front opening, neck, hem and cuffs. Construction order: back, fronts, sleeves, edging, finishing. Pieces seamed together before edging worked, so edging gives neat finished frame. Wear open over plain top and jeans, dress, or festive pyjamas on Christmas morning. Because front is open, fit forgiving — meant to drape, not pull closed. Original pattern for confident beginner who can chain, half double crochet and single crochet, and sew simple seams.
Materials
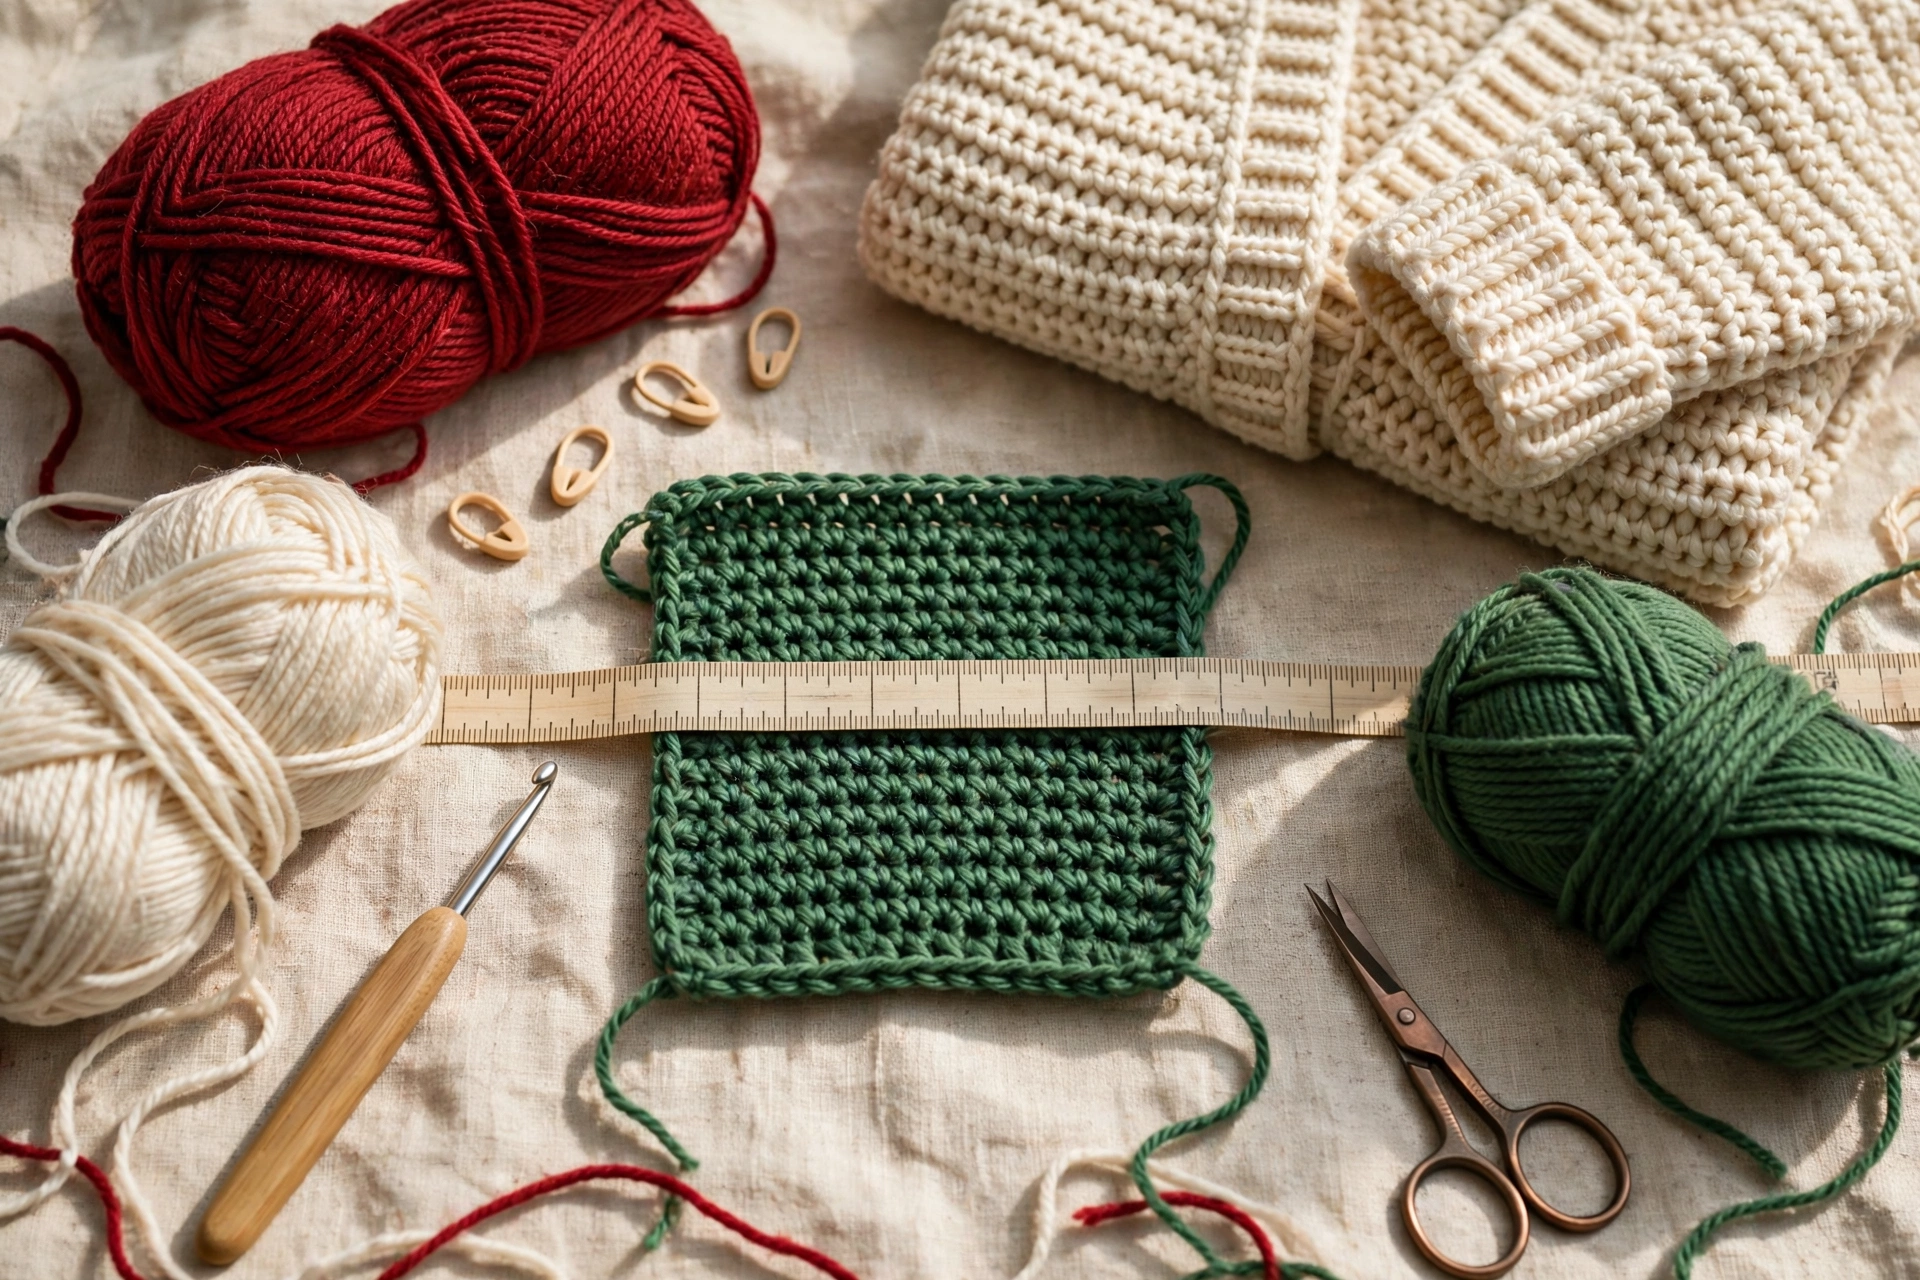
Worsted weight yarn (medium, weight 4) in three colours: Main colour (MC) — cranberry red approx. 1,150 yards for main size; Contrast colour A (CC A) — cream approx. 150 yards for stripes; Contrast colour B (CC B) — green approx. 180 yards for edging. Crochet hook: 5.5 mm (US I-9). Tapestry needle, scissors, measuring tape, stitch markers (optional, useful for marking shoulder and armhole positions). Yarn amounts approximate, vary with tension and exact yarn; buy little extra if plan to lengthen body or sleeves.
Step 1: Materials and gauge
Gauge
14 half double crochet stitches and 10 rows = 4 inches (10 cm) in half double crochet, using 5.5 mm hook. Check gauge before start. If fewer stitches in 4 inches, try smaller hook; if more stitches, try larger hook. Getting close matters, because measurements based on it: 14 stitches = 4 inches means about 3.5 stitches per inch, and 10 rows = 4 inches means 2.5 rows per inch.
Finished Size and Measurements — Main Size
Pattern written in full for Size M, main size. Size range S to 2XL. Main size (M): Finished bust circumference, measured around body with fronts meeting (for reference — cardigan worn open): about 44 inches; Back width: 22 inches; Each front width: about 11 inches; Length from shoulder to hem: 26 inches; Sleeve length, cuff to top: about 19 inches; Cuff circumference: about 10 1/4 inches; Upper-arm circumference: about 17 inches; Back neck width left open between shoulder seams: about 7 3/4 inches. Size M designed to fit bust about 38–40 inches with comfortable ease for open, draped cardigan. If between sizes, choose larger size for relaxed fit.
Size range and adjustment guidance for other sizes
Do not guess whole new set of stitch counts for another size. Instead, work from measurements below and your gauge, and adjust main-size pieces as follows: Approximate target finished bust: S about 40 inches; M (main size, written in full below) about 44 inches; L about 48 inches; XL about 52 inches; 2XL about 56 inches. Approximate target lengths: S about 25 inches, M 26 inches, L 27 inches, XL 27–28 inches, 2XL 28 inches. Sleeve length stays about 19 inches for most sizes, or adjust to arm length. How to adjust, using gauge 3.5 stitches per inch and 2.5 rows per inch: To make body wider or narrower: Each 4-inch step in bust size is about 14 stitches total across body. Split change across three body pieces — roughly half on back and roughly quarter on each front — and keep back neck opening roughly same width as main size, so shoulder seams stay balanced. Work out new starting chain from own gauge swatch, then check width with tape measure after few rows. To make body longer or shorter: Add or remove rows in multiples of 2 rows (about 3/4 inch per 2 rows) before finish piece, keeping cream stripes same position relative to hem — 8 rows red, then 2 rows cream, then red to top. To make sleeves wider or narrower: Start with cuff that fits comfortably around wrist, then increase evenly up sleeve, in pairs (one increase at each edge on same row), until top of sleeve measures about upper-arm circumference plus about 1 inch ease. Space increase rows evenly over sleeve length. To make sleeves longer or shorter: Add or remove plain rows at top end of sleeve (after last increase row), keeping cream stripes near cuff. Always make gauge swatch, measure pieces as go, try pieces against yourself before seaming.
Abbreviations (US Terms)
ch — chain; hdc — half double crochet; sc — single crochet; st(s) — stitch(es); MC — main colour (cranberry red); CC A — contrast colour A (cream); CC B — contrast colour B (green); RS — right side; WS — wrong side. Notes on counting: Throughout, turning chain (ch 2 at start of hdc row, ch 1 at start of sc row) does NOT count as stitch. Work first stitch of row into first stitch of previous row, not into turning chain. Stitch count given at end of every row where count changes; where no count given, count same as previous row. Stripes do not change stitch count — only colour changes.
Pattern — Main Size M
Work pieces in order: back, fronts, sleeves. Then assemble, work edging, finish.
Step 2: Back piece
Back
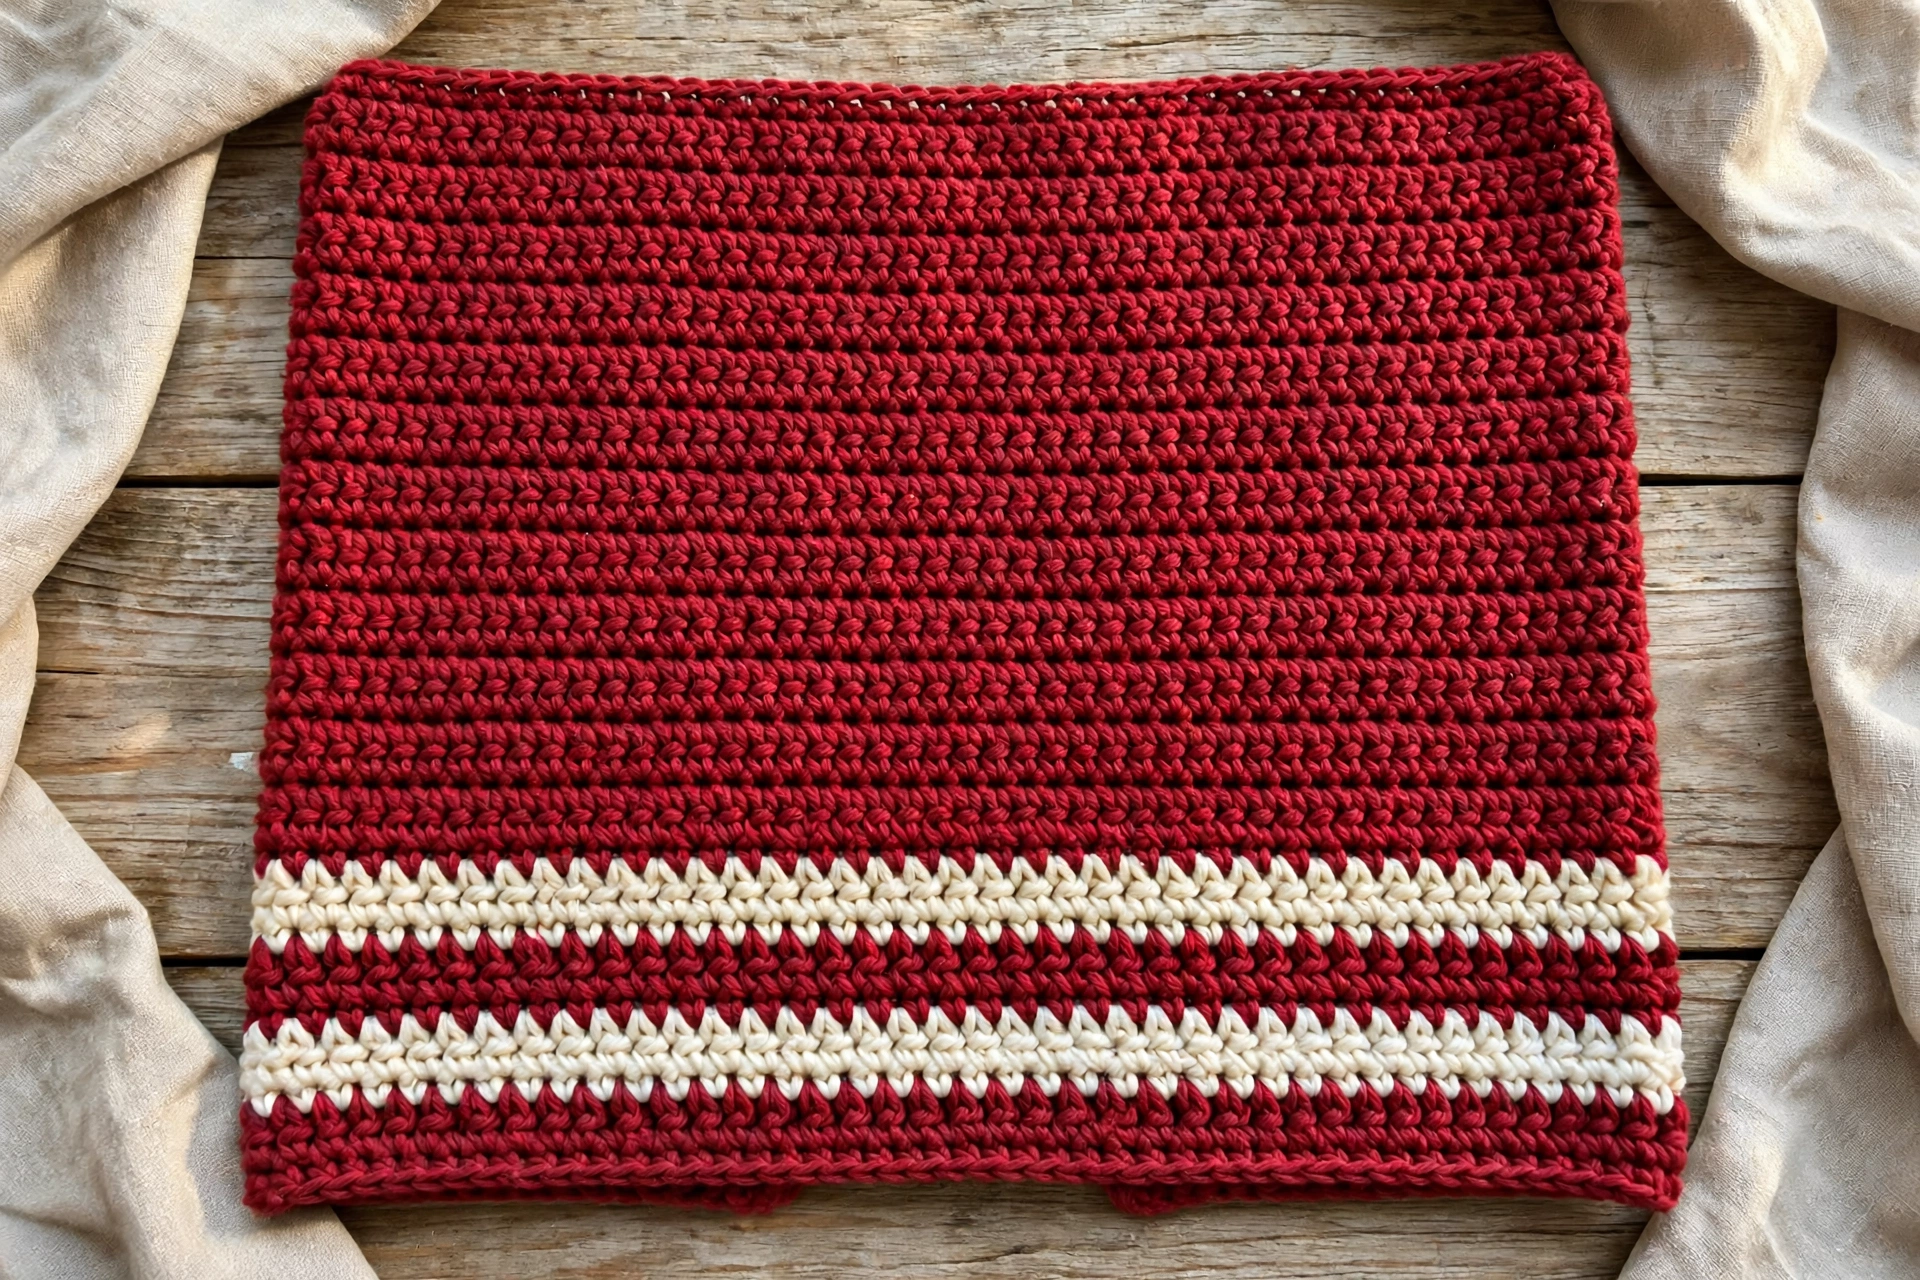
Worked from hem up, in rows, turning at end of each row. With MC, ch 79. Row 1 (RS): Hdc in 3rd ch from hook and in each ch across — 77 hdc. Rows 2–8: Ch 2 (does not count), hdc in each st across — 77 hdc, MC. Rows 9–10: Change to CC A. Ch 2, hdc in each st across — 77 hdc. These are cream stripes. Rows 11–65: Change back to MC. Ch 2, hdc in each st across — 77 hdc. Back now 65 rows long, 26 inches at gauge. Fasten off, leaving long tail for seaming if wish.
Step 3: Two front pieces
Fronts (Make 2)
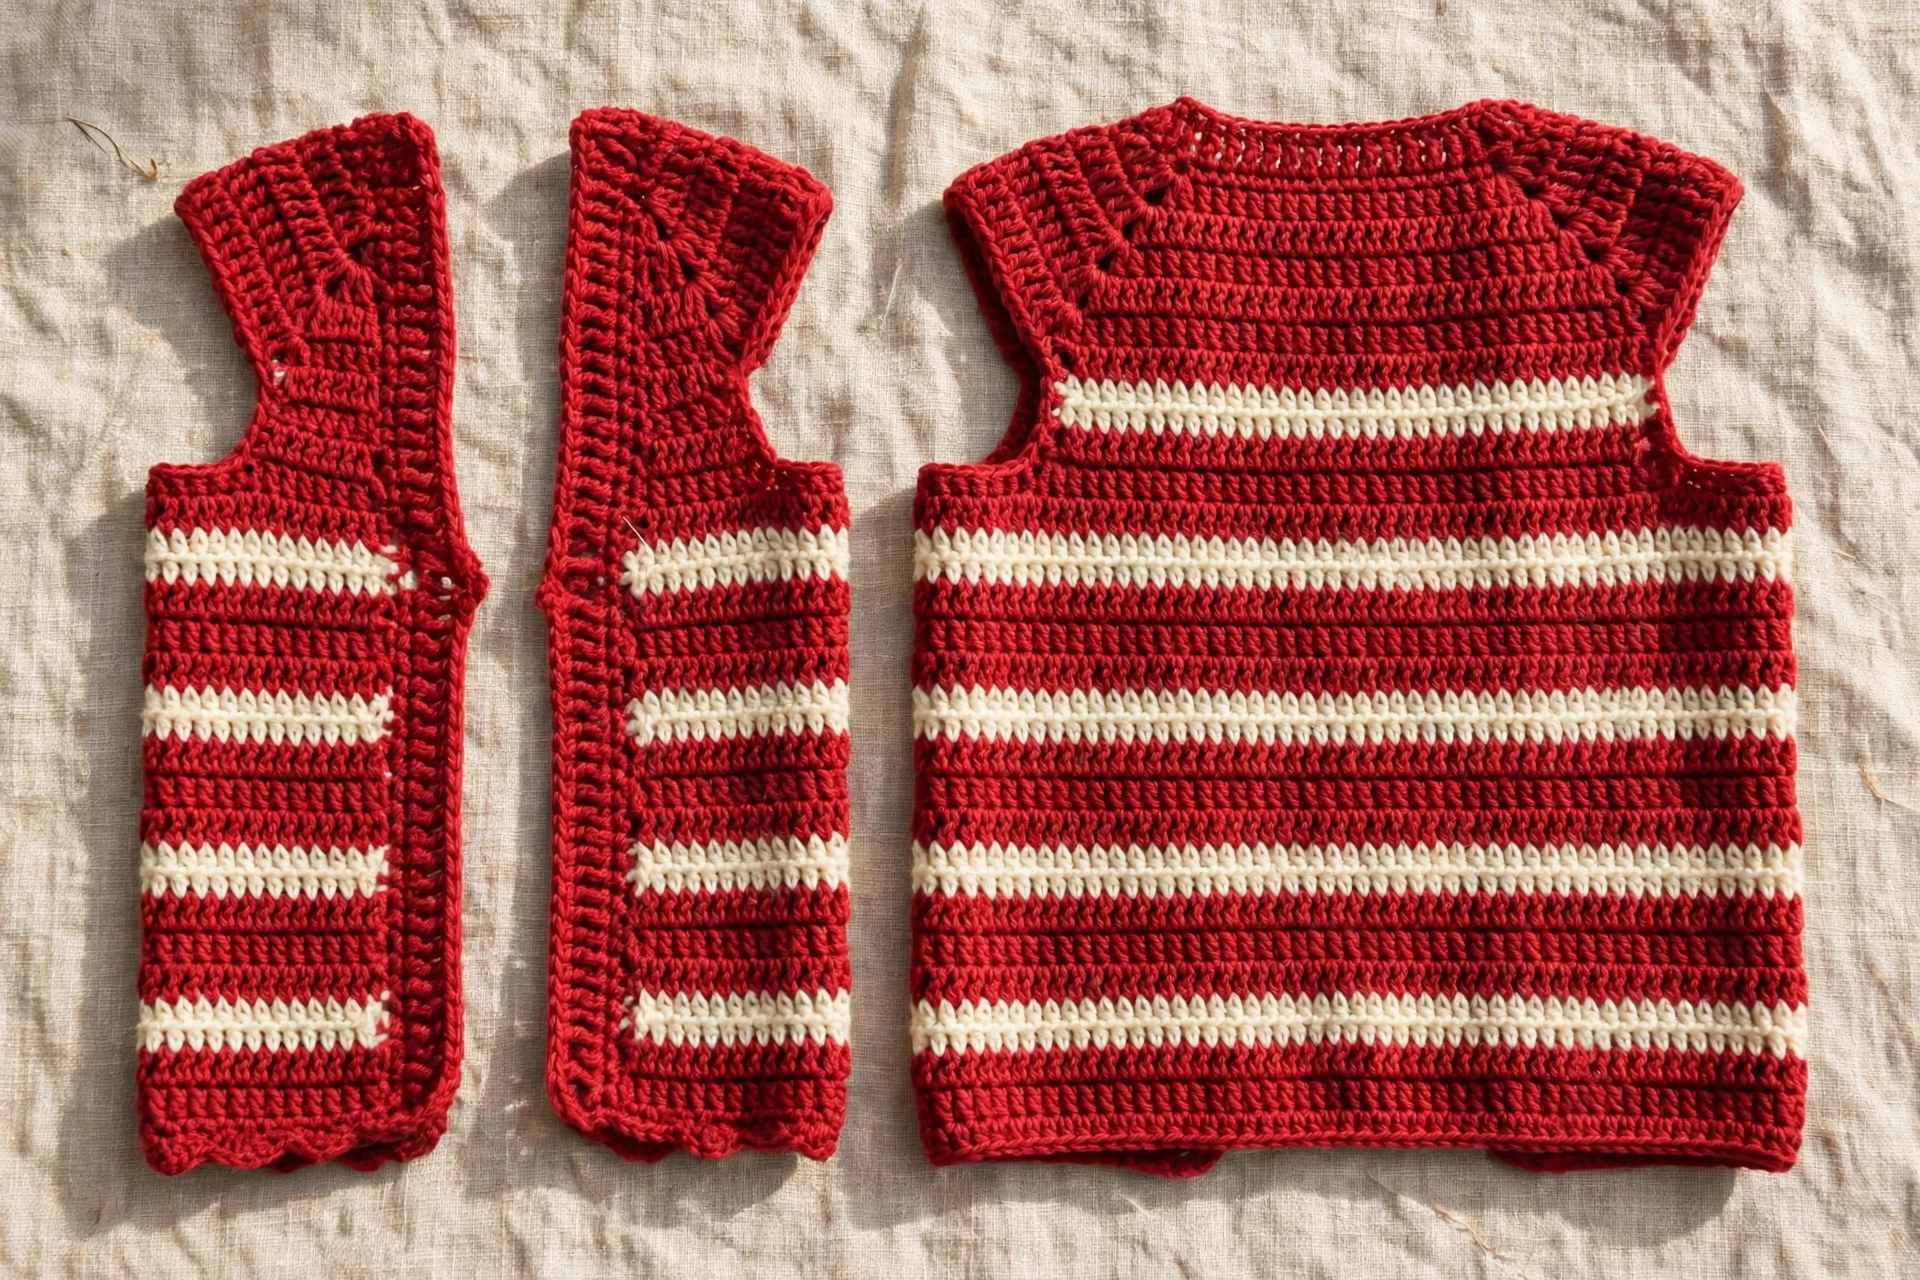
Both fronts identical — no left/right shaping in open-front design. Work each front from hem up, in rows, turning at end of each row. With MC, ch 41. Row 1 (RS): Hdc in 3rd ch from hook and in each ch across — 39 hdc. Rows 2–8: Ch 2, hdc in each st across — 39 hdc, MC. Rows 9–10: Change to CC A. Ch 2, hdc in each st across — 39 hdc. Cream stripes, matching back. Rows 11–65: Change back to MC. Ch 2, hdc in each st across — 39 hdc. Each front now 65 rows long (26 inches). Fasten off. Check: two fronts together (39+39=78) plus back (77) give total body width about 44 inches at gauge.
Step 4: Sleeves
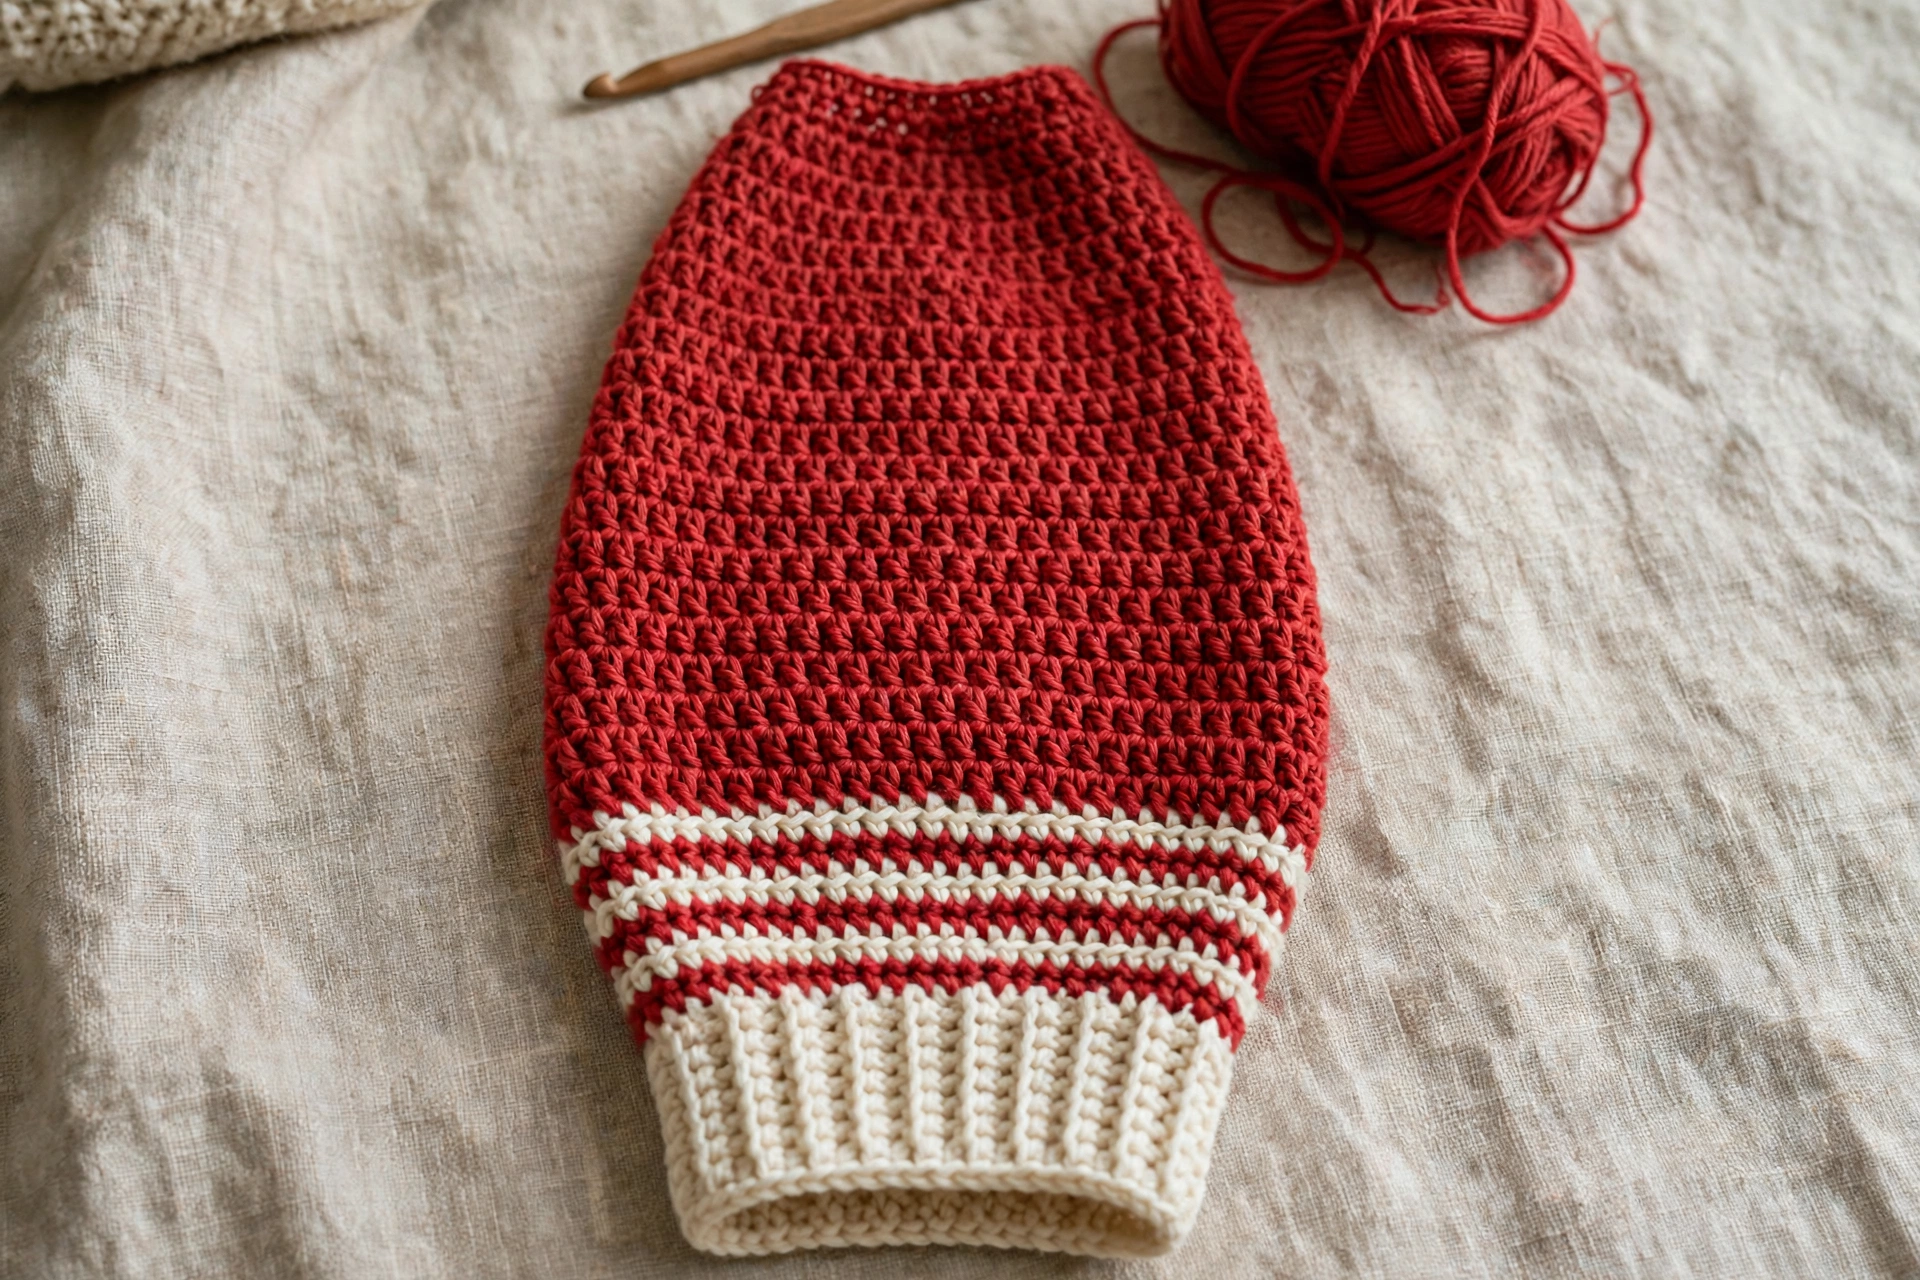
Sleeves (Make 2)
Each sleeve worked from cuff up, in rows, turning at end of each row. Increases worked in pairs — one at each edge on same row — so sleeve widens evenly. With MC, ch 20. Row 1 (RS): Hdc in 3rd ch from hook and in each ch across — 18 hdc. Rows 2–6: Ch 2, hdc in each st across — 18 hdc, MC. Row 7 (increase row): Ch 2, work 2 hdc in first st, hdc in each st across to last st, work 2 hdc in last st — 20 hdc, MC. Rows 8–14: Ch 2, hdc in each st across — 20 hdc. Work Row 8 in MC, Rows 9–10 in CC A (cream stripes, matching body), Rows 11–14 in MC. Row 15 (increase): Ch 2, 2 hdc in first st, hdc across to last st, 2 hdc in last st — 22 hdc, MC. Rows 16–22: Ch 2, hdc across — 22 hdc, MC. Row 23 (increase): — 24 hdc, MC. Rows 24–30: hdc across — 24 hdc, MC. Row 31 (increase): — 26 hdc, MC. Rows 32–38: hdc across — 26 hdc, MC. Row 39 (increase): — 28 hdc, MC. Rows 40–46: hdc across — 28 hdc, MC. Row 47 (increase): — 30 hdc, MC. Row 48: Ch 2, hdc across — 30 hdc, MC. Each sleeve now 48 rows long (about 19 inches at gauge), widening from 18 stitches at cuff to 30 at top. Fasten off. Check sleeve increase sequence: 18→20→22→24→26→28→30, with one increase at each edge on Rows 7, 15, 23, 31, 39 and 47 — six increase rows, adding 2 each, 12 added total.
Finishing and Assembly
Lay pieces out flat, RS up, check measurements before seaming. Block lightly if yarn allows, per yarn care, let pieces dry flat.
Step 5: Assembly
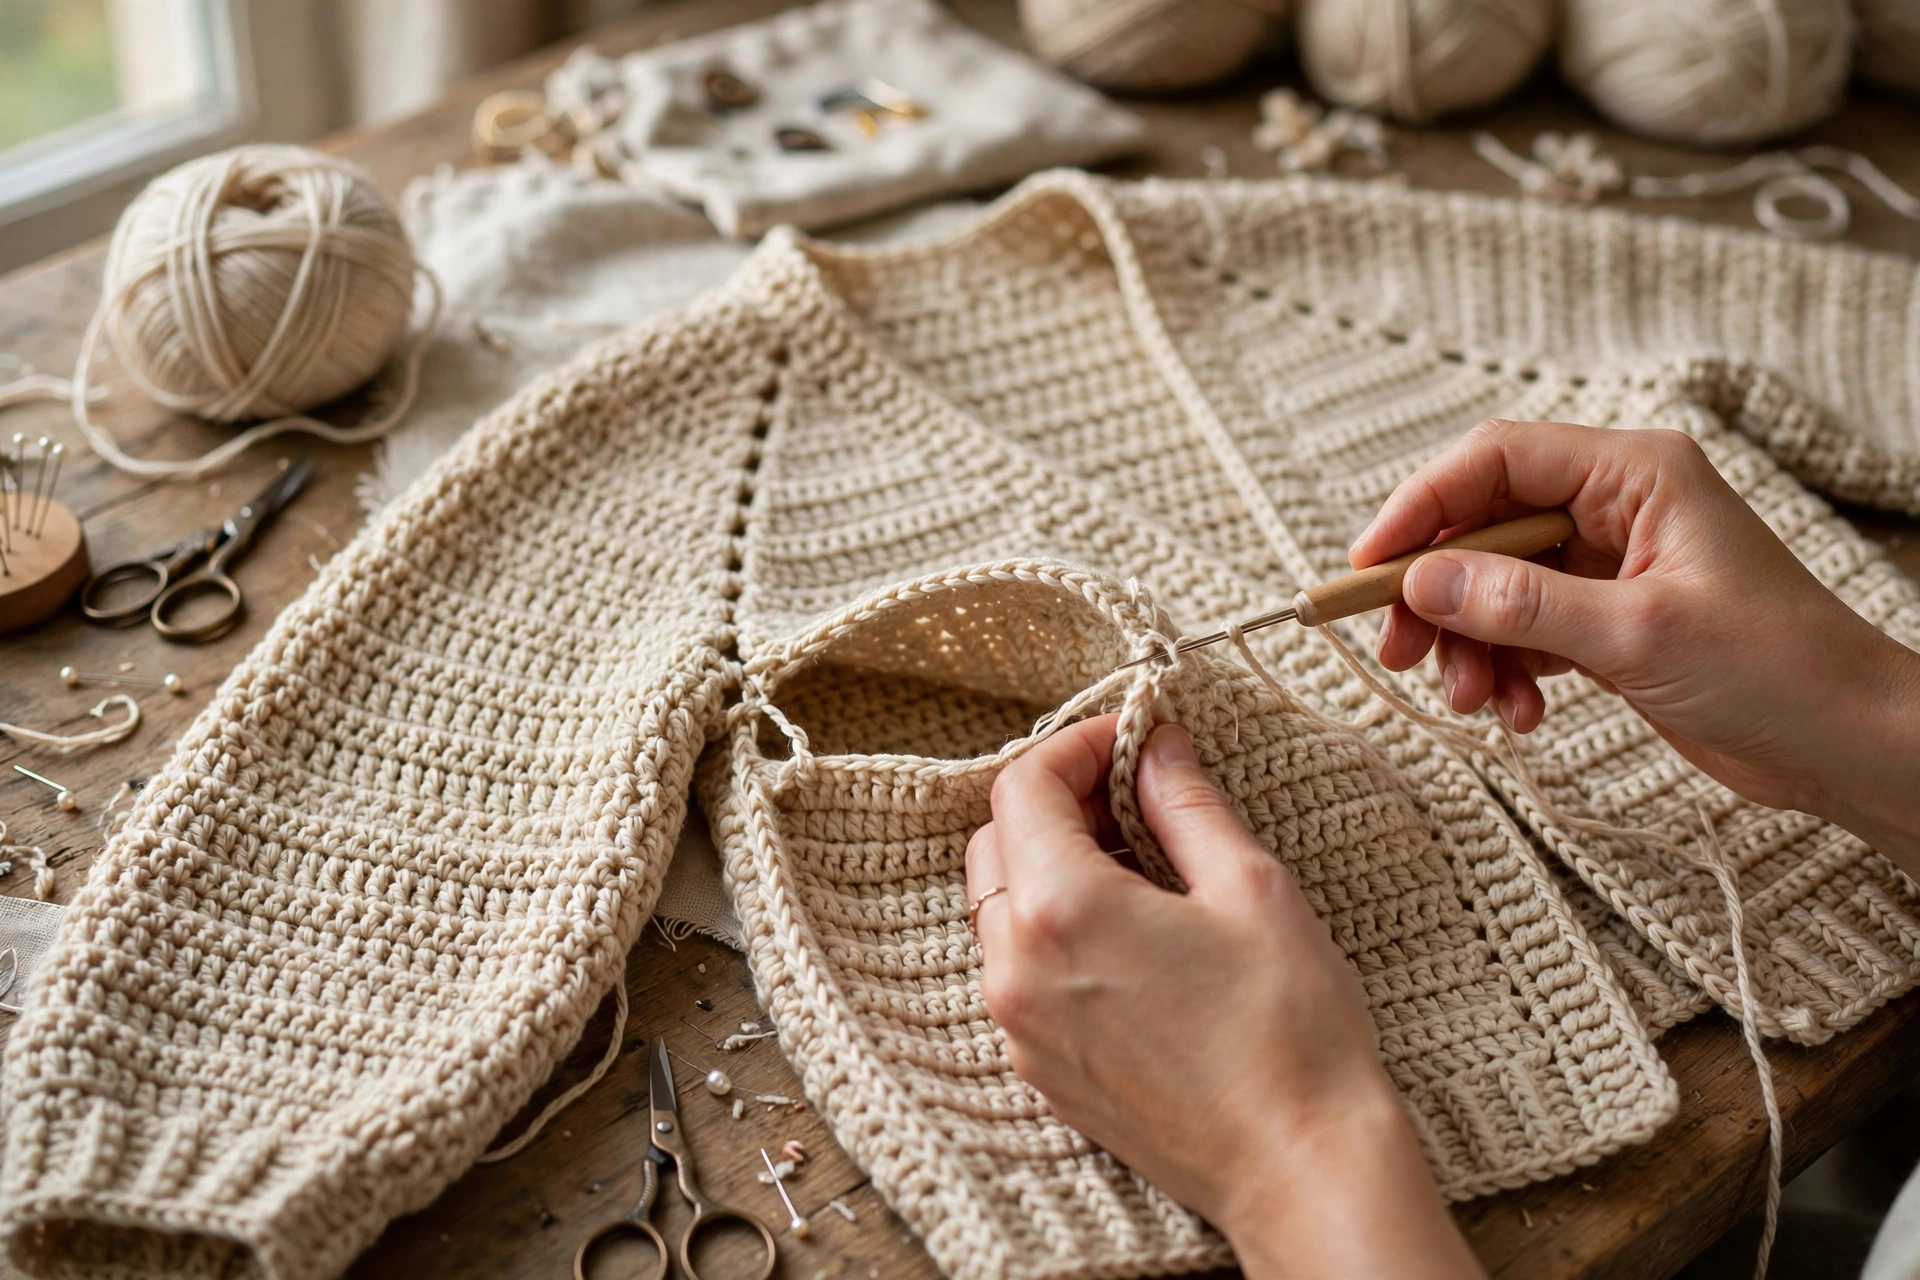
1. Shoulder seams: Place back and one front together RS facing. Seam top edge of front to top edge of back for 25 stitches, starting at outer (armhole) edge. Repeat for second front. Leaves centre 27 stitches of back top edge open as back neck: 25+27+25=77, full width of back. Each front has 14 stitches of top edge left unseamed (39−25=14); those form part of front neckline and will be covered by edging. 2. Side seams and armhole openings: Seam each front to back along side edges, starting at hem and working up for 44 rows. Leave top 21 rows of each side open (about 8 1/2 inches) as armhole opening: 44+21=65 rows, full length of body. 3. Sleeve seams: Fold each sleeve in half lengthwise, RS together, seam two long edges together from cuff to top (all 48 rows). Turn sleeve RS out. 4. Set in sleeves: With RS facing, pin then sew top edge of each sleeve (30 stitches) around armhole opening, easing slightly to fit. Armhole opening about 16 3/4 inches around (two sides about 8 1/2 inches), sleeve top about 17 inches around, so small amount of easing normal; distribute evenly rather than gathering in one place.
Step 6: Bottom and cuff edging
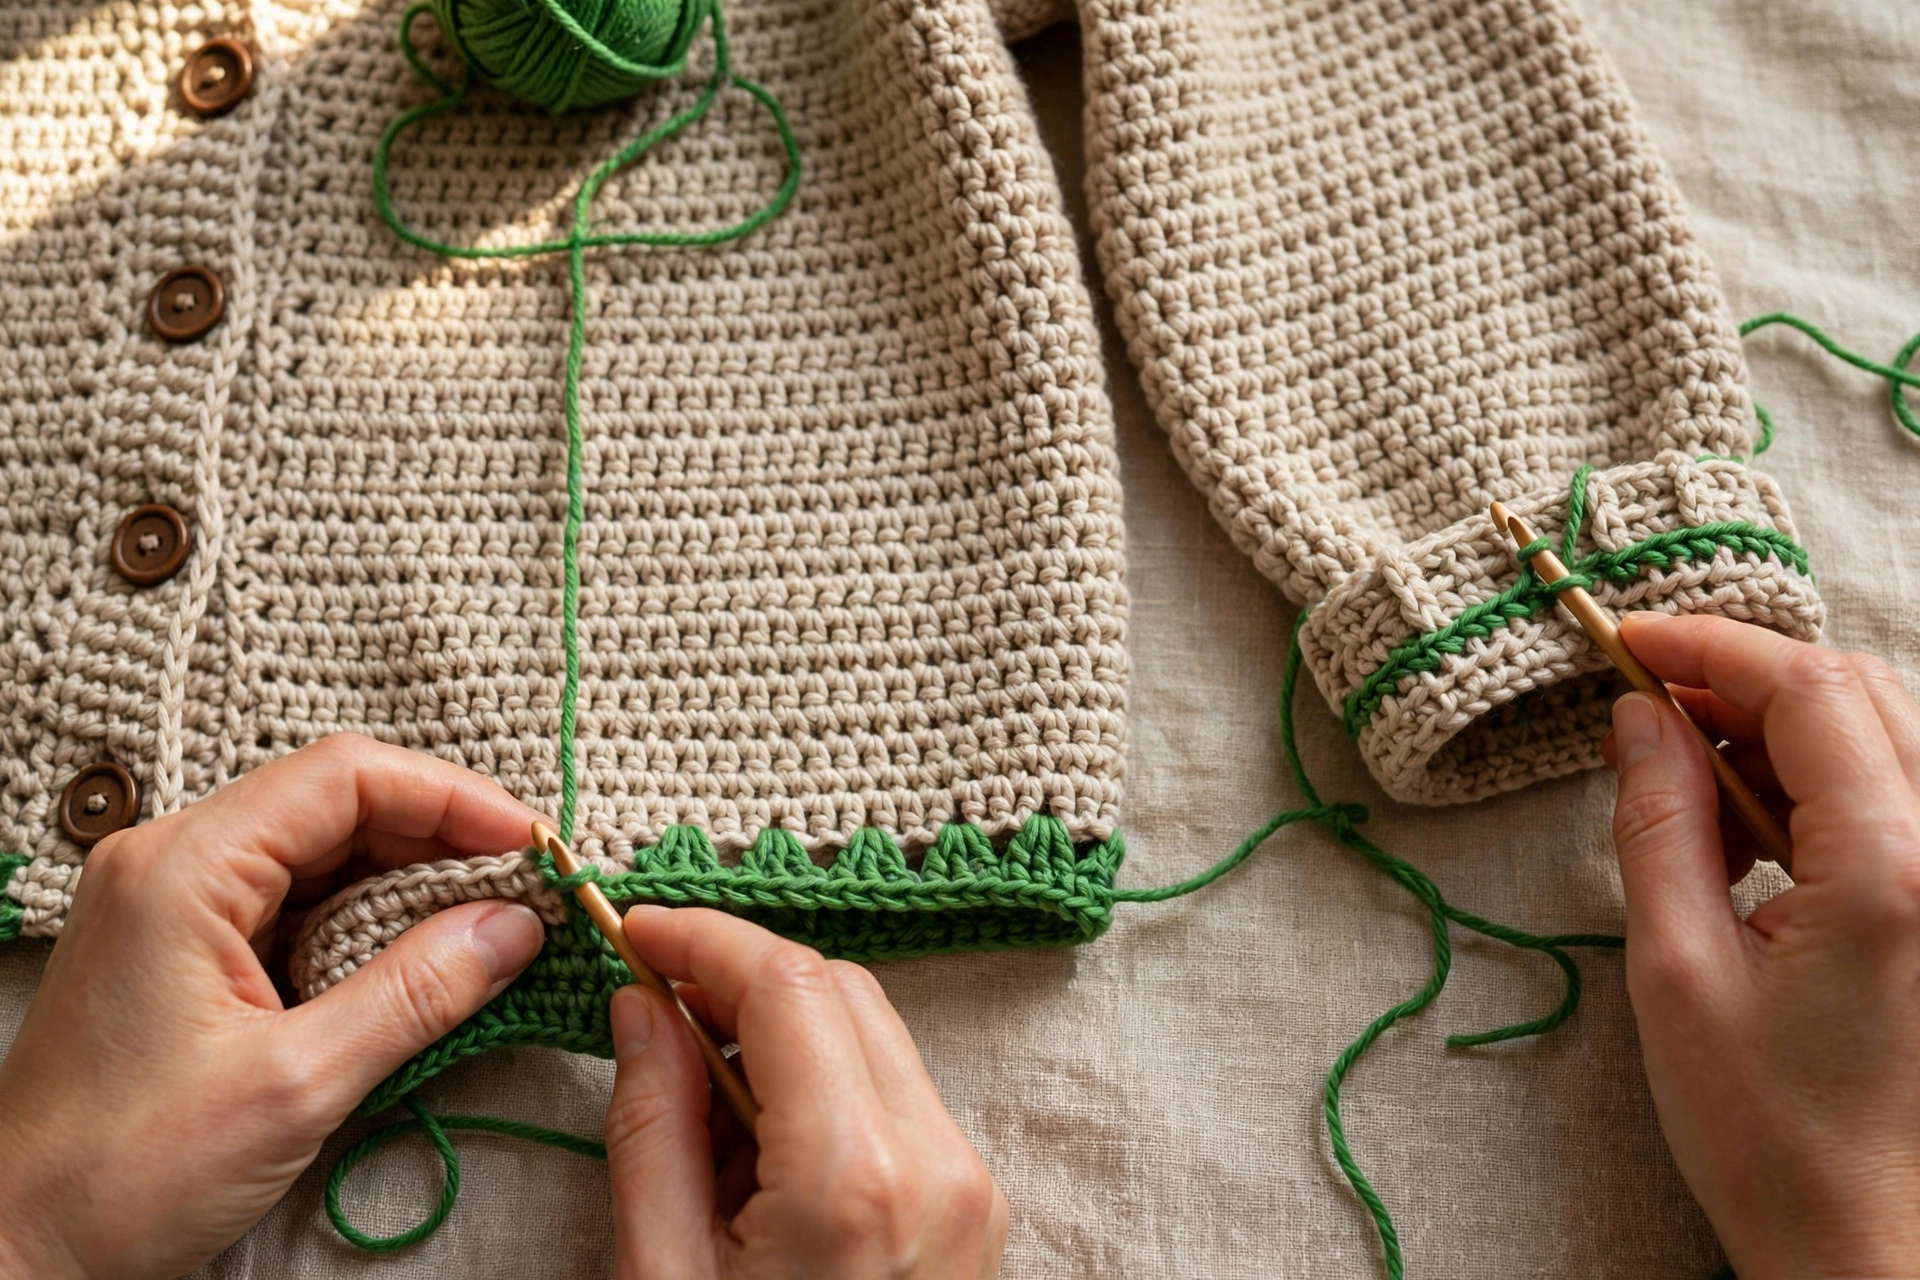
5. Edging — bottom hem: With CC B (green) RS facing, join yarn at one bottom corner of body. Work 1 row sc evenly across bottom edge: 1 sc in each stitch across first front (39 sc), back (77 sc) and second front (39 sc) — 155 sc total. Then second row: ch 1 (does not count), sc in each sc across — 155 sc. Fasten off. 7. Edging — cuffs: With CC B (green), join yarn at cuff seam of one sleeve. Work 1 row sc around cuff: 1 sc in each stitch around — 18 sc. Then second row: ch 1, sc in each sc around — 18 sc. Fasten off. Repeat for second sleeve.
Step 7: Front and neck edging
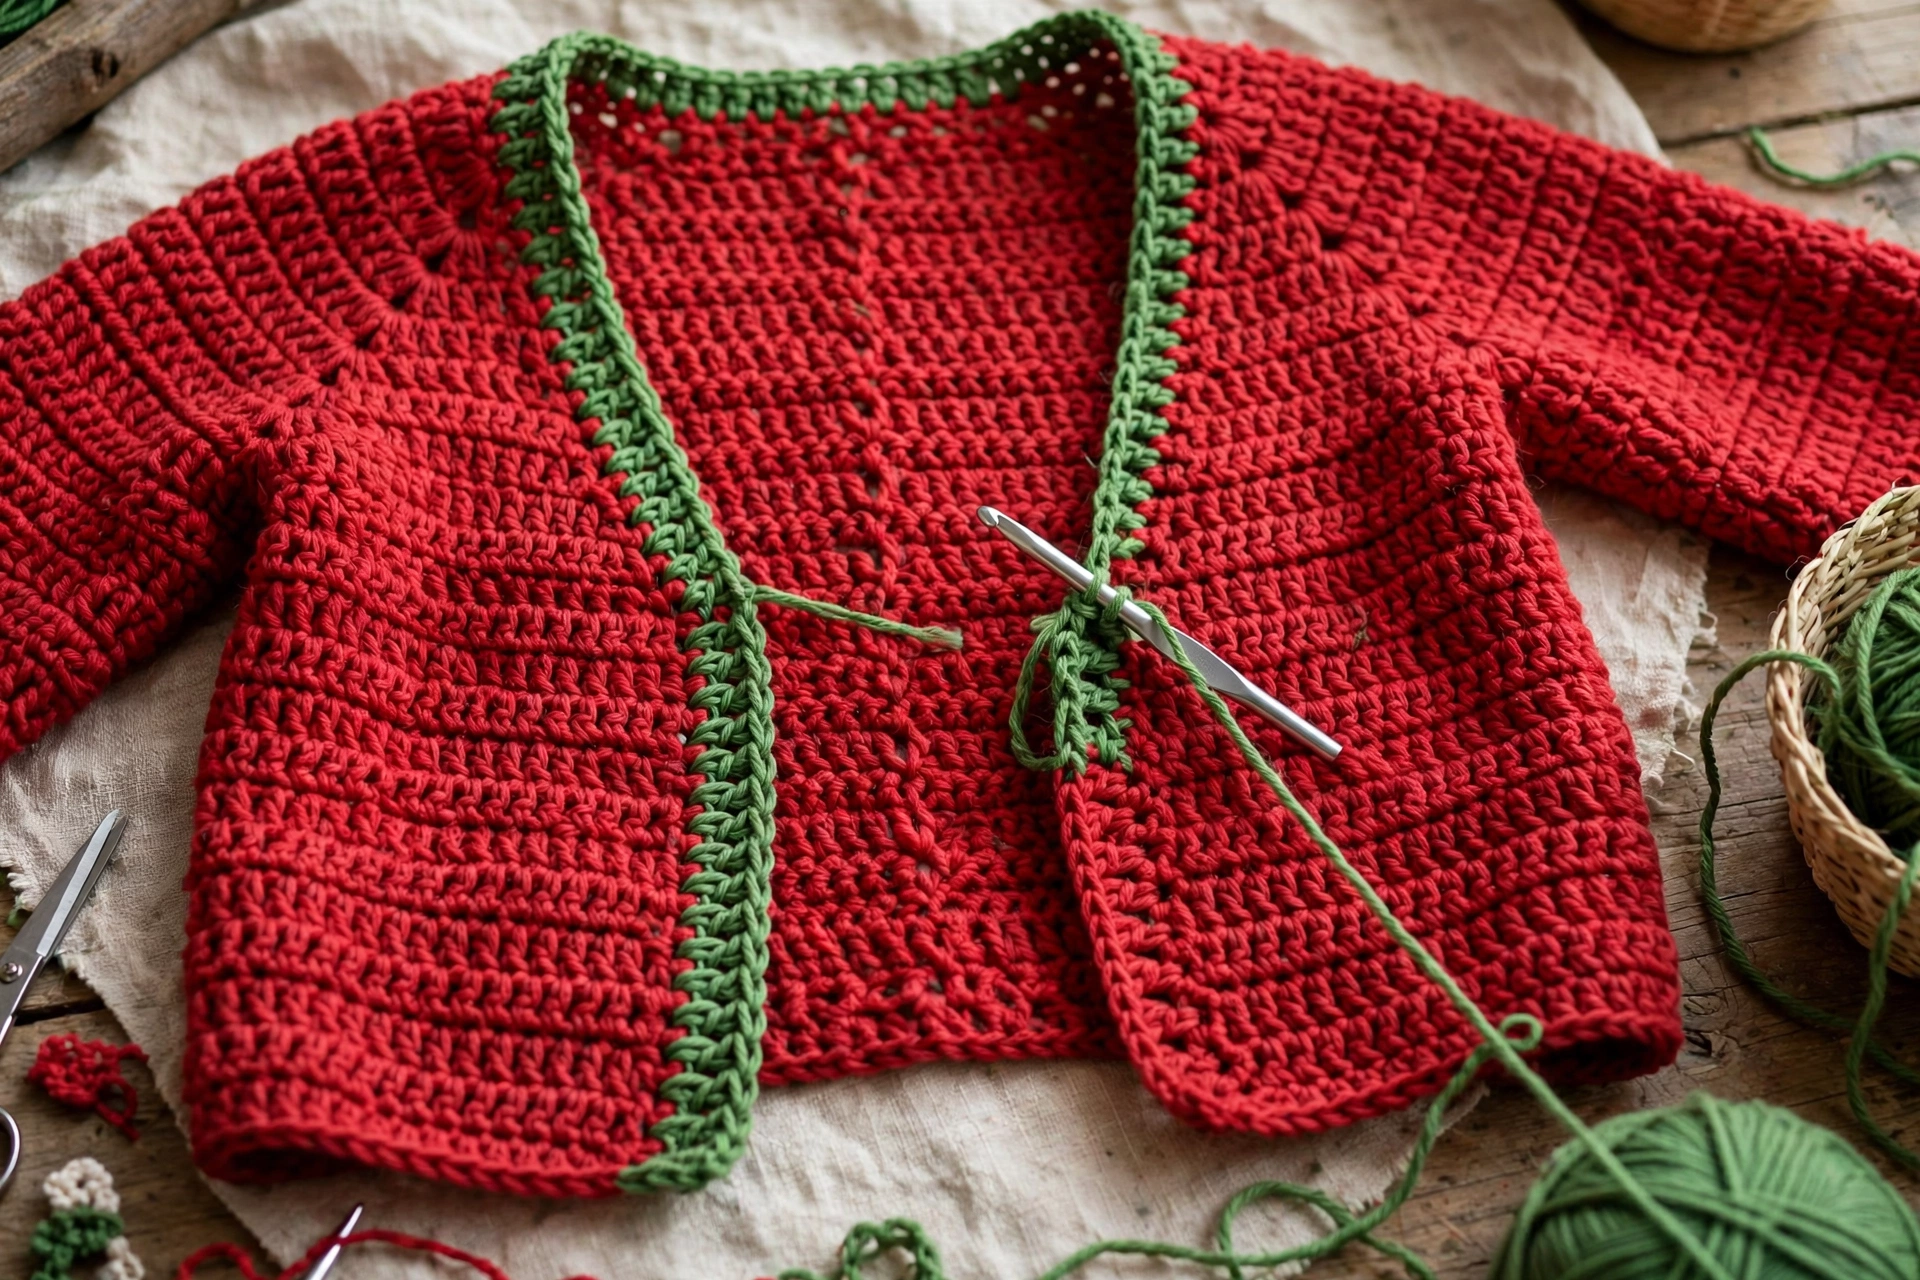
6. Edging — front opening and neck: With CC B (green) RS facing, join yarn at bottom corner of right front. Work 1 row sc as follows: sc up front edge, 1 sc in end of each row (65 sc); sc across unseamed top edge of right front (14 sc); sc across back neck (27 sc); sc across unseamed top edge of left front (14 sc); sc down front edge of left front, 1 sc in end of each row (65 sc). Total: 65+14+27+14+65=185 sc. Then second row: ch 1, sc in each sc across — 185 sc. Fasten off.
8. Final finishing: Weave in all ends securely with tapestry needle, weaving stripe colour changes in on WS so do not show on RS. Check seams, trim loose ends, give cardigan final light blocking if needed. Try on and check front edges hang evenly.
Step 8: Finished cardigan
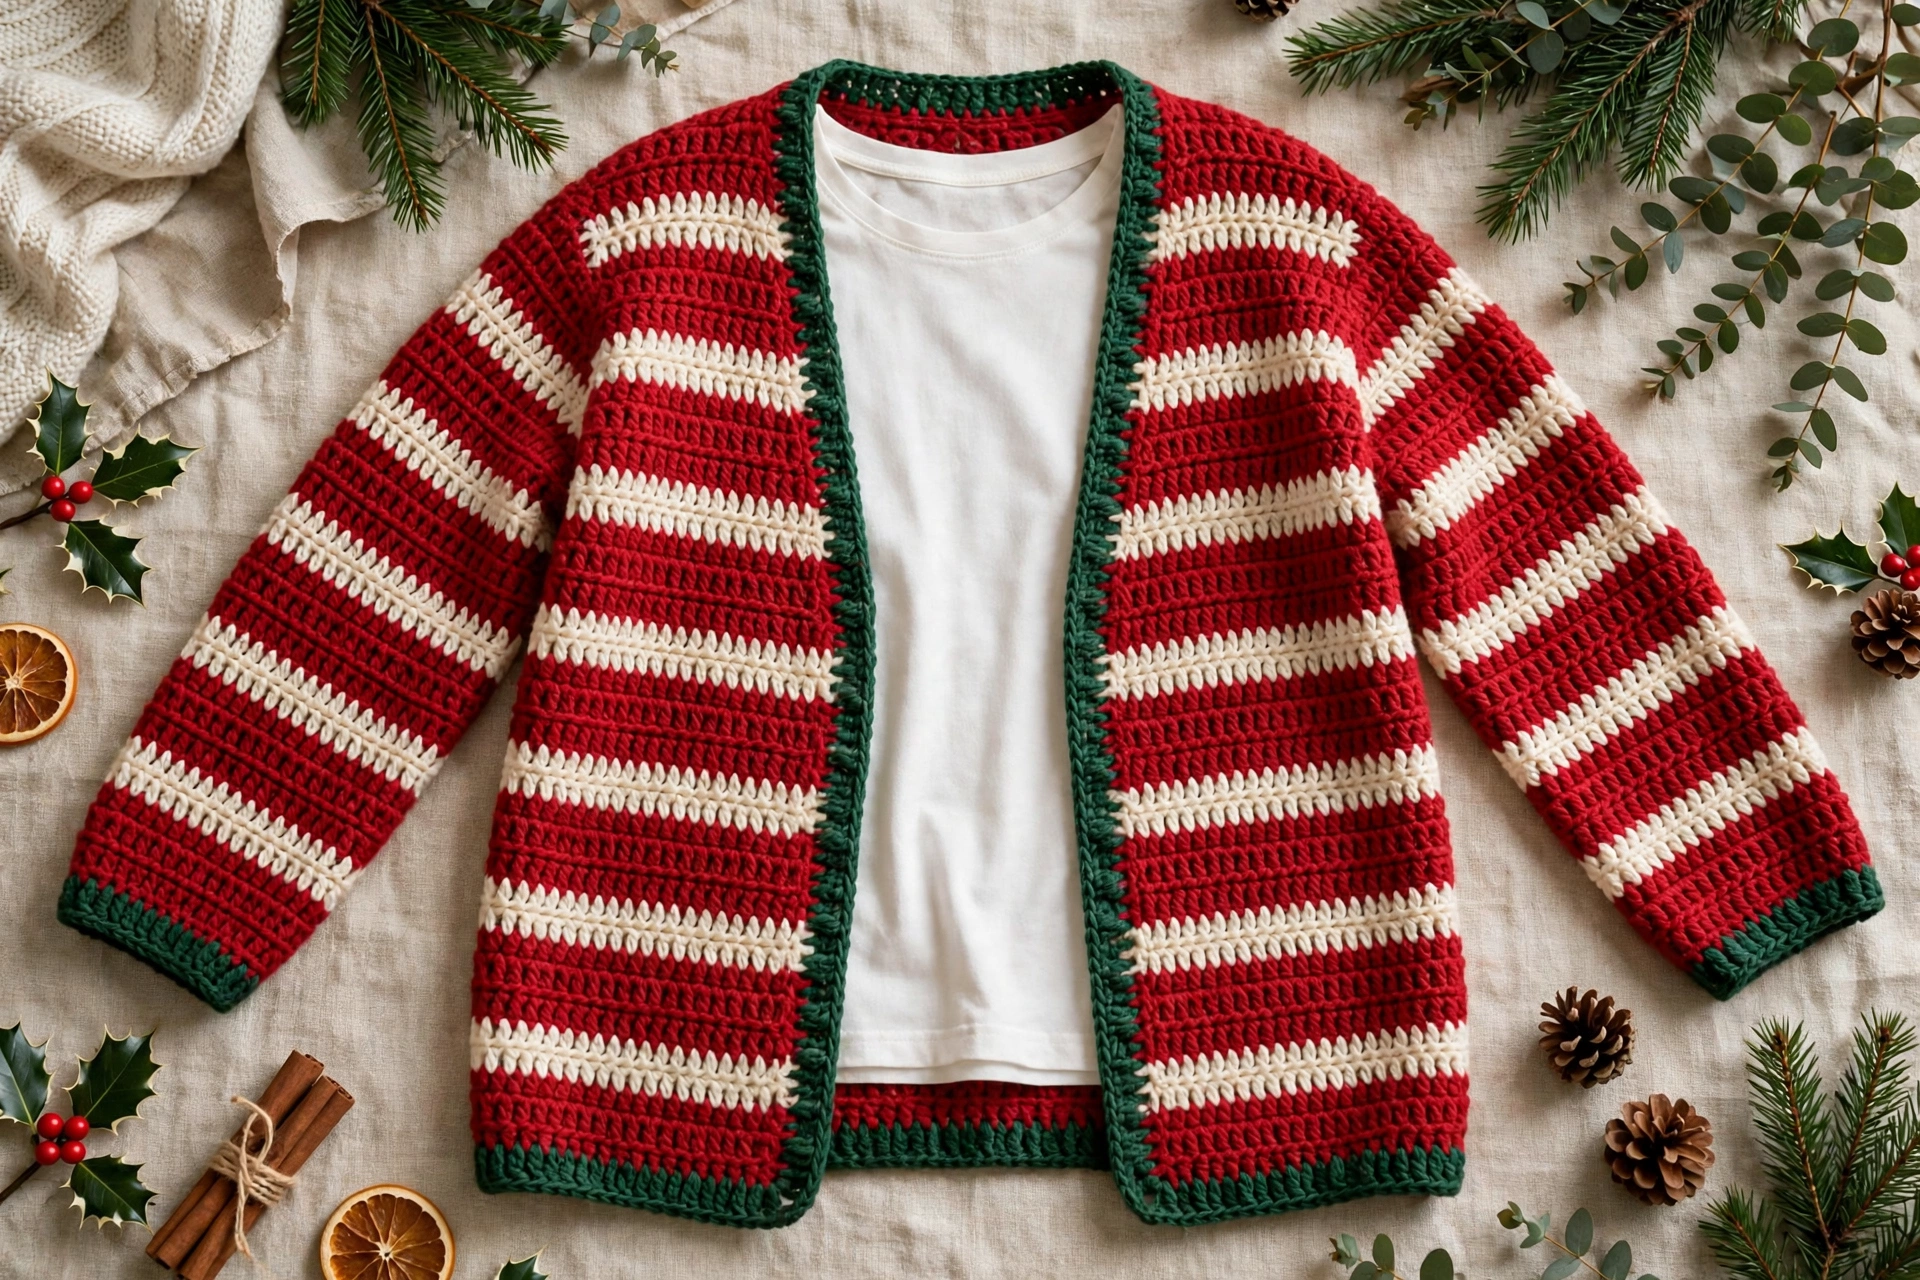
Completed open-front cardigan laid flat and worn open over plain top, showing red body, cream stripes and green edging.
Tips
Keep turning chain consistent — stitch counts only work if turning chain does not count; if start counting it, every row will grow by one. Mark increase rows on sleeves — stitch marker or scrap of contrasting yarn at each increase row makes easy to check increased six times and two sleeves match. Count after each increase row — sleeve sequence easy to check: after each increase row count should go up by exactly 2. Seam before edge — front and neck edging worked over shoulder and neckline joins, so covers and neatens those seams; working it before seaming would leave gaps. Ease, do not gather, sleeves — pin sleeve top to armhole at shoulder, underarm and halfway points first, then sew between pins; spreads small difference evenly. Make it your own — cardigan works just as well in other festive combinations — e.g. green as main colour with red edging, or deep navy with cream stripes; keep stripe rows same place so body and sleeves still match.
FAQ
Is cardigan really open-front, with no buttons? Yes, designed to be worn open, with green edging framing front opening; if prefer closure, can add single shawl pin or brooch at front, but no buttonholes included.
What skill level? Confident beginner — need chain, half double crochet and single crochet, plus simple seaming; no waist shaping, no armhole shaping on body pieces, sleeves increase in simple regular sequence.
Can I make cardigan longer? Yes, add rows to back and both fronts in multiples of 2 rows, keeping cream stripes 8 rows up from hem; add same number of rows to each piece so hem stays level, allow extra red yarn.
Can I use different yarn weight? You can, but stitch counts and measurements will change; make gauge swatch in chosen yarn, work out how many stitches need for 22-inch back width and 11-inch front width from own gauge, check length in rows same way; do not simply follow main-size stitch counts with different yarn weight.
How do I wash finished cardigan? Follow care instructions for yarn used; general guide hand wash or machine wash gentle cool cycle if yarn allows, reshape while damp, dry flat rather than hanging, so open front does not stretch out of shape.
Why are sleeves narrower at cuff? Sleeves start at 18 stitches (about 10 1/4 inches around) so cuff sits neatly at wrist, then increase to 30 stitches (about 17 inches around) at upper arm; taper keeps sleeve comfortable without excess fabric at wrist.