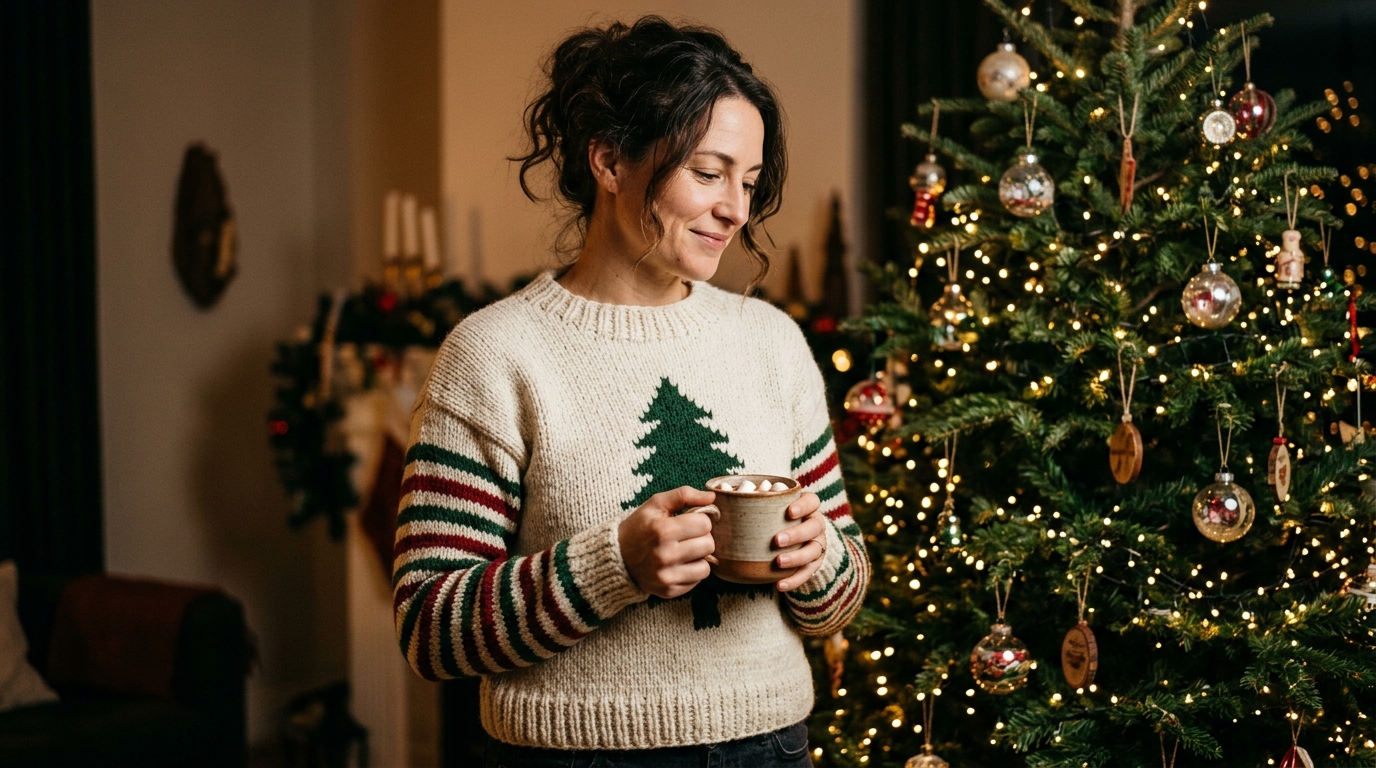
Free Crochet Christmas Sweater Pattern: The Cozy Tree Pullover (Sizes S to 2XL)
This is a complete, step-by-step crochet Christmas sweater pattern in five sizes. It is a relaxed, drop-shoulder pullover in cream half double crochet, with red ribbed bands, striped sleeves and a stepped Christmas tree appliqué on the front. It is made from simple rectangles that you sew together, so there is no complicated shaping, and it is a great first sweater for a confident beginner.
Every stitch count in this pattern is given for each size, so you can follow it exactly or adjust the length and sleeves to fit you. Read the whole pattern once before you start, and always make a gauge swatch first.
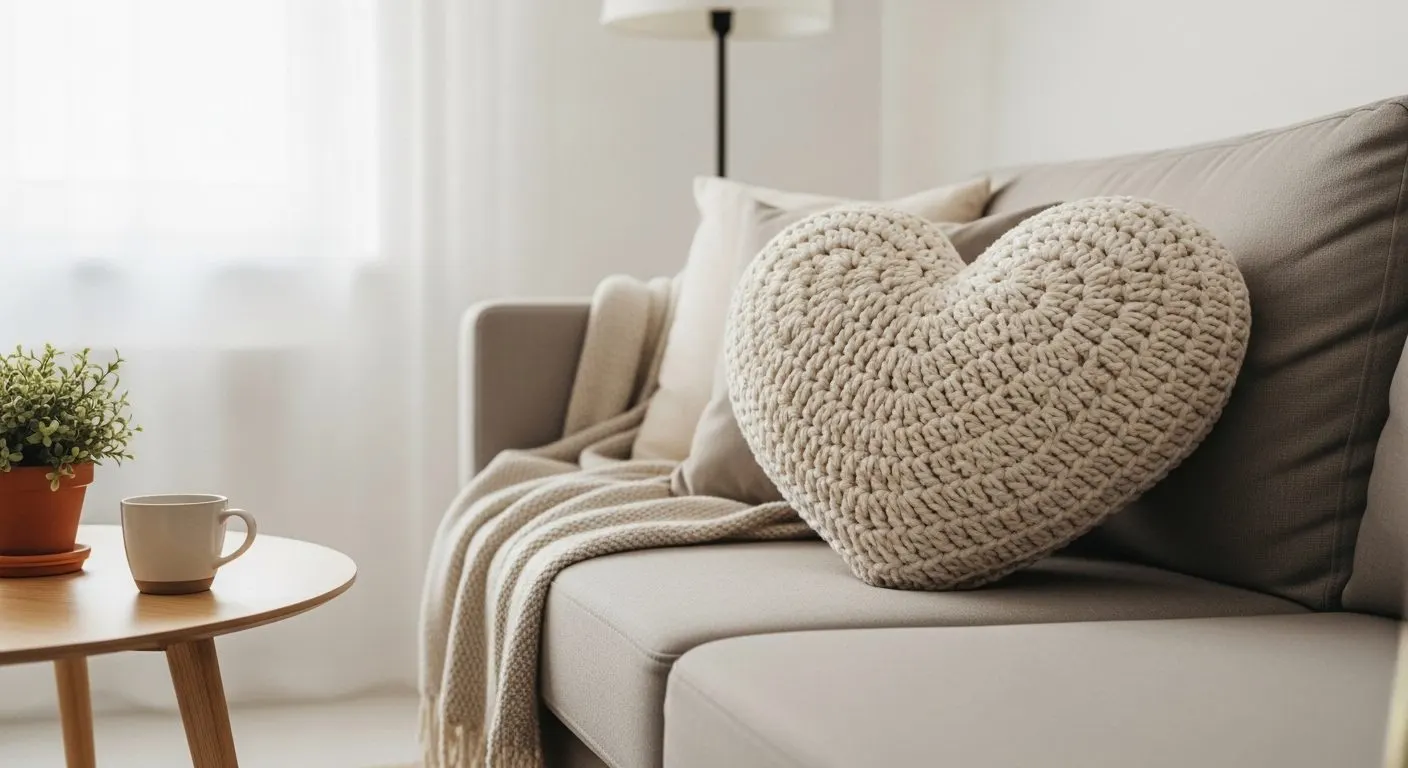
Want a matching cozy throw for the sofa? Take a look at our 5 Crochet Christmas Blanket Patterns: Cozy, Festive and Free.
Pattern at a Glance
- Skill level: easy to intermediate (half double crochet, increases, simple seaming)
- Time: about 20 to 30 hours
- Construction: back and front panels, two sleeves and an appliqué tree, worked flat and sewn together, with ribbed bands worked in the round
- Fit: relaxed, with positive ease of about 8 to 12 cm (3 to 5 in)
Sizes and Finished Measurements
| Measurement | S | M | L | XL | 2XL |
|---|---|---|---|---|---|
| Finished chest | 95 cm (37.5 in) | 105 cm (41.5 in) | 114 cm (45 in) | 123 cm (48.5 in) | 132 cm (52 in) |
| Total length (including hem band) | 56 cm (22 in) | 58 cm (23 in) | 60 cm (23.5 in) | 62 cm (24.5 in) | 64 cm (25 in) |
| Sleeve length, shoulder seam to cuff (including cuff) | 47 cm (18.5 in) | 48 cm (19 in) | 49 cm (19.25 in) | 50 cm (19.75 in) | 51 cm (20 in) |
| Upper arm circumference | 40 cm (15.75 in) | 43 cm (17 in) | 45 cm (17.75 in) | 47 cm (18.5 in) | 48 cm (19 in) |
| Suggested bust size | up to 86 cm (34 in) | 91 to 97 cm (36 to 38 in) | 102 to 107 cm (40 to 42 in) | 112 to 117 cm (44 to 46 in) | 122 to 127 cm (48 to 50 in) |
Choose the size by adding 8 to 12 cm (3 to 5 in) of ease to your bust measurement and picking the closest finished chest.
Materials
Yarn: worsted or Aran weight (weight 4) soft acrylic or wool-blend yarn. Avoid heavy 100% cotton, which stretches. Approximate amounts:
| Colour | S | M | L | XL | 2XL |
|---|---|---|---|---|---|
| Cream (MC) | 420 m (460 yd) | 460 m (505 yd) | 500 m (550 yd) | 545 m (595 yd) | 595 m (650 yd) |
| Red (CC1) | 155 m (170 yd) | 170 m (185 yd) | 185 m (200 yd) | 200 m (220 yd) | 215 m (235 yd) |
| Green (CC2) | 105 m (115 yd) | 120 m (130 yd) | 135 m (150 yd) | 145 m (160 yd) | 160 m (175 yd) |
| Brown (CC3) | 20 m (22 yd) | 20 m (22 yd) | 20 m (22 yd) | 20 m (22 yd) | 20 m (22 yd) |
These amounts include about 10 to 15 percent extra. Buy an additional ball of cream if you are between sizes or crochet loosely.
Recommended product (yarn): Lion Brand Wool-Ease worsted yarn. It is a soft, machine-washable acrylic and wool blend that comes in cream, red, green and brown shades, so you can match this whole palette from one line. As an Amazon Associate I earn from qualifying purchases. Affiliate link: paste your link
Tools
- 5.5 mm (I/9) crochet hook for the body and sleeves
- 4.5 mm (7) crochet hook for the ribbed bands
- Stitch markers (at least 6)
- Tapestry needle and sharp scissors
- Pins and a tape measure
- 5 small red buttons or pom-poms and 1 gold button for the tree decorations
Gauge
13 half double crochet (hdc) and 10 rows = 10 cm (4 in) using the 5.5 mm hook.
To check gauge, chain 22, hdc in the 3rd chain from the hook and in each chain across (20 hdc), then work 14 more rows of hdc. Wash and dry the swatch as you will the sweater, then measure the centre 10 cm (4 in). If you have more stitches than 13, go up a hook size; if you have fewer, go down a hook size. Matching the gauge matters more than matching the hook size.
Recommended product (hooks): Clover Amour ergonomic crochet hook set. Its soft grips are comfortable for the long hours this sweater takes. Before buying, check that the set includes the 4.5 mm and 5.5 mm hooks used here. As an Amazon Associate I earn from qualifying purchases. Affiliate link: paste your link
Abbreviations (US terms)
- ch: chain
- sl st: slip stitch
- sc: single crochet
- hdc: half double crochet
- inc: increase (2 hdc in the same stitch)
- BLO: back loop only
- st(s): stitch(es)
- RS / WS: right side / wrong side
- MC: main colour (cream), CC1: red, CC2: green, CC3: brown
- FO: fasten off
- [ ]: stitch count at the end of the row or round
- S (M, L, XL, 2XL): numbers are given for the smallest size first, with the other sizes in brackets. If only one number is given, it applies to all sizes.
Notes Before You Begin
- The ch 2 at the start of each hdc row does not count as a stitch. Work the first hdc in the same stitch as the base of the ch 2, and the last hdc in the last stitch of the row.
- Always turn your work at the end of each row.
- Colour changes in the middle of a row: pull the new colour through the last 2 loops of the final stitch of the previous row, so the change is clean.
- All pieces are worked in rows from the bottom up.
- The ribbed bands are worked in the round with a smaller hook. This makes them snug and slightly gathered.
Step 1: Back Panel (MC)
With the 5.5 mm hook and MC, ch 64 (70, 76, 82, 88).
- Row 1: hdc in the 3rd ch from the hook and in each ch across, ch 2, turn [62 (68, 74, 80, 86) hdc].
- Rows 2 to 50 (52, 54, 56, 58): hdc in each st across, ch 2, turn [62 (68, 74, 80, 86)].
On the last row, do not ch 2. FO and weave in the ends.
Check: The back panel should measure about 48 (52, 57, 62, 66) cm wide and 50 (52, 54, 56, 58) cm tall.
Step 2: Front Panel (MC)
With the 5.5 mm hook and MC, ch 64 (70, 76, 82, 88).
- Row 1: hdc in the 3rd ch from the hook and in each ch across, ch 2, turn [62 (68, 74, 80, 86)].
- Rows 2 to 42 (44, 46, 48, 50): hdc in each st across, ch 2, turn [62 (68, 74, 80, 86)].
Neck shaping (shoulders worked separately)
The neck opening is 34 stitches wide on every size.
Left shoulder
- Row 43 (45, 47, 49, 51): hdc in the first 14 (17, 20, 23, 26) sts, ch 2, turn. Do not work the remaining stitches. [14 (17, 20, 23, 26)]
- Rows 44 to 50 (46 to 52, 48 to 54, 50 to 56, 52 to 58): hdc in each st across, ch 2, turn [14 (17, 20, 23, 26)]. This gives you 8 rows on the shoulder in total.
On the last row, do not ch 2. FO.
Right shoulder
- With the RS of the front panel facing you, skip the next 34 sts (the neck opening) after the left shoulder. Join MC with a sl st in the next st.
- Row 43 (45, 47, 49, 51): ch 2, hdc in the same st and in each remaining st across, ch 2, turn [14 (17, 20, 23, 26)].
- Rows 44 to 50 (46 to 52, 48 to 54, 50 to 56, 52 to 58): hdc in each st across, ch 2, turn [14 (17, 20, 23, 26)].
On the last row, do not ch 2. FO and weave in the ends.
Check: The front panel should be the same width and height as the back panel, with a square neck opening about 26 cm (10 in) wide and 8 cm (3 in) deep.
Step 3: Sleeves (make 2)
Sleeves are worked from the cuff upward, increasing at both edges. Use the 5.5 mm hook.
With MC, ch 34.
- Row 1: hdc in the 3rd ch from the hook and in each ch across, ch 2, turn [32].
Shaping: Continue in hdc for the total number of rows shown in the table. On each increase row, work: ch 2, turn, 2 hdc in the first st, hdc in each st across to the last st, 2 hdc in the last st. This adds 2 stitches. Work all other rows with hdc in each st across.
| S | M | L | XL | 2XL | |
|---|---|---|---|---|---|
| Increase rows | every 4th row, starting on Row 4 (Rows 4, 8, 12, … 40) | every 3rd row, starting on Row 3 (Rows 3, 6, 9, … 36) | every 3rd row, starting on Row 3 (Rows 3, 6, 9, … 39) | every 3rd row, starting on Row 3 (Rows 3, 6, 9, … 42) | every 3rd row, starting on Row 3 (Rows 3, 6, 9, … 45) |
| Number of increase rows | 10 | 12 | 13 | 14 | 15 |
| Total rows | 42 | 43 | 44 | 45 | 46 |
| Final stitch count | 52 | 56 | 58 | 60 | 62 |
Work the remaining rows after the last increase row in plain hdc, so each sleeve ends with thloosely up the edge or cut and weave in the ends later. The sleeve stripes continue through the increases without changing the pattern.
Check: Each sleeve should measure about 32 cm wide at the cuff edge and 40 (43, 45, 47, 48) cm wide at the top, and 42 (43, 44, 45, 46) cm long.
Step 4: Christmas Tree Appliqué
The tree is a stepped, half double crochet shape. It is worked with the 5.5 mm hook.
Tree (CC2, green)
- Foundation: ch 19
- Row 1: hdc in the 3rd ch from the hook and in each ch across, ch 2, turn [17]
- Row 2: hdc in each st across, ch 2, turn [17]
- Row 3: hdc in each st across, ch 1, turn [17]
- Row 4: sl st in each of the first 2 sts, ch 2, hdc in the next 13 sts, leave the last 2 sts unworked, ch 2, turn [13]
- Row 5: hdc in each st across, ch 2, turn [13]
- Row 6: hdc in each st across, ch 1, turn [13]
- Row 7: sl st in each of the first 2 sts, ch 2, hdc in the next 9 sts, leave the last 2 sts unworked, ch 2, turn [9]
- Row 8: hdc in each st across, ch 2, turn [9]
- Row 9: hdc in each st across, ch 1, turn [9]
- Row 10: sl st in each of the first 2 sts, ch 2, hdc in the next 5 sts, leave the last 2 sts unworked, ch 2, turn [5]
- Row 11: hdc in each st across, ch 2, turn [5]
- Row 12: hdc in each st across, ch 1, turn [5]
- Row 13: sl st in each of the first 2 sts, ch 2, hdc in the next st, leave the last 2 sts unworked, ch 2, turn [1]
- Row 14: hdc in the st. FO leaving a 40 cm (16 in) tail.
The tree should be about 13 cm (5 in) wide and 14 cm (5.5 in) tall.
Trunk (CC3, brown)
- Foundation: ch 5
- Row 1: hdc in the 3rd ch from the hook and in each of the next 2 chs, ch 2, turn [3]
- Rows 2 to 3: hdc in each st across, ch 2, turn [3]
FO leaving a tail. Sew the trunk to the bottom centre of the tree, overlapping the base row by 1 row.
Step 5: Block and Prepare the Pieces
- Wash or steam-block all pieces to the measurements in the size table, pinning them flat on a towel or blocking mat. Let them dry completely.
- Lay the front panel flat with the right side facing up. Position the tree in the centre, with its tip about 8 cm (3 in) below the neck opening. Pin it in place.
- Sew the tree to the front panel with whip stitches around the edge, using the long tail and matching yarn. Then sew on the 5 red buttons or pom-poms as ornaments, and the gold button at the tip of the tree.
Recommended product (blocking): Foam blocking mats with T-pins. They let you pin every panel and sleeve to the exact measurements in the size table, which makes the seams line up neatly. As an Amazon Associate I earn from qualifying purchases


Step 6: Assembly
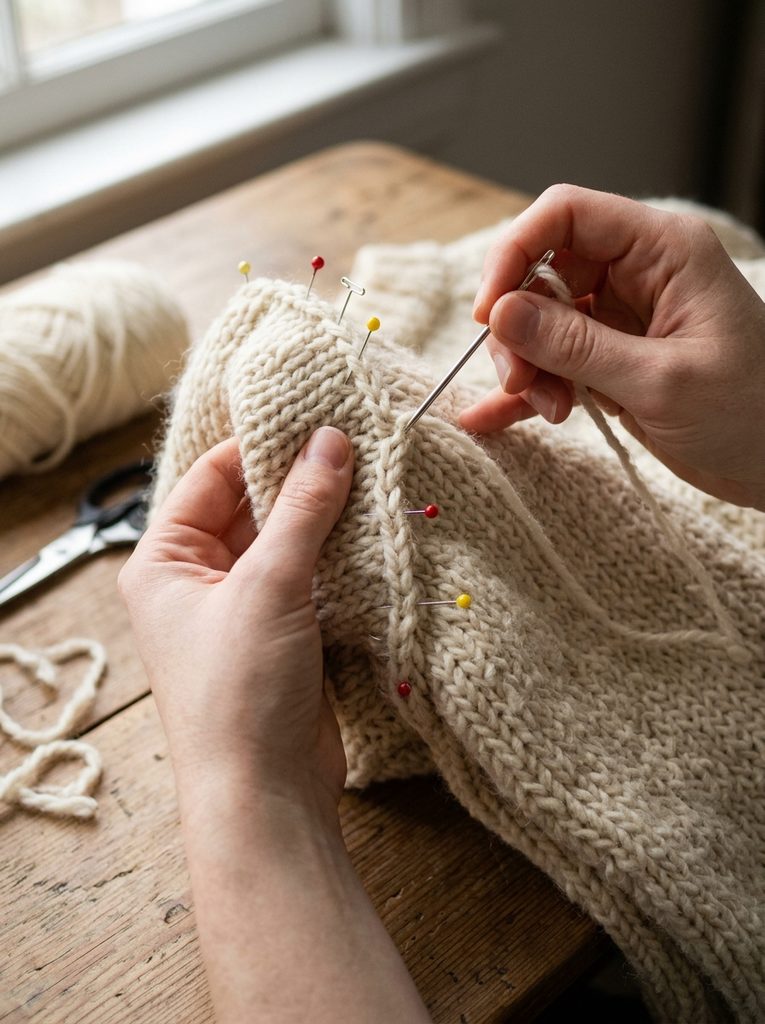
Use the 5.5 mm hook only if you are joining with sl st; otherwise use a tapestry needle with MC and a mattress stitch or whip stitch. Work with the right sides facing out for a neat seam.
6a. Shoulder seams
Place the front on top of the back with right sides together. Match the shoulder stitches: each shoulder is 14 (17, 20, 23, 26) sts wide. Sew the front shoulder stitches to the matching back shoulder stitches. Repeat for the other shoulder. The 34 stitches in the middle of the back remain open as the back of the neck.
6b. Mark the armholes
The armhole depth is 20 (22, 22, 23, 24) rows. On both side edges of the front and the back, measure down from the shoulder edge and place a marker after this many rows.
6c. Attach the sleeves
- Lay the sweater flat with the right side up and the shoulder seams on the fold.
- Fold each sleeve in half lengthwise and mark the centre of the top edge.
- Match the centre of the sleeve top to the shoulder seam. Pin the top edge of the sleeve to the armhole edge on the front and the back, from the shoulder seam down to each marker, easing evenly. The sleeve has 52 (56, 58, 60, 62) stitches, and the armhole edge on each side has 20 (22, 22, 23, 24) rows, so spread the sleeve stitches evenly.
- Sew the sleeves in place.
6d. Side and sleeve seams
- Fold the sweater with the right sides together.
- Sew the side seams from the hem up to the armhole marker. Each side seam is 30 (30, 32, 33, 34) rows long.
- Continue by sewing the underarm seam of each sleeve, from the armhole down to the cuff.
Turn the sweater right side out. Weave in all loose ends.
Step 7: Ribbed Bands (CC1, red)
The bands are worked in the round with the 4.5 mm hook. Hdc worked in the back loop only creates a ribbed, stretchy texture.
Hem band
- With the RS facing, join CC1 at a side seam on the bottom (foundation) edge. Ch 1.
- Round 1: sc in each foundation stitch around the bottom of the sweater, sl st to the first sc [124 (136, 148, 160, 172) sc]
- Rounds 2 to 6: ch 2, hdc in the BLO of each st around, sl st to the first hdc [124 (136, 148, 160, 172)]
FO and weave in the ends. The band should be about 5 cm (2 in) deep.
Cuffs (make 2)
- With the RS facing, join CC1 at the sleeve seam on the cuff edge. Ch 1.
- Round 1: sc in each foundation stitch around the cuff, sl st to the first sc [32 sc]
- Rounds 2 to 6: ch 2, hdc in the BLO of each st around, sl st to the first hdc [32]
FO and weave in the ends.
Neckband
- With the RS facing, join CC1 at the left shoulder seam. Ch 1.
- Round 1: sc in each of the 34 sts across the back neck, sc evenly down the left side of the front neck (8 sc, 1 in each row end), sc in each of the 34 sts across the bottom of the front neck, sc evenly up the right side of the front neck (8 sc), sl st to the first sc [84 sc]
- Rounds 2 to 5: ch 2, hdc in the BLO of each st around, sl st to the first hdc [84]
FO and weave in the ends. If the neck opening feels tight, use a larger hook for the last round.
Step 8: Finishing
- Weave in any remaining ends and trim them.
- Lightly steam the bands so the ribbing lies flat. Do not press the buttons or pom-poms.
- If any seams look uneven, take out a few stitches and re-sew them, easing the stitches as you go.
Adjusting the Fit
- Make the body longer or shorter: Add or remove rows on both the front and the back panels in equal amounts. Each 10 rows is 10 cm (4 in). On the front panel, add or remove the rows before the neck shaping so the neck stays the same depth.
- Make the sleeves longer or shorter: Add or remove plain rows after the last increase row. Each 10 rows adds 10 cm (4 in).
- Make the sleeves narrower: Stop increasing earlier, then sew the sleeve to the armhole, easing the extra armhole length in. You can also make the armhole shallower.
- Different yarn or gauge: If your gauge is different, work out the stitch counts again: multiply the finished width you want (in cm) by your stitches per cm, and use a foundation chain of that number plus 2. Keep the neck opening and band stitch counts proportional.
Care Instructions
Hand wash in cool water with mild soap, press out the water gently (do not wring), and dry flat on a towel away from direct heat. Reshape the sweater while it is damp. Machine washing on a gentle cycle is fine if your yarn label allows it, but flat drying keeps the shape.
Frequently Asked Questions
Is this sweater suitable for a beginner? If you can work half double crochet in rows, increases and sew simple seams, yes. The shaping is minimal, and each panel is a basic rectangle.
How long does it take? Most crocheters finish it in 20 to 30 hours, depending on size and speed.
Can I make it in another colour? Yes. Try a white sweater with a red tree, a green sweater with white trees, or a grey sweater with red details.
How do I stop the sweater stretching? Use a wool-blend or acrylic yarn, avoid 100% cotton, crochet at a tight gauge and dry flat.
Can I add more decorations? You can sew on small stars, jingle bells (for adult sweaters only), or embroider a garland of running stitches across the tree.
Final Thoughts
A handmade Christmas sweater is a statement piece that is warm, cheerful and completely unique. Take your time with the gauge swatch, measure as you go, and enjoy the festive details. Happy crocheting, and Merry Christmas!
Once your sweater is finished, make a matching throw from our 5 Crochet Christmas Blanket Patterns so the whole family is cozy for the holidays.
Pattern notes: This pattern is for personal use. If you sell finished items, please credit the pattern designer.e final stitch count shown. On the last row, do not ch 2. FO leaving a 60 cm (24 in) tail.
Stripe sequence (repeat every 12 rows)
- Rows 1 to 4: MC (cream)
- Rows 5 to 6: CC1 (red)
- Rows 7 to 10: MC (cream)
- Rows 11 to 12: CC2 (green)
Change colour at the end of the row before, as described in the notes. Carry the yarn