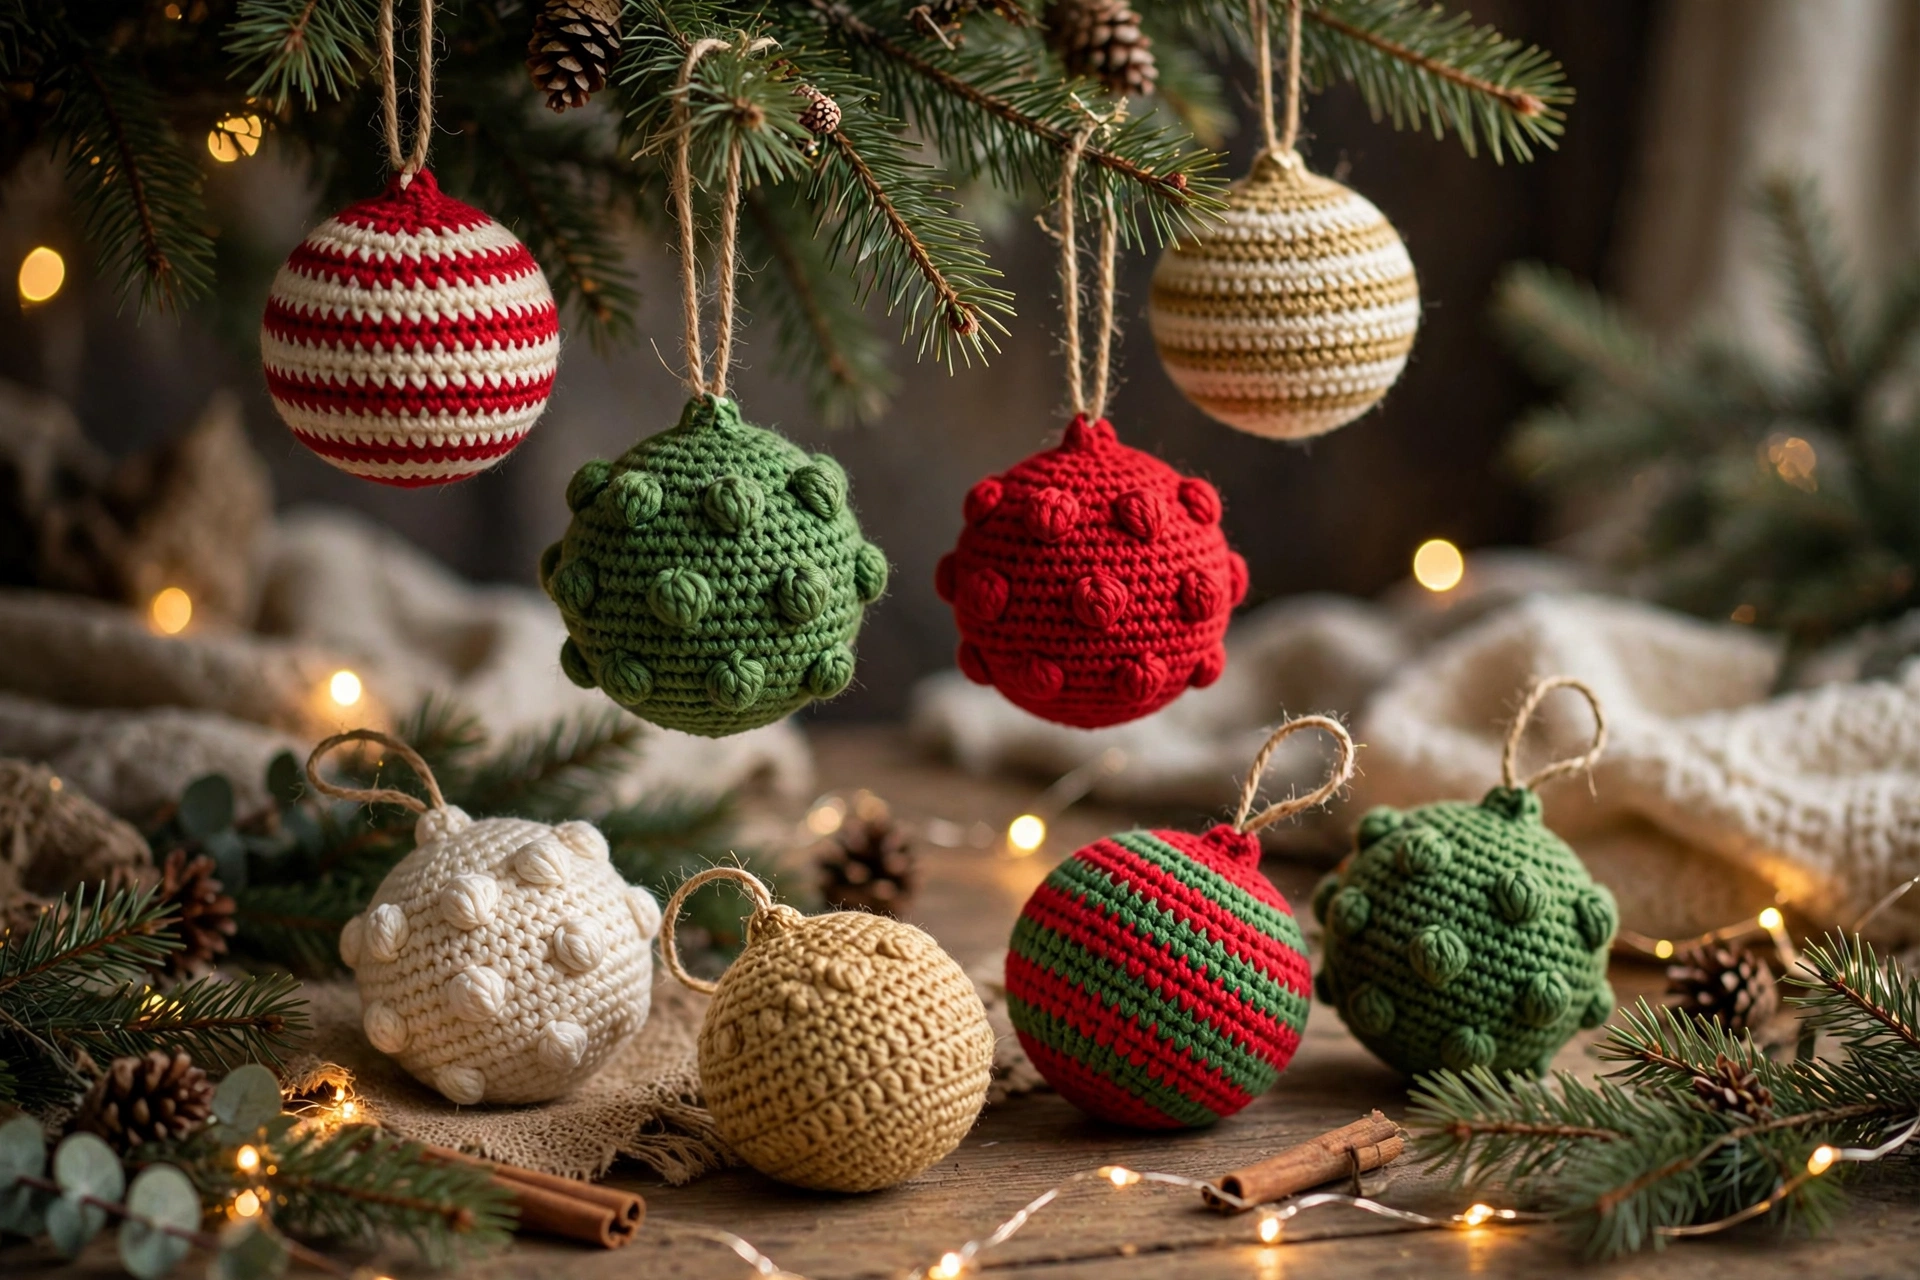
Crochet Christmas Balls Patterns: Classic, Textured & Novelty Baubles for Beginners
A Little Ball of Christmas Joy
There is something wonderfully satisfying about holding a finished crochet Christmas ball. It is small, soft, round, and instantly festive — and it is one of the friendliest projects for a beginner.
Most balls use simple stitches worked in the round, and you can often finish one in an evening.
Why Balls Are Perfect for Beginners
A ball is wonderfully forgiving. You start small, grow outward, then gently close the shape again, with no tricky seams to join. Uneven tension is easily hidden by the stuffing and round shape.
Balls are also a great way to practise increasing, decreasing, and changing colour in the round.
Classic Balls: Single-Colour and Striped
Start with a smooth, single-colour ball. Choose a colour you love — deep red, forest green, snowy white, gold, or a soft pastel for a modern tree. Worked in a plain, even stitch, it looks polished and lets the yarn shine.
Striped balls are the natural next step. Change colour every few rounds to create even bands, keeping changes at the same point so stripes line up neatly.
Textured Balls: Bobble, Popcorn and Cluster Effects
Once you are happy with a smooth ball, texture adds interest without a whole new project. Bobble, popcorn, and cluster stitches all create little raised bumps on the surface.
In simple terms, you work several stitches into the same place and gather them together, so they pop out from the fabric. The result is a cosy, tactile bauble, a little like a knitted snowball.
You can cover the whole ball in texture, or add just one or two textured rounds as a band around the middle. Texture uses a little more yarn, so allow extra for a set.
Novelty Balls: Faces and Fun Toppings
Novelty balls keep the basic ball shape and add simple features on top to make a character. For a snowman, work the ball in white or cream, then add small dark eyes, a tiny carrot-coloured nose, and a stitched smile.
For a reindeer, start with a brown ball, add a lighter muzzle, small eyes, and little antler shapes at the top. A red nose turns it into a very special reindeer indeed. For a penguin, use a dark ball, add a white face patch, a small beak, and tiny eyes.
Pom-pom-topped balls are simpler still. Make a small, fluffy pom-pom and attach it securely to the top. Keep features small, light, and stitched on firmly.
Choosing a Size: Small, Medium and Large
Size affects how your baubles look on the tree, and how well they hang. Small balls, roughly golf-ball size or a little larger, suit branch tips, small tabletop trees, and garlands. They are quick to make and use very little yarn.
Medium balls are the most versatile. They are big enough to show off stripes, texture, or a cute face, but not so heavy that they pull a branch down. If you are making your first set, medium is a great place to start.
Large balls make a statement lower down on a big tree or in a bowl as a centrepiece. They are heavier, so hang them on a sturdy branch. For balance, mix sizes: large low down, medium in the middle, small toward the top.
Stuffing, Shaping and Finishing
Good stuffing is the secret to a beautifully round ball. Fibre fill is the most popular choice: light, soft, and easy to shape. Add it a little at a time, pushing it gently into all the curves, rather than stuffing one big lump in at once. Aim for firm enough to hold its shape, but still soft to squeeze.
Yarn scraps are a thrifty alternative, especially for smaller balls. Snip little ends and offcuts into short pieces and use them as filling. Avoid heavy fillings, lumpy scraps that create bumps, and anything that might leak colour or shed through your stitches.
Avoid overstuffing, too: if stitches stretch open and filling peeks through, take a little out. As you close the ball, roll it gently, smooth out flat spots, and adjust the filling before you fasten off.
Hanging Loops: Chain, Ribbon and Yarn
A beautiful ball deserves a loop you can trust. A chain loop is crocheted as a short chain and joined into a loop at the top. It matches your yarn perfectly and is very strong in the same yarn as your ball.
A ribbon loop adds a pretty, dressy touch. Thread a short length of ribbon through the top, fold it into a loop, and stitch it securely in place. Velvet looks luxurious, while simple satin suits a classic tree.
A yarn loop is the simplest option: fold a length of matching yarn in half and stitch both ends firmly into the top. Whichever loop you choose, stitch through several stitches at the top, not just one, and weave the ends in well. Give the loop a gentle tug before hanging your bauble.
Practical Tips
- Start with a medium, single-colour ball before trying texture or faces.
- Use a hook slightly smaller than your yarn label suggests for tighter stitches that hide stuffing.
- Count stitches after increases and decreases to keep your ball round and even.
- Make a test ball first with a new yarn to see how it drapes and shows texture.
- Keep balls light for upper branches, and save heavier balls for lower branches.
- For gifts, make all the balls first, then add faces or pom-poms as a batch.
- Store finished baubles in a soft bag or box with tissue paper, so they keep their shape.
FAQ
Are crochet Christmas balls suitable for complete beginners?
Yes. A simple ball uses basic stitches worked in the round and is a small, quick project. Start smooth and single-colour, then add stripes, texture, or faces as your confidence grows.
How do I stop stuffing from showing through?
Use a slightly smaller hook for tighter stitches and do not overstuff. Add fibre fill gradually, stopping when the ball feels firm but the stitches still sit neatly together.
Which size ball should I make for my tree?
Medium balls suit most trees and are the easiest starting point. Add small balls for branch tips and the top, and larger balls for lower branches or a bowl display.
How do I attach a hanging loop so it does not come off?
Stitch your chain, ribbon, or yarn loop through several stitches at the top and weave the ends in securely. Give it a gentle pull to test it before hanging.